11 mobile installation, Installation example, Installation steps – Kenwood TM-261A User Manual
Page 8: Mobile installation, Preparation for mobile and fixed station operation
Attention! The text in this document has been recognized automatically. To view the original document, you can use the "Original mode".
PREPARATION FOR MOBILE AND FIXED STATION OPERATION
11 MOBILE INSTALLATION
Install the transceiver in a safe, convenient position inside
your vehicle that minimizes danger to your passengers and
yourself while the vehicle is in motion. For example,
consider installing the transceiver under the dash in front of
the passenger seat so that knees or legs will not strike the
radio during sudden braking of your vehicle. Try to pick a
well-ventilated location that is shielded from direct sunlight.
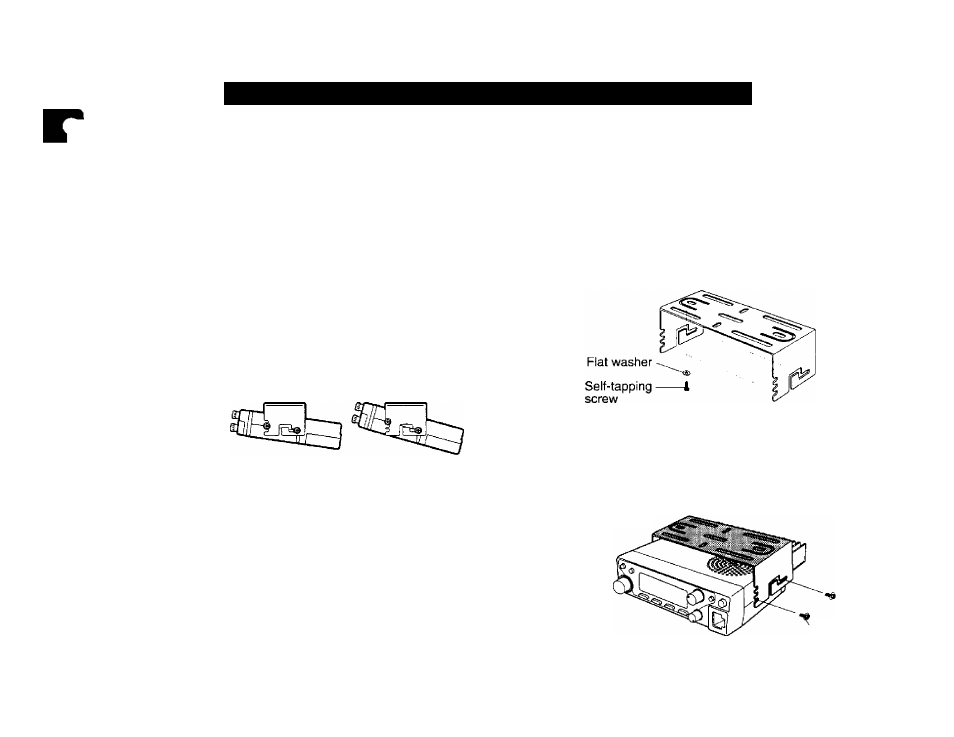
■ Installation Example
Use the supplied mounting bracket to install the
transceiver inside your vehicle. To enjoy the best
viewing angle, you can position the transceiver in the
bracket in a number of ways as shown below.
—I in^
Installation Steps
1 Install the mounting bracket in the vehicle using the
supplied flat washers and self-tapping screws.
There are 4 washers and 4 screws supplied.
• The bracket can be mounted with the bracket opening
for the transceiver facing down for underdash
mounting, or with the opening facing up.
If mounted underdash, the bracket must be installed
so that the 3 screw holes on the edge of each bracket
side are facing forward. This allows you to mount the
transceiver horizontally or to angle it fonvard.
If mounted with the bracket opening facing upward,
position the bracket with the 3 holes facing the rear to
angle the transceiver upward. Position the bracket
with the 3 holes facing forward if you plan to angle the
transceiver downward. The transceiver can be
mounted horizontally, angled neither up nor down, with
the bracket positioned either way.
2 Position the transceiver, then insert and tighten the
supplied hexagon SEMS screws and washers.
There are 2 screws and 2 washers supplied for each
side of the bracket.
• Double check that all hardware is tightened to prevent
vehicle vibration from loosening the bracket or
transceiver.
SEMS screw