Embroidery screen – Kenmore 200 User Manual
Page 68
Attention! The text in this document has been recognized automatically. To view the original document, you can use the "Original mode".
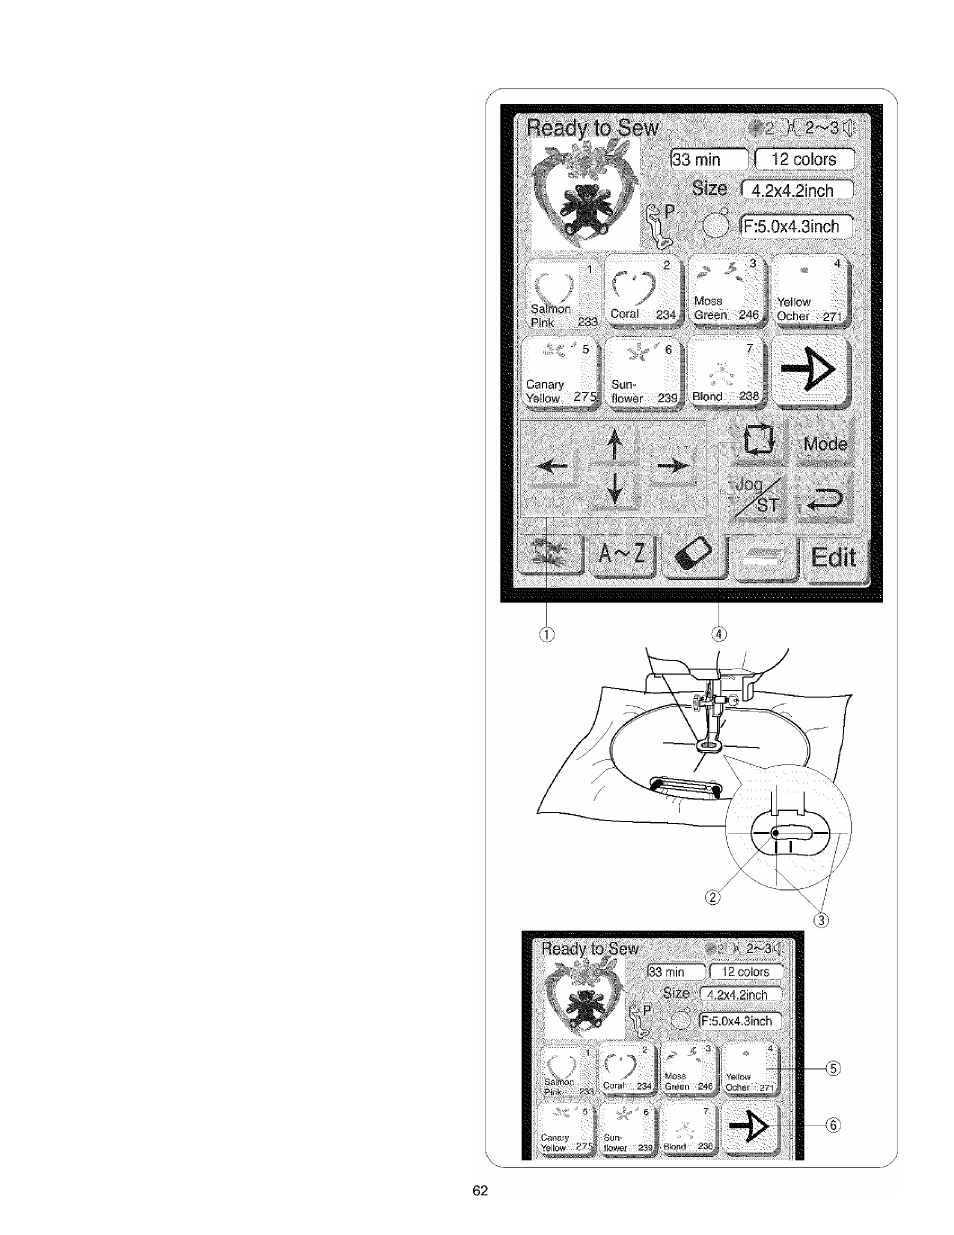
Embroidery Screen
When you select an embroidery design, the visual touch
screen will show the design’s parts and their sequence
numbers, the thread coior code, the presser foot to use,
sewing time, number of colors needed and the embroidery’s
actual measurements. When you press the start/stop
button, the machine will automatically start sewing.
(T)
J og keys
Adjust the hoop position with the jog keys ® so that the
needle drop position
(D
comes right above the center of
the centerlines (3) on the fabric.
(T)
Jog keys
(2) Needle drop position
(D
Centerlines
Ф Trace key
You can check the size of the sewing area by pressing
the О key. The carriage traces the outline of selected
embroidery pattern.
) Color/part keys
The thread color and sewing order of each embroidery
part are indicated on the key. When you start sewing, the
machine will automatically stop sewing after it finishes
sewing one part of the embroidery design.
Change the thread and start sewing again. The color of
the key will turn gray after you finish sewing that part of
the embroidery design.
* Sewing a specific color/part by skipping
You can sew only a specific part of the design by
skipping the parts before it.
Press the color/part key (|) previous to the part you
wish to start sewing, and the skipped parts will turn to
gray.
) Big arrow key
A big arrow key (6) will be displayed when there are more
design parts to be displayed. Press it to view the other
embroidery design parts.