Quiiting, Quilting – Kenmore 200 User Manual
Page 29
Attention! The text in this document has been recognized automatically. To view the original document, you can use the "Original mode".
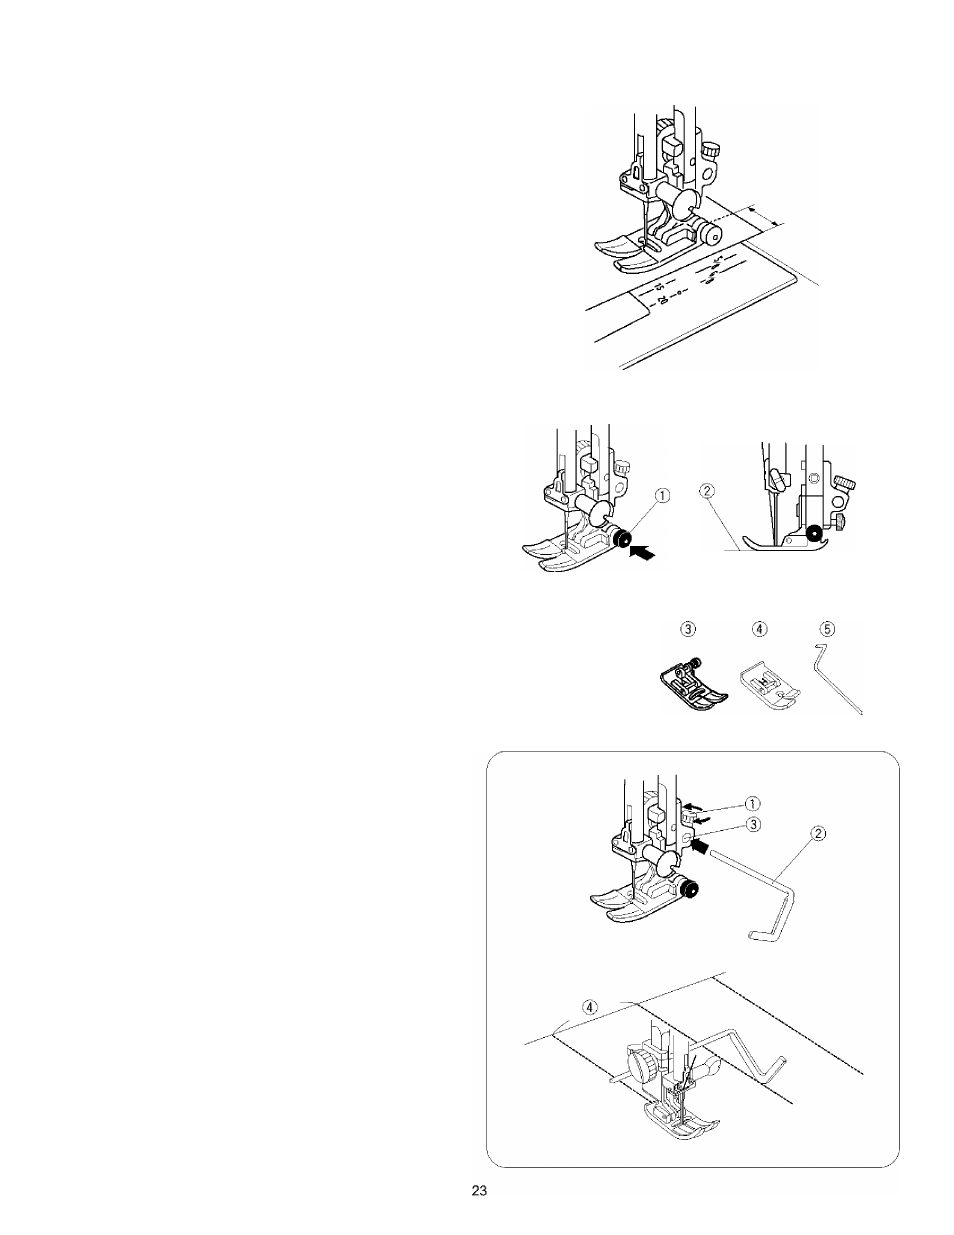
Needle plate guide line
The seam guides on the needle plate and hook cover
plate help you to measure seam allowance.
The number marks on the needle plate indicate the
distance between the center needle position and the
edge of the fabric. There are marks for 15 mm, 20 mm,
4/8 in., 5/8 in. and 6/8 in.
• To sew from the edge of thick fabric
(T) Black button
(D Thick fabrics
The black button
(T)
on the zigzag foot locks the foot in the
horizontal position.
This is helpful when starting sewing from the far edge of
thick fabrics
(D
or sewing across a hem.
Lower the needle into the fabric at the point where you
wish to start sewing.
Lower the foot while pushing the black button ® in. The
foot is locked in the horizontal position to avoid slipping.
The lock releases when the hem is passed.
Quiiting
® Stitch pattern:
(
2
) Needle thread tension
(D Presser foot A:
0 Presser foot H:
0 Quilter
® Pressure dial
1
2 to 6
Zigzag foot
Straight stitch foot
©
I 1
I
4^
Note:
When using the straight stitch foot, make sure to adjust
the needle position to 3.5. Otherwise the needle may hit
the sewing foot and possibly break.
Use the seam guide lines on the needle plate, or free-arm,
to help determine the spacing between quilting stitches. The
quilter will help keep the stitching line straight.
[T] Loosen the quilter holding screw.
Slide the quilter
@
in the hole 0 to the desired width
and tighten the screw ©.
[2] Sew, guiding the quilter over the previous row of
stitching.
© Quilter holding screw
(D Quilter
© Hole
0 Spacing