To attach the embroidety hoop to the machine, Notes, To attach embroidery foot p – Kenmore 200 User Manual
Page 65: Thread holder
Attention! The text in this document has been recognized automatically. To view the original document, you can use the "Original mode".
To Attach the Embroidety Hoop to the
Machine
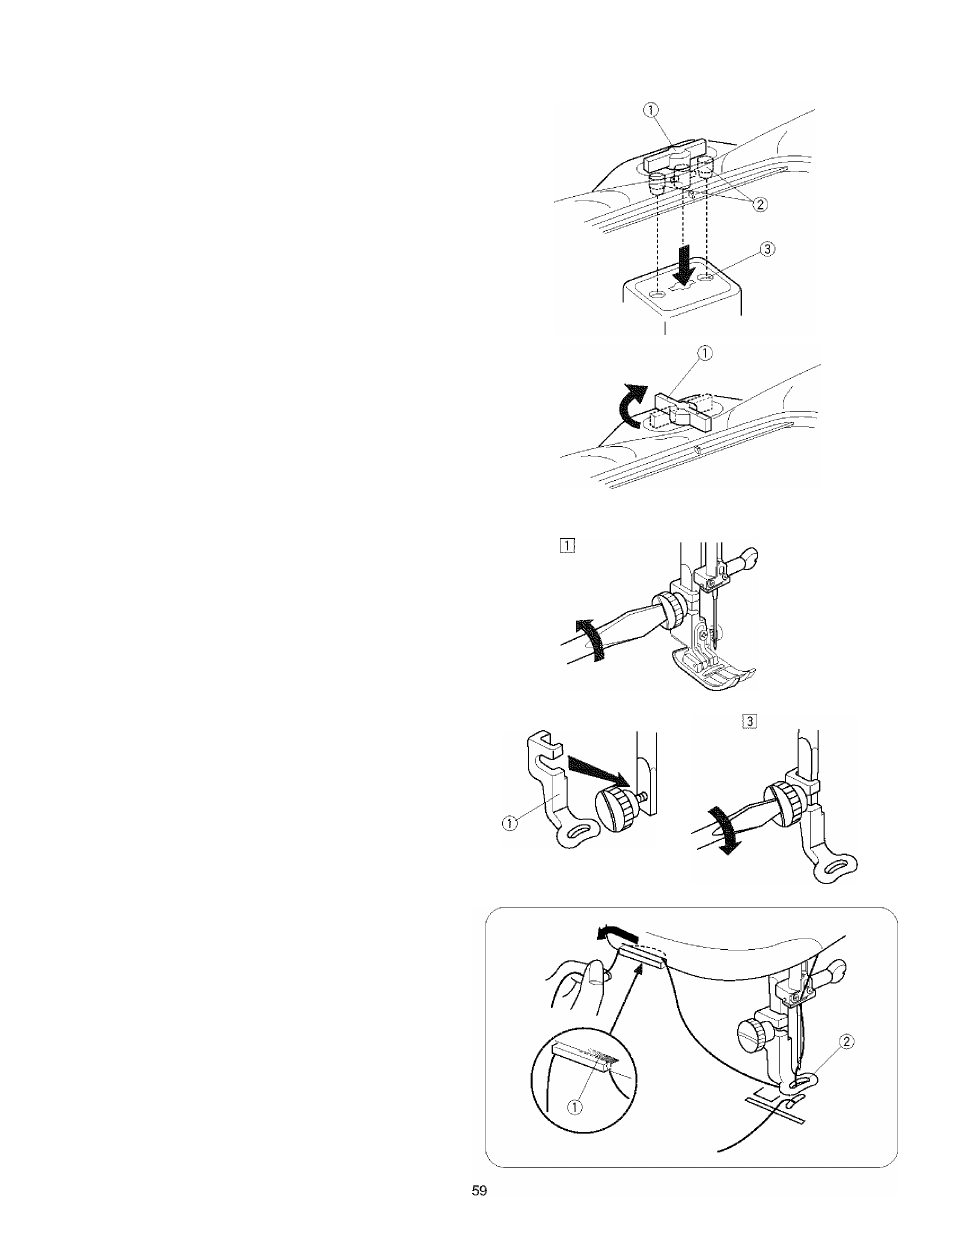
Turn the attaching knob ® so it is paraiie! with the hoop,
and set it on the carriage.
Attach the hoop by fitting the pins (2) into the carriage
holes
CD,
and turn the attaching knob ® clockwise to
secure the hoop.
(T)
Attaching knob
CD
Pins
(D
Carriage holes
Notes;
• Always provide sufficient clearance for the embroidery
carriage behind your machine before embroidery
sewing.
• Do not try to move the carriage by hand or touch the
carriage while it is moving.
• Make sure to return the carriage to the home position
before turning off the power switch (see page 63).
To Attach Embroidery Foot P
(T) Embroidery foot P
Q] Loosen the thumbscrew and remove the foot holder to
the rear.
[2] Attach Embroidery foot P (T) to the presser bar from
behind.
[D Tighten the thumbscrew securely with the screwdriver.
Thread Holder
To prevent the needle thread from becoming tangled, place
the thread end on the thread holder ®.
Pass the needle thread through the hole on embroidery foot
P and draw it up to the thread holder.
Hang about 3/4" to 1*1/2" (2 to 4 cm) of thread from front to
back on the thread holder.
(T) Thread holder
(D Hole on embroidery foot P