Kenmore 200 User Manual
Page 28
Attention! The text in this document has been recognized automatically. To view the original document, you can use the "Original mode".
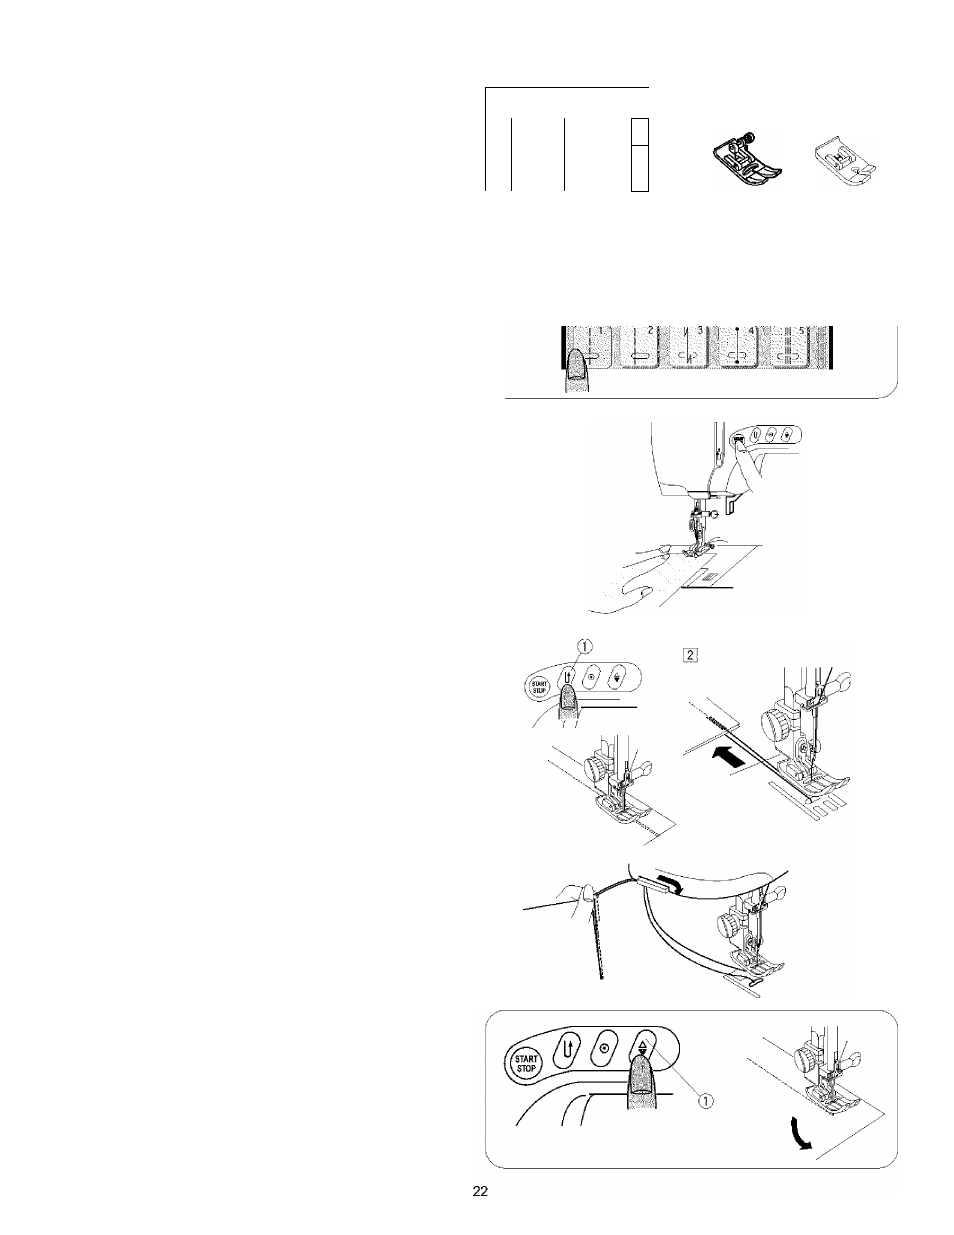
straight Stitch
(T)
Stitch pattern:
(
2
)
Needie thread tension
(
1
)
Presser foot A:
® Presser foot H:
(D Pressure dial
1 or 2
2 to 6
0
0
0
I 1
m
Zigzag foot
1
Straight stitch foot
m
0
Note:
When using the straight stitch foot, make sure to adjust
the needie position to 3.5. Otherwise the needle may hit
the sewing foot and possibly break.
Straight Stitch
To sew
Raise the presser foot and position the fabric next to a
seam guideline on the needle plate. Lower the needle to
the point where you want to start.
Pull the threads towards the back and lower the presser
foot. Press the start/stop button or foot control, and gently
guide the fabric aiong the seam guideline letting the fabric
feed naturally.
Securing seam
0
Reverse button
Jj For fastening the ends of seams, press the reverse
button 0 and sew several reverse stitches.
The machine sews reverse stitches as long as you press
and hold the reverse button
0
.
When sewing with the lock*a-matic stitch and locking
stitch, press the reverse button once, the machine will
sew several reverse or locking stitches and stop
automatically.
2] Raise the presser foot. Remove the fabric, draw it to the
back.
3] Cut the thread by using the thread cutter.
Now the threads are cut the proper length for starting the
next seam.
Changing sewing direction
0
Up/down needie button
Stop the machine and bring the needie down into the
fabric by pressing the up/down needle button
0
.
Raise
the presser foot. Pivot the fabric around the needie to
change the sewing direction as directed. Lower the
presser foot and sew in a new direction.