A&D Weighing ML-50 User Manual
Page 16
MS-70 / MX-50 / MF-50 / ML-50
14
6.
6.
6.
6. Preparation
Preparation
Preparation
Preparationssss
6.1.
6.1.
6.1.
6.1. Installing the Analyzer
Installing the Analyzer
Installing the Analyzer
Installing the Analyzer
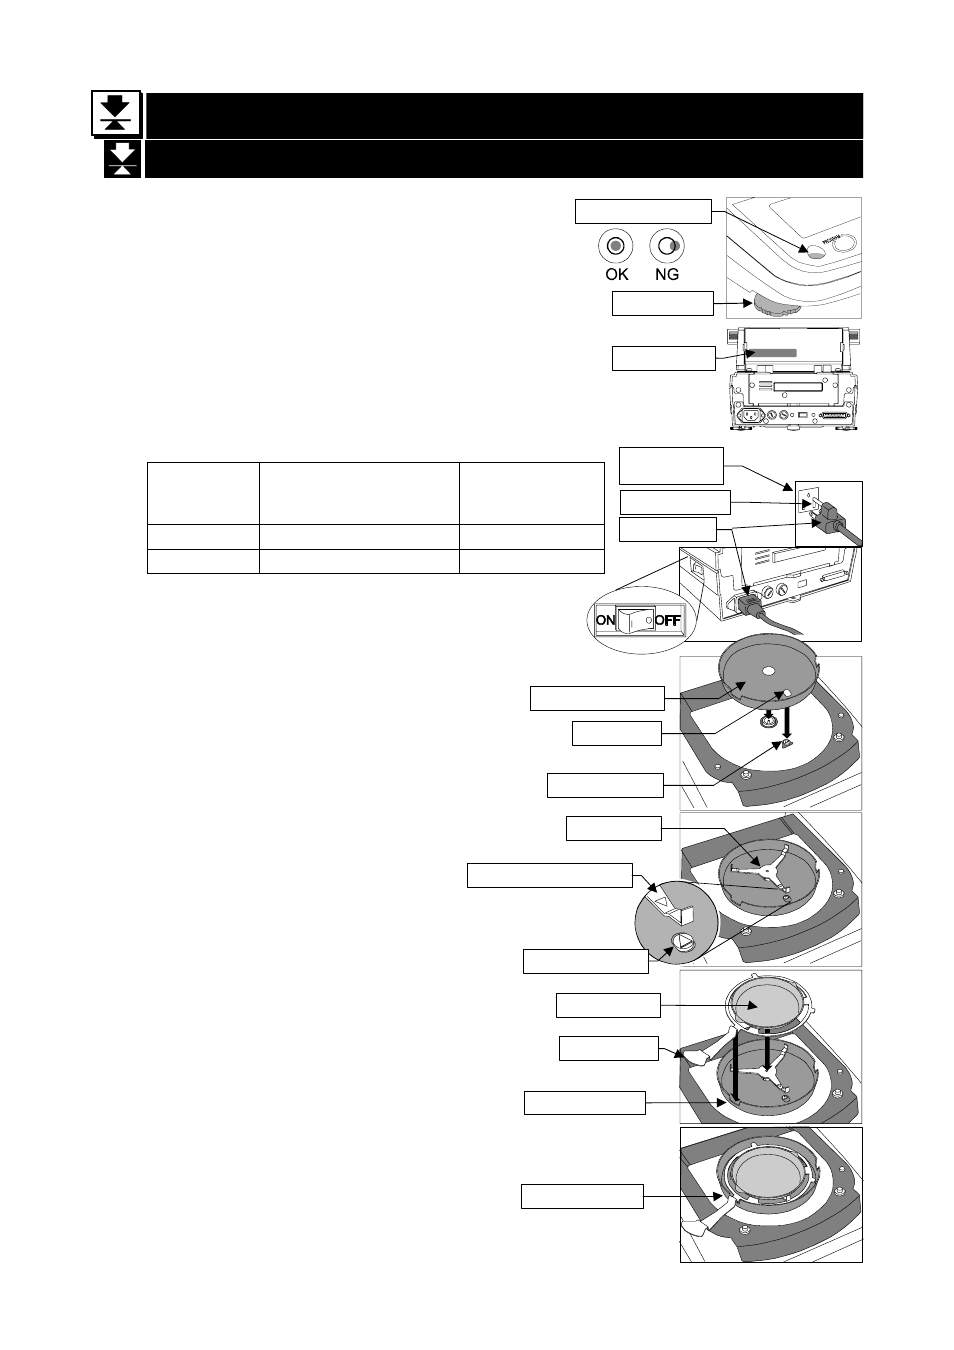
1. Select the place to install the analyzer.
Refer "3.1.Installing the Analyzer".
2. Level the analyzer by adjusting the leveling feet
and confirm it using the bubble spirit level.
3. Read the power supply voltage label on the back of
the heater cover.
Confirm that voltage, frequency and outlet type
is correct for your local voltage.
Confirm that the rated voltage of the halogen
lamp is correct to your power supply voltage.
Voltage
Label
Power Supply Voltage
The Rated
Voltage of the
Halogen Lamp
100 - 120 V AC 100 V to AC 120 V
AC 120 V
200 - 240 V AC 200V to AC 240 V
AC 240 V
4. Confirm that the power switch is
"OFF" position.
5. Connect the power cord. Ground
the analyzer with the earth
terminal on the power cord.
6. Align the guide hole of the breeze
break ring to the guide on body.
7. Install the pan support.
Align together the
∆
signs on the
pan support and body.
8. Put the sample pan on the pan
handle.
And hook the pan handle on the
notch in the rim of the breeze
break ring.
Leveling foot
Bubble spirit level
Voltage label
Earth terminal
Power cord
Outlet with a
earth terminal
Example
Sign
∆
on pan support
Sign
∆
on body
Guide hole
Sample pan
Pan handle
Pan support
Breeze break ring
Guide on body
Notch in the rim
Notch in the rim