Interior detail installation, Interior.detail.installation – Hangar 9 1/4-Scale J-3 Cub ARF User Manual
Page 33
33
Required Parts
•.Fuselage.assembly.
•.Front.windscreen
•.Side.window.(left.and.right).•.Upper.window
•.Front.seat.bottom.
•.Front.seat.back
•.Rear.seat.bottom.
•.Rear.seat.back
•.Floor.
•.Instrument.panel
•.Windscreen.supports.
•.Hook.and.loop
•.Pilot
•.#2.x.1/2-inch.sheet.metal.screw.(4)
Required Tools and Adhesives
•.Switch.harness.
•.Medium.CA
•.Phillips.screwdriver.
•.Hobby.knife
•.Hobby.scissors.
•.30-minute.epoxy
•.Canopy.glue
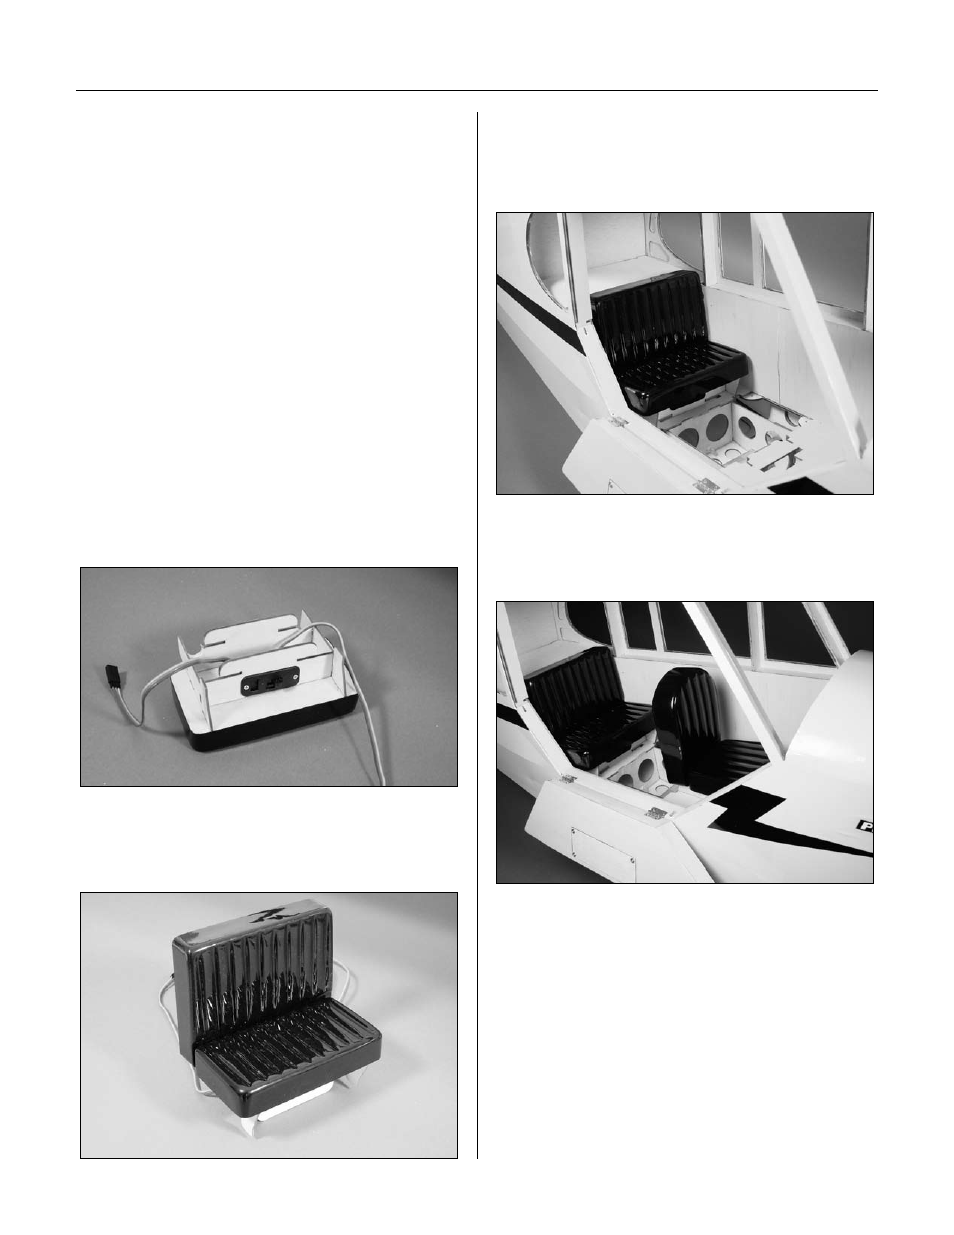
.Step 1
Install.the.switch.harness.into.the.opening.in.the.rear..
seat.bottom.
.Step 2
Use.medium.CA.to.glue.the.rear.seat.back.to.the.rear..
seat.bottom.
.Step 3
Plug.the.switch.harness.into.the.battery.and.receiver..Slide.
the.rear.seat.into.position,.guiding.the.wires.from.the.
switch.harness.behind.the.seat.
.Step 4
Glue.the.front.seat.back.to.the.front.seat.bottom..Slide.the.
front.seat.into.position.
Interior Detail Installation