Hangar 9 1/4-Scale J-3 Cub ARF User Manual
Page 27
27
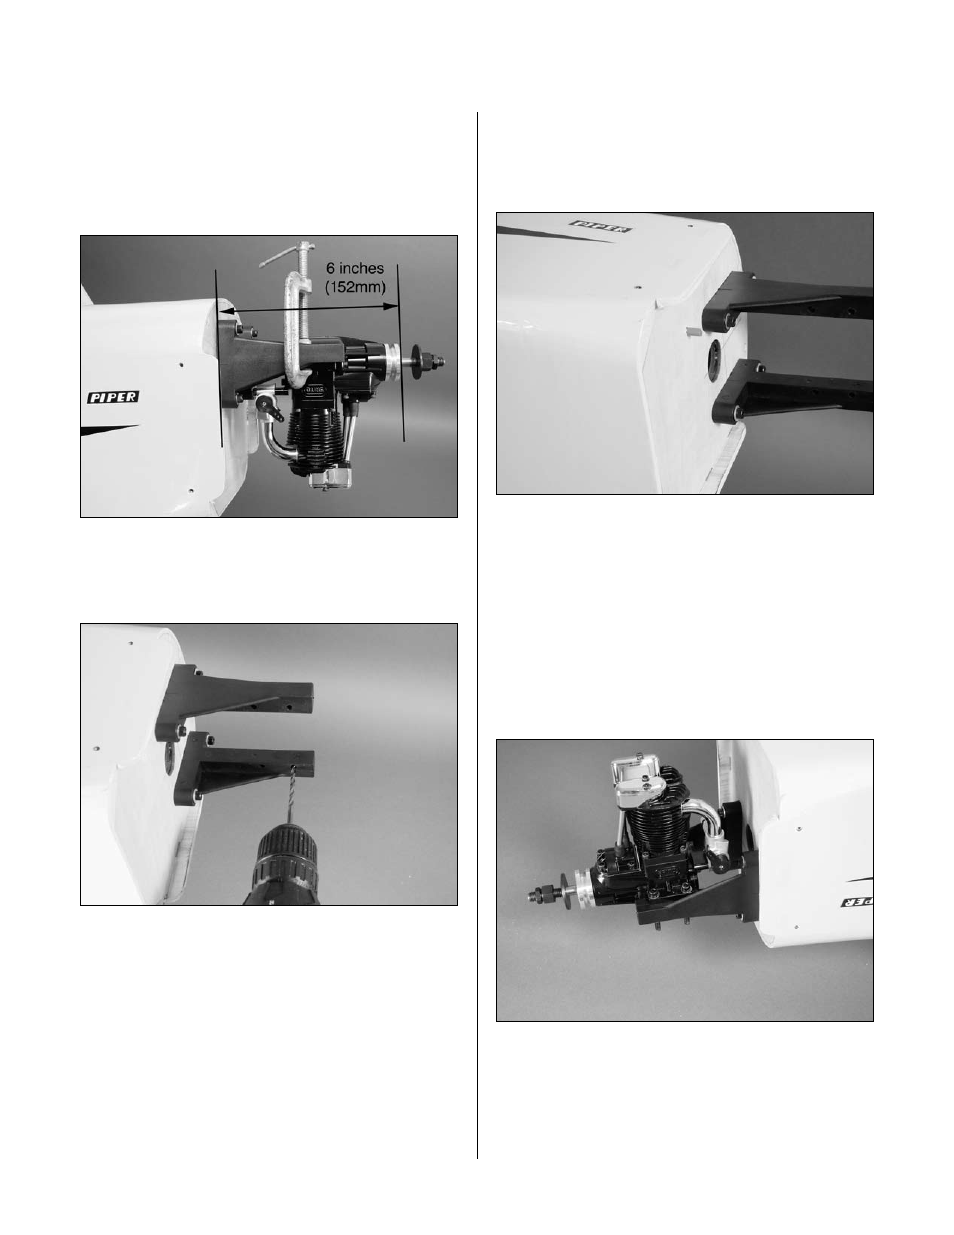
.Step 4
Position.the.engine.on.the.mount.so.the.drive.washer.is.6.
inches.(152mm).forward.of.the.firewall..Clamp.the.engine.
to.the.mount.and.transfer.the.locations.for.the.engine.
mounting.bolts.onto.the.engine.mounts.
.Step 5
Drill.the.locations.for.the.engine.mounting.screws.using.a.
drill.and.5/32-inch.(4mm).drill.bit.
.Step 6
Slide.the.throttle.pushrod.tube.into.the.hole.drilled.in.
the.firewall..The.tube.will.extend.forward.of.the.firewall.
slightly..Use.medium.CA.to.glue.the.tube.to.the.firewall.
Note:.It.may.be.necessary.to.rotate.
the.carburetor.to.align.with.the.throttle.
pushrod.tube..Check.the.alignment.before.
attaching.the.engine.to.the.engine.mount.
.Step 7
Use.four.8-32.x.1
.
1
/
2
-inch.socket.head.screws,.four..
8-32.locknuts.and.eight.#8.washers.to.secure.the.engine.
to.the.mount.
Engine Installation (Glow)