Hangar 9 1/4-Scale J-3 Cub ARF User Manual
Page 24
24
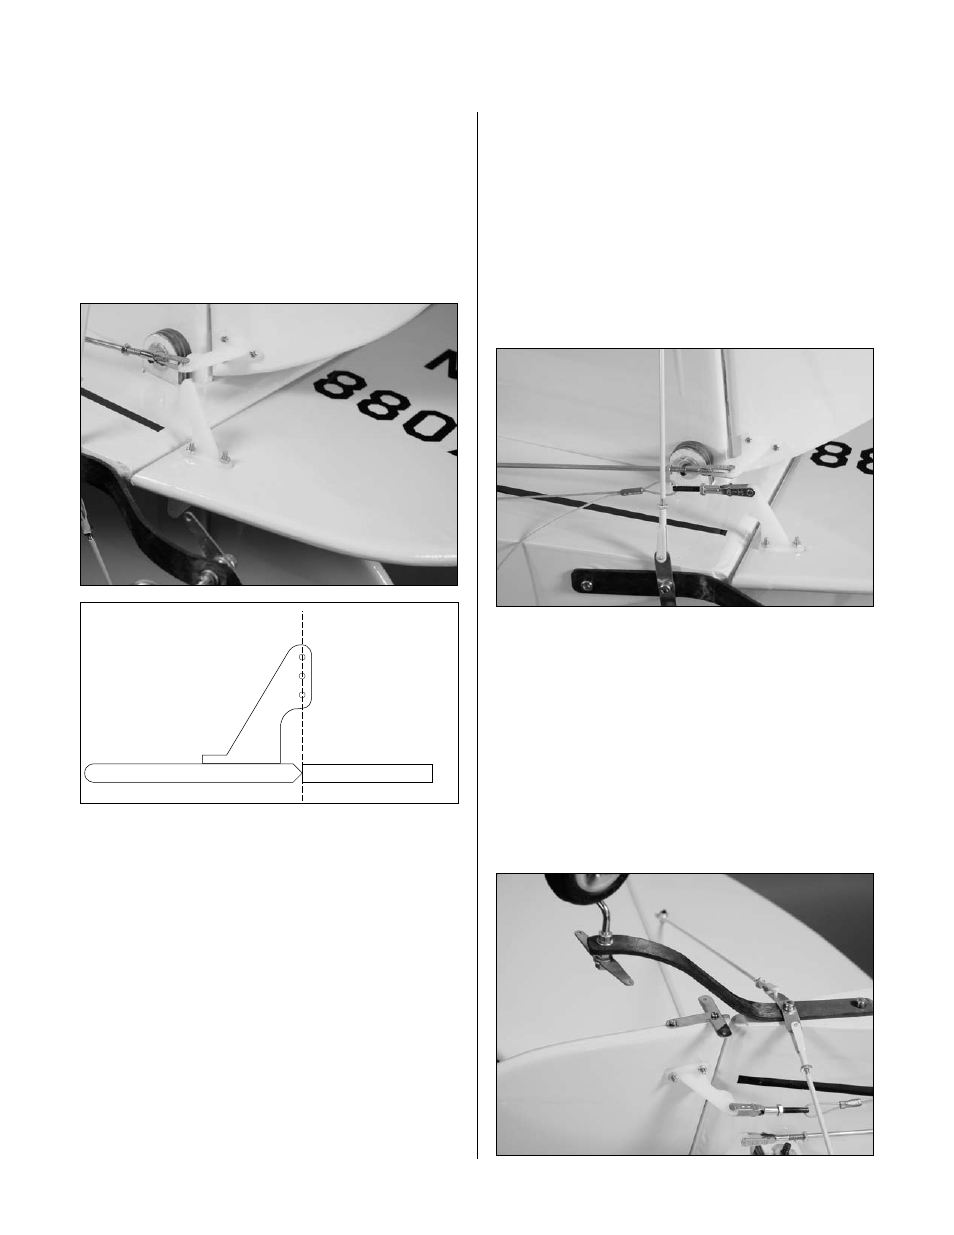
.Step 17
The.rudder.uses.two.control.horns.mounted.on.either.
side..Position.one.horn.so.it.is.aligned.with.the.mark.
made.in.the.previous.step..Mark.and.drill.the.holes.for..
the.control.horn.screws,.then.mount.the.horns..The.three..
2-56.x.5/8-inch.machine.screws.go.through.the.first.
control.horn,.through.the.rudder,.through.the.second.horn.
and.are.then.secured.using.three.2-56.nuts.
Align holes with hinge line
Note:.Use.threadlock.on.the.nuts.to.prevent.
them.from.vibrating.loose.in.flight.
.
.Step 18
Slide.a.piece.of.safety.tubing.on.a.metal.clevis..Thread.a.
4-40.nut.and.metal.clevis.onto.a.rigging.coupler..Slide.
a.crimp.onto.the.cable,.then.slide.the.cable.through.the.
coupler..The.cable.will.then.go.back.through.the.crimp..
Prepare.both.ends.of.the.cable.and.attach.the.clevises.to.
the.control.horns..Adjust.the.cable.so.there.is.light.tension.
on.the.cable,.then.secure.the.cable.using.the.crimp.and.
crimping.pliers.or.vice.grips..Make.sure.to.install.that.
safety.fuel.tubing.on.those.clevises.
Note:.Once.the.length.of.the.cable.
has.been.adjusted,.use.threadlock.on.
the.nuts.and.clevises.to.prevent.them.
from.vibrating.loose.in.flight.
.Step 19
Attach.the.rudder.tiller.bracket.to.the.rudder.using.two..
#2.x.5/8-inch.sheet.metal.screws..It.is.highly.suggested.to.
remove.the.screws,.then.apply.a.few.drops.of.thin.CA.into.
the.holes.and.reinstall.the.screws.
Radio Installation