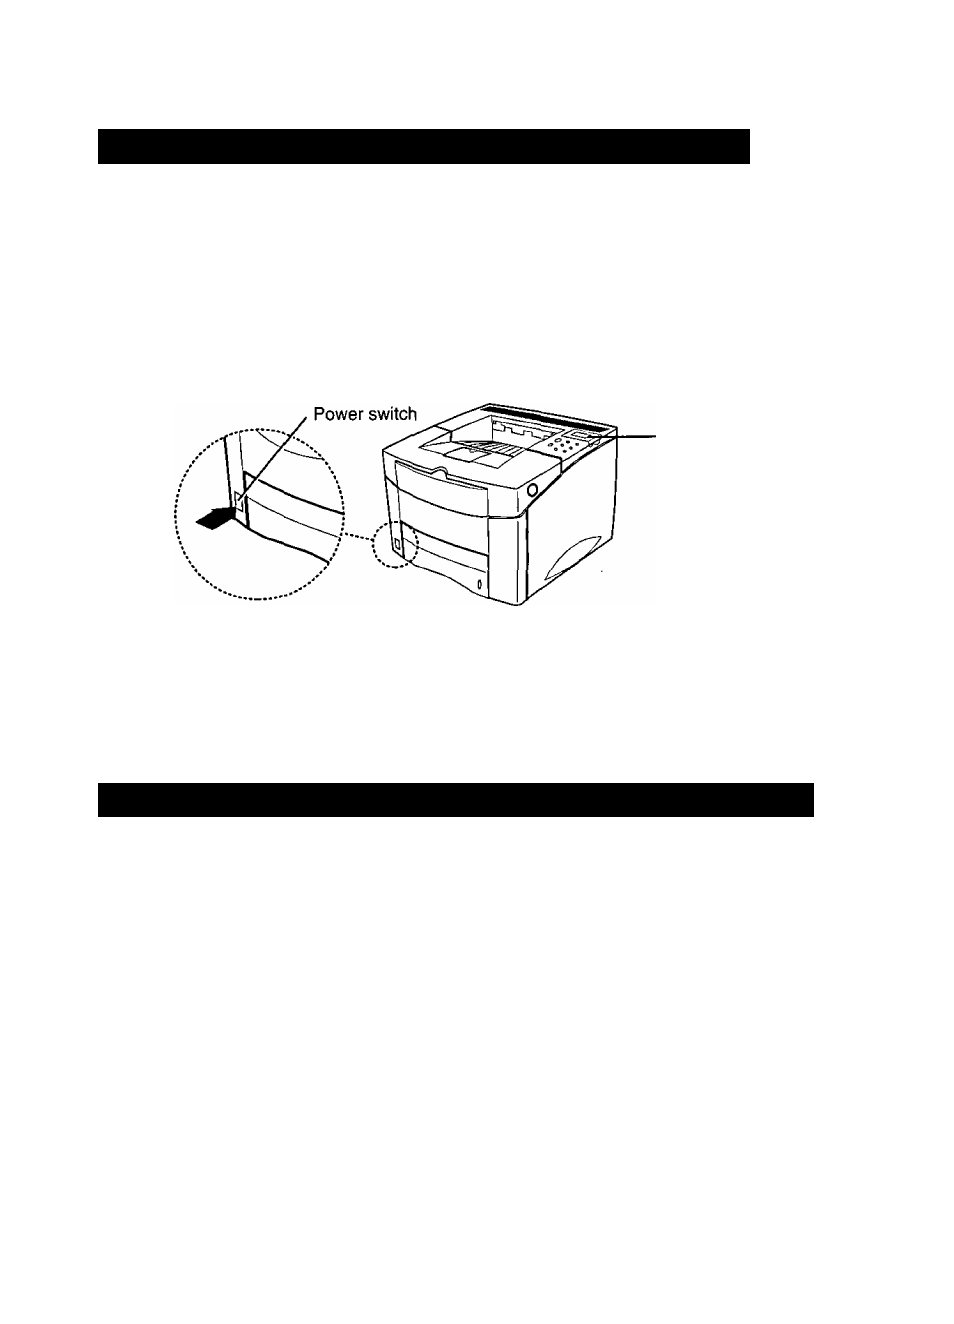
Connect the other end into a suitable ac outlet, Power the printer on by pressing the power switch, Make sure “ready” appears on the display – Panasonic KX-P7510 User Manual
Page 32: Press on line/continue button, Connecting the power cord and power on, Printing the test page from the operator panel, Orfl, Setting up the printer
Attention! The text in this document has been recognized automatically. To view the original document, you can use the "Original mode".
Setting up the Printer
Connecting the power cord and power on
(Q
(D
*o
o
€
o
o
o
Q1
3
a
T3
o
£
(D
O
3.
-0
3
(D (D CO *D &) CO (D 1 2 3 Connect the appropriate end of the power cord supplied to the connector on the rear of the printer. Connect the other end into a suitable AC outlet. Power the printer on by pressing the power switch. You will hear some movement inside the printer, then “READY” is displayed on Operator panel display N ote • When you power on your system for the first time, if “New Hardware Found” is displayed on the computer screen, close the window, and install the printing software using the procedure described in “Installing the printer driver” on page 34. Printing the test page from the operator panel Print a menu map page to make sure the printer is operating correctly. Q T3 fi) 3 o 1 2 Make sure “READY” appears on the display. Press ON LINE/CONTINUE button. “OFFLINE” appears on the display and the printer is off-line. orfl ; i : ne ; i . jl ! 32
the operator panel display. The printer is ready for printing.
For instructions of buttons on the operator pane), see page 19.
O
o
0)
o