Installation guidelines – Waterworks Alden Metal Round Two Leg Single Washstand with Backsplash 6" x 18 1/2 x 30 1/8" User Manual
Page 2
ALDEN
Round Metal Washstand Legs
INSTALLATION GUIDELINES
Page 2 of 4
11.26.2012
These guidelines have been prepared for the professional contractor to aid in the installation of:
ALDEN WASHSTAND LEGS (STYLE#'S ALWS01 & ALWS02) WITH ALDEN LAVATORY SINK
(STYLE#'S ALSK01 &ALSK02)
All dimensions are based on original specification and are subject to change and variation.
Please consult your Design Associate for current specifications.
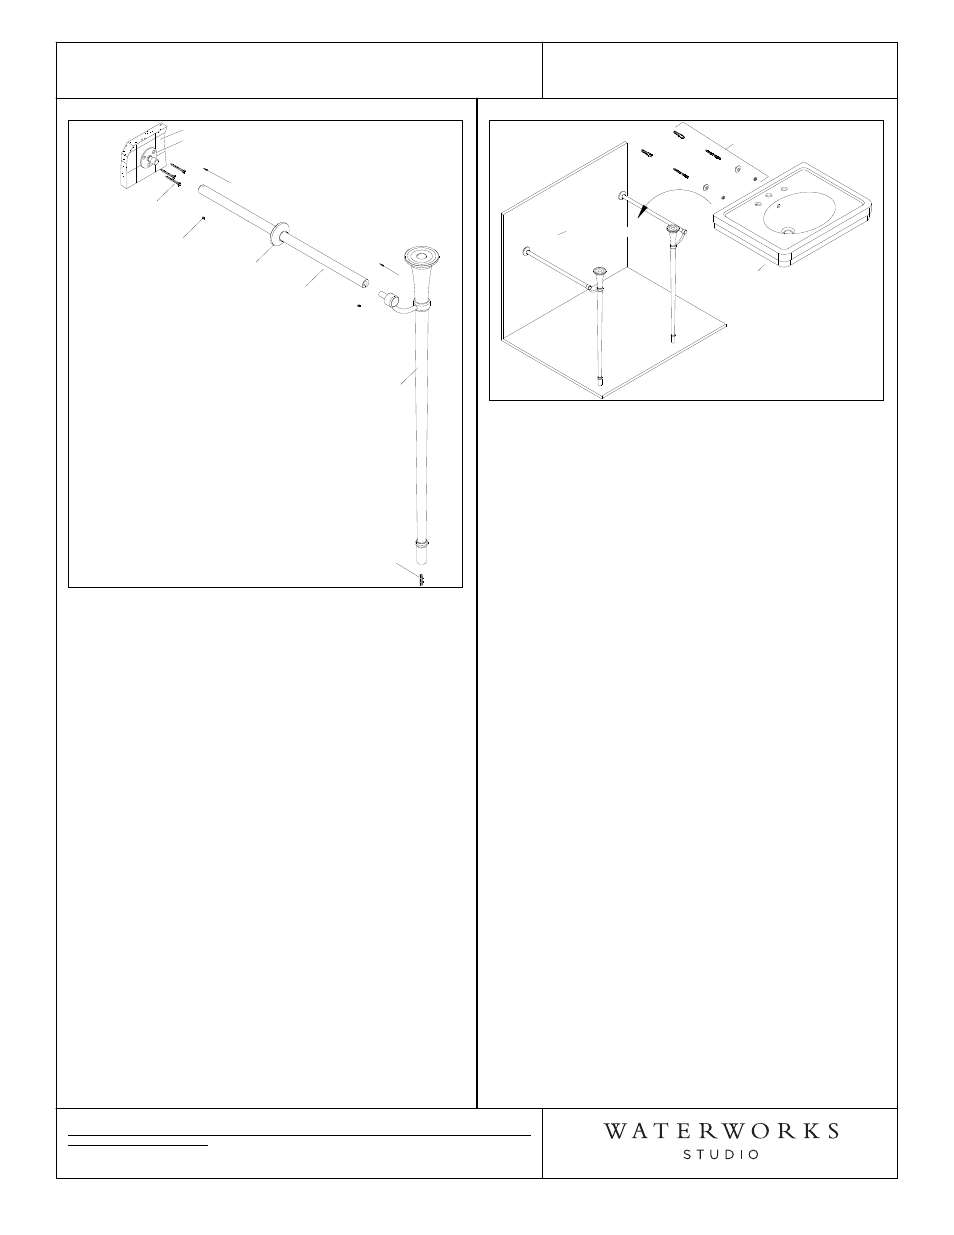
Figure - 01
ESCUTCHEON
SET SCREW
FINISHED WALL
WALL FLANGE
WALL SCREW
WASHSTAND ARM
WASHSTAND LEG
FLOOR PIN
7. Re-position the legs once more with the foot pins in
the drilled holes and secure to the wall with the
screws provided. Slide the escutcheons to the wall
so they cover the flanges.
8. Position the lavatory top in place and mark the
location of the lavatory mounting screws. Be sure
the top is level prior to marking the locations.
9. Remove the lavatory top and install the mounting
screws in the marked locations.
10. It is recommended for ease of installation, to mount
the lavatory faucet at this point, prior to setting the
top.
11. Apply a bead of adhesive silicone in the trough on
top of the legs.
12. Re-position the lavatory top and check to ensure
that it is sitting flush on top of the legs. Secure to
the wall using the mounting hardware from the
lavatory top.
13. Wipe away any excess silicone adhesive, using a soft
damp cloth if necessary to remove.
Figure - 02
LAVATORY TOP
(ALSK01 SHOWN)
FINISHED WALL
LAVATORY
MOUNTING
HARDWARE
¾
If further assistance is required, please contact
Product Support at 1-800-927-2120 (8am-6pm EST).
¾
See service part document for parts ordering,
available on WATERWORKS.COM.