Waterworks Easton Classic Handshower On Bar with Oak Handle User Manual
Installation guidelines
Easton
®
Handshower on Bar
4/06
W A T E R W O R K S
These guidelines have been prepared for the professional contractor to aid in the installation of:
EASTON HANDSHOWER ON BAR (EAHS40-K EAHS41-K EAHS42-K EAHS43-K)
All dimensions are based on original specifications and are subject to change and variation.
Please consult your Design Associate for current specifications.
Installation Guidelines
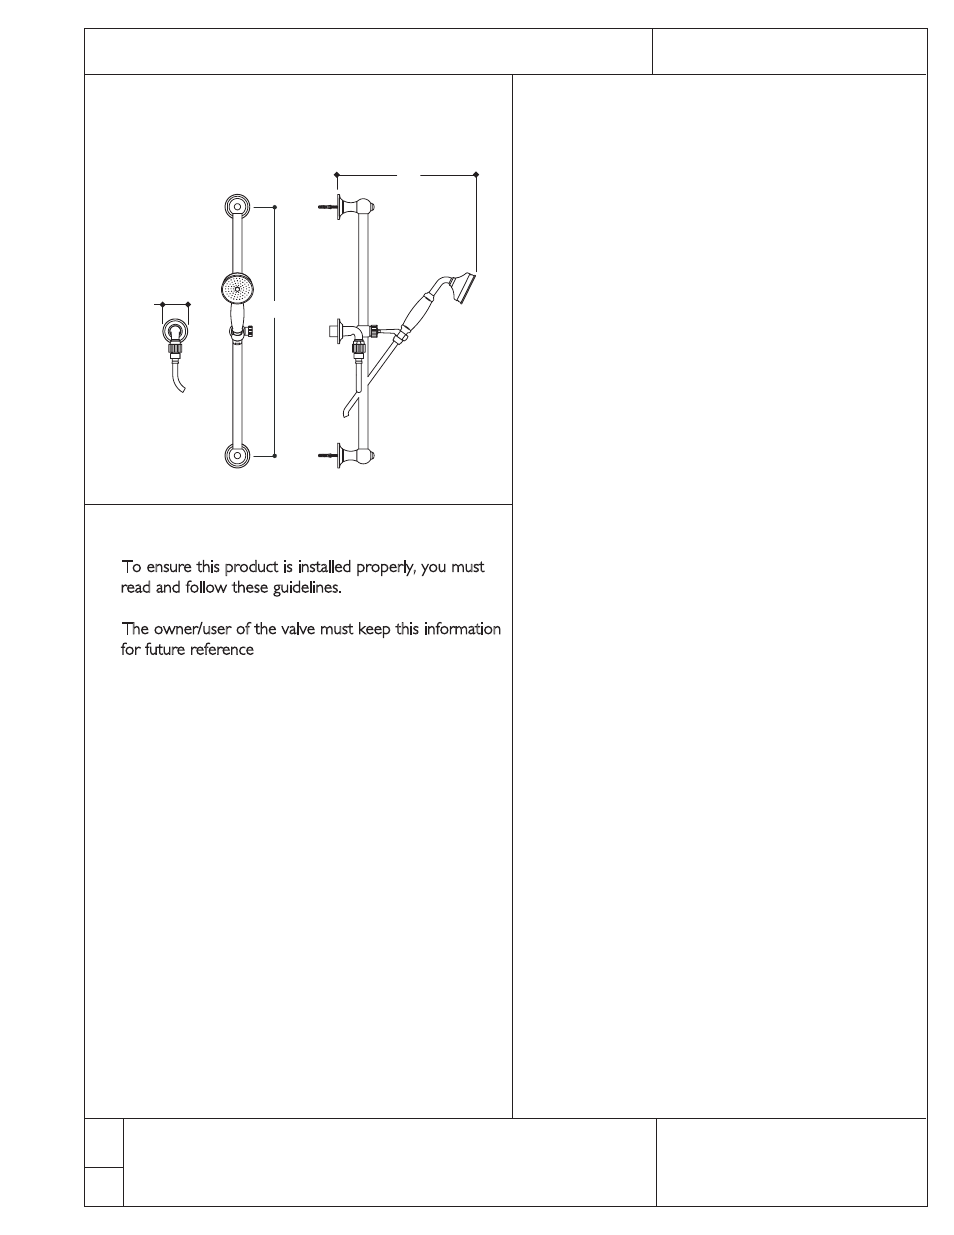
1
3. Determine the ideal location of the bar assembly based
on the clients preference and install blocking or position
over a stud to properly secure the bar.
BAR AND ELBOW INSTALLATION:
4. The inlet elbow is
1
/
2
" female IPS; install the elbow using
a nipple of appropriate length.
5. Drill holes at the proper spread of 23
5
/
8
" to
accommodate the bar mounting screws (4).
6. Remove the cap(5) from each bar end(3), thread the
screw(4) into the wall then reinstall the cap.
7. Install the hand shower of choice according to the
Installation Guidelines provided with the hand shower.
8. To adjust the angle of the hook, loosen the nut (7g).
9. To adjust the height of the hook, loosen the knob(7a).
. If further assistance is required, please contact Product
Support at 1-800-927-2120 (8am-7pm EST)
Ø2
3
/
8
"
23
5
/
8
"
1
/
2
" Female
IPS
13"
IMPORTANT:
. To ensure this product is installed properly, you must
read and follow these guidelines.
. The owner/user of the valve must keep this information
for future reference
. Be sure your installation conforms to local codes.
. A wall valve or diverter valve (sold separately) controls
on/off/volume and must be installed for proper
operation of this product.
. This product must be installed by a professional
contractor.
. Refer to the specification and assembly drawings
attached. This product is sold partially assembled but
shown fully disassembled for illustrative and service
purposes only.
. Inspect this product to assure you have all parts
required for proper installation.
. Use only a strap wrench or protected/smooth-jaw
wrench on any finished surface
ROUGH IN:
1. Install a wall valve or diverter valve(sold separately) at
the desired location.
2. Finish the rough in by installing a well supported
1
/
2
"
female IPS elbow.
EAHS40-K (metal handle)
EAHS41-K (white porcelain handle)
EAHS42-K (oak handle)
EAHS43-K (black porcelain handle)