Installation guidelines – Waterworks Regulator Wall Mounted Articulated Pot Filler, Metal Wheel and Lever Handles User Manual
Page 2
PRODUCT SUPPORT 800.927.2120 8am - 6pm EST
REGULATOR
Wall Mounted Articulated Pot Filler
Installation Guidelines
Page 2 of 3
Rev - 01
10.8.2014
These guidelines have been prepared for the professional contractor to aid in the installation of:
REGULATOR WALL MOUNTED ARTICULATED POT FILLER WITH METAL WHEEL HANDLE AND LEVER HANDLE
(STYLE No. RGPF01, RG01PF UK)
All dimensions are based on original specification and are subject to change and variation.
Please consult your Design Associate for current specifications.
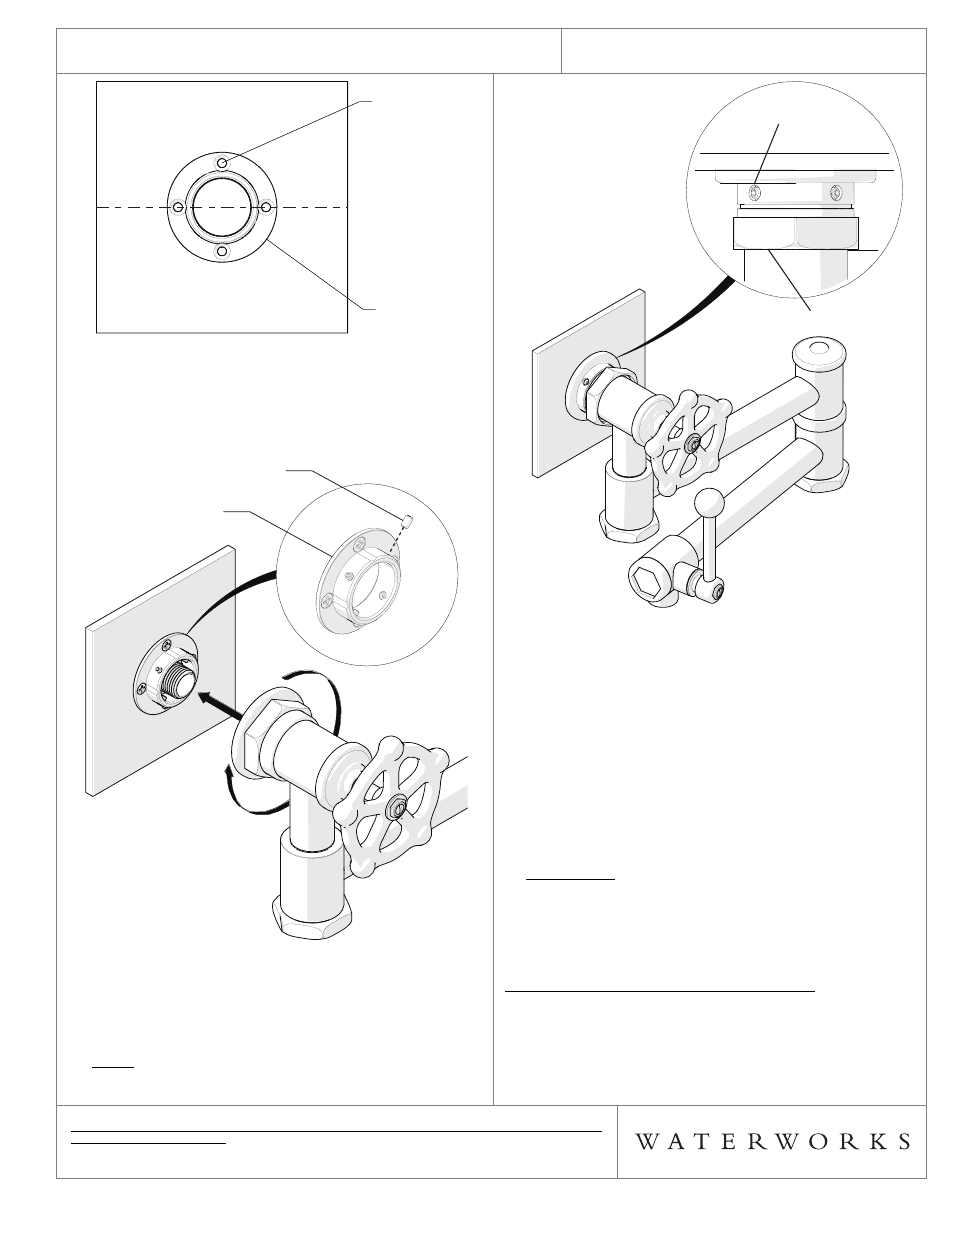
FIGURE – 02
5. Loosen the SET SCREWS, there are 4, on the
MOUNTING PLATE then thread the POT FILLER onto
the 1/2" male NPT connection. Make sure to securely
tighten the POT FILLER. See FIGURE – 03.
FIGURE – 03
6. Slide the ESCUTCHEON against the finish wall then
slide the HEX COLLAR off of the ESCUTCHEON to
expose the SET SCREWS. See Figure – 04.
NOTE: It may be necessary to rotate the
ESCUTCHEON.
PRE-DRILLED
HOLES
MOUNTING
PLATE
C/L
PRE-DRILLED
HOLES
MOUNTING
PLATE
SET SCREW
MOUNTING PLATE
FIGURE – 04
7. Securely tighten the SET SCREWS then slide the HEX
COLLAR back on the ESCUTCHEON. The SET SCREWS
will prevent the POT FILLER from rotating.
8. If desired, a bead of caulk or a clear silicone may be
applied where the escutcheons contact the finished
wall. DO NOT use putty.*
9. Remove the AERATOR from the SPOUT using the
TOOL provided then open the inlet supply water and
carefully turn the WHEEL and LEVER HANDLES to
flush out any debris in the supply lines.
IMPORTANT: Both valves must be open for water to
flow out. Only 1 valve must be closed to shut-off the
water.
10. Inspect all connections for leaks then re-install the
aerator.
SERVICING THE SHUT-OFF CARTRIDGE(S):
11. To access the SHUT-OFF CARTRIDGE located on the
inlet of the POT FILLER, unthread the SCREW, remove
the HEX COLLAR, METAL WASHER, WHEEL HANDLE
and HANDLE STEM then unthread the GLAND COVER.
See FIGURE – 05.
SET SCREW (x4)
HEX COLLAR