0 options, 1 time and date, 1 setting the time and date – Rice Lake SURVIVOR LaserLight Series Stop/Go Remote Displays - Installation & Operation Manual User Manual
Page 27: Options, Setting the time and date
Options
23
4.0
Options
There are several options available with the LaserLight remote display. They include:
•
Time and date (Standard on 4", 6" and 4"SG models)
•
Temperature
The Time-Date and Temperature options display in three-second cycles (along with weight) when displayed
weight is zero or below.
•
Field installable visor
•
Pole mount kit
•
Traffic light option
4.1
Time and Date
Time and Date is standard and factory installed on the 4
"
, 6
"
and 4
"
SG Models.
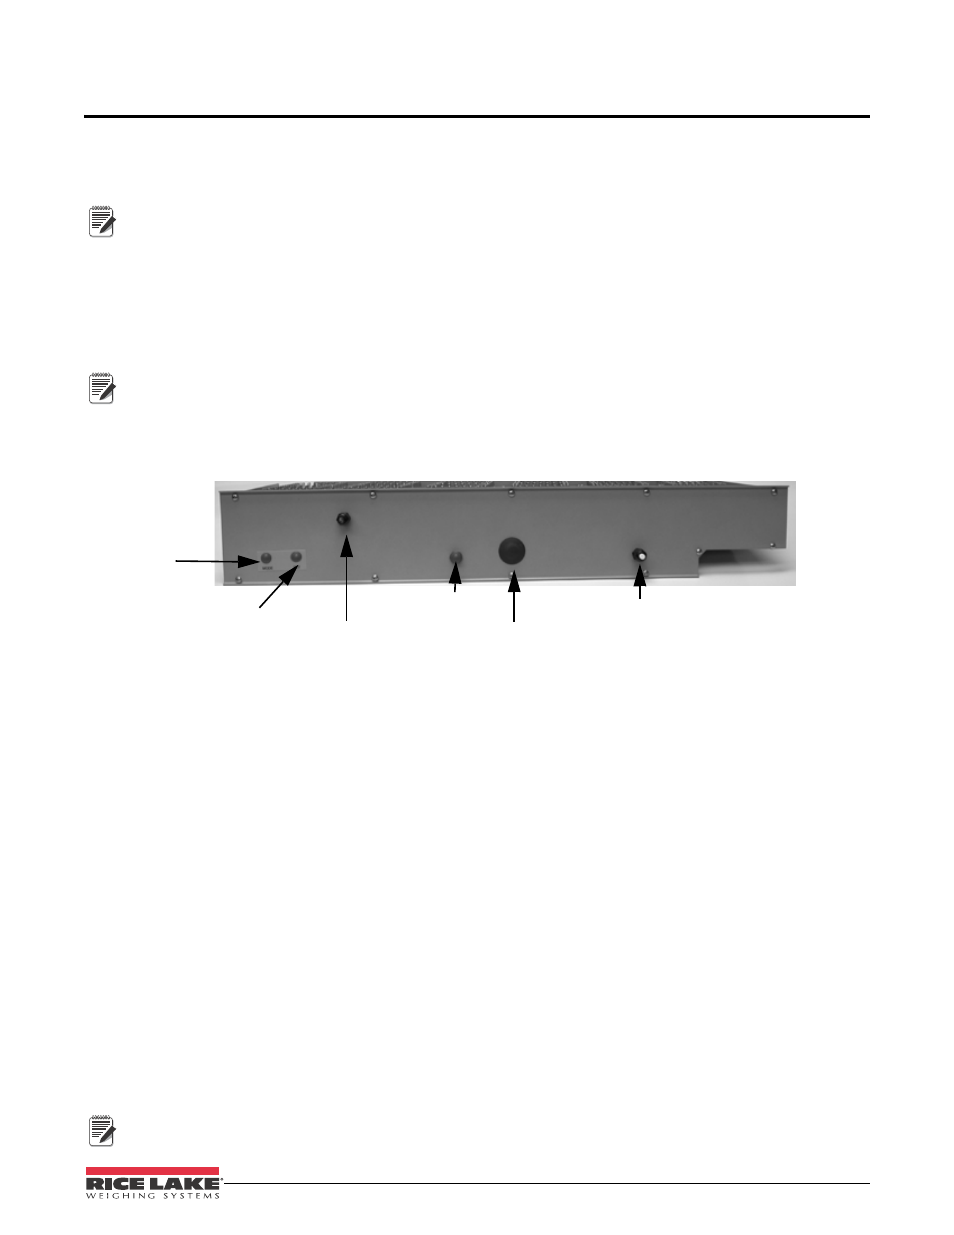
The time and date option can be either factory installed or can be ordered at a later date. Figure 4-1 shows the
location of the time and date option.
Figure 4-1. LaserLight Bottom Enclosure
If the time and date option (PN 75853) is added after initial installation, see Section 2.0 on page 4 for enclosure
disassembly instructions.
To install the this option,
1. Cut the adhesive labels from the option holes and install the time and date switch assembly.
2. Attach time and date wiring to J7 on the CPU board.
The switch with the blue wires goes in the Mode option hole (outside hole). The other goes in the Set
option hole (inside hole).
3. Connect the 4 pin connector to J7.
4. Insert the Yellow clock chip in socket U7.
4.1.1
Setting the Time and Date
1. Go to
CONFIG
and enable the Time and Date under
ENABLE
. See Figure 3-5, “Configuration Main Menu
2. Press the
SET
button to enter the time in Hours.
3. Use the
MODE
button to increment the Hours.
4. Press the
SET
button to set the Hours and move to Minutes.
5. Use the
MODE
button to increment Minutes.
6. Press the
SET
button to set the minutes and move to Month.
7. Repeat these steps as you move through Month, Day and Year.
Time and temperature are only displayed at a weigh of zero (0)
Note
Note
Set Hole
Time & Date Set
Light Probe
Learn Switch
Temperature Probe
Membrane Vent
Mode Hole
Note