3 installing the lan card in the pci riser, 4 routing the lan card cables to the front panel, Installing the lan card in the pci riser – Kontron NSW1U IP Network Server User Manual
Page 58: Routing the lan card cables to the front panel
NSW1U Network Server—Optional Component Installation Procedures
Kontron IP Network Server NSW1U
Product Guide, rev. 1.4
December 2009
58
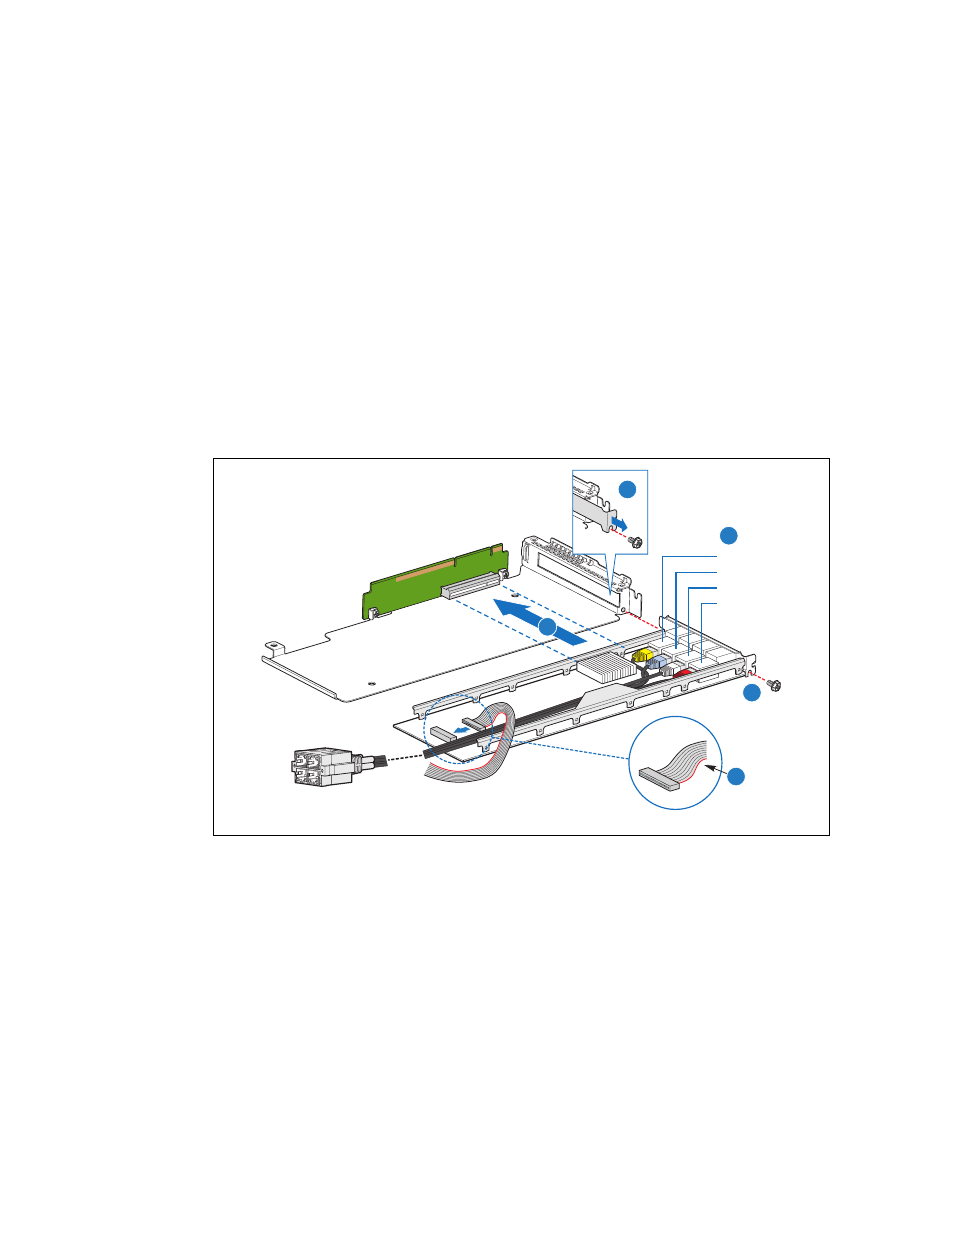
4.6.1.3
Installing the LAN Card in the PCI Riser
See
when performing the steps below.
1. Remove the PCI riser card assembly from the chassis and turn it upside down. For instructions,
Section 4.4.1, “Removing the PCI Riser Card Assembly” on page 52
.
2. Remove the add-in card filler panel from the rear panel of the chassis and save the screw. (“A”)
3. Connect the four GbE cables to the LAN card as shown in the color coding portion of
.
(“B”)
4. Connect the LED ribbon cable to the LAN card. Note where the red stripe is for a proper
connection.(“C”)
5. Install the LAN card into the PCI riser assembly slot. (“D”)
6. Route the cables around the heat sink and straight back close to the LAN card rail. Be careful not
to pull the cables too tight.
7. Secure the LAN card in the riser with the screw from the filler panel that was removed. (“E”)
4.6.1.4
Routing the LAN Card Cables to the Front Panel
1. Remove the factory-installed PCI support bracket by loosening the two screws. (
, “A”)
2. Replace the bracket with the LAN card support bracket accessory that has an opening for routing
the LAN card cables. (“B”)
Figure 40.
Configuring and Installing the LAN Card
AF000887
Yellow
Red
White
Blue
A
B
C
D
E