3 installing an optical device, 2 installing the optical device in the chassis, Installing an optical device 4.3.1 – Kontron NSW1U IP Network Server User Manual
Page 49: Installing the optical device in the chassis
Kontron IP Network Server NSW1U
December 2009
Product Guide, rev. 1.4
49
Optional Component Installation Procedures—NSW1U Network Server
4.3
Installing an Optical Device
Caution:
The optical device is NOT hot-swappable. Before installing or replacing an optical drive,
you must first take the system out of service, turn off all peripheral devices connected
to the system, turn off the system by pressing the power button, and unplug the power
cord(s) from the system or wall outlet.
To install an optical device in the NSW1U Network Server, you need the carrier tray, interposer board
and the signal and power cables from the accessory kit that shipped with the system.
4.3.1
Removing the Optical Device Filler Panel from the Chassis
1. Remove the chassis cover. For instructions, see
Section 3.2.1, “Removing the Chassis Cover” on
2. Remove the front bezel. For instructions, see
Section 3.2.3, “Removing the Front Bezel” on
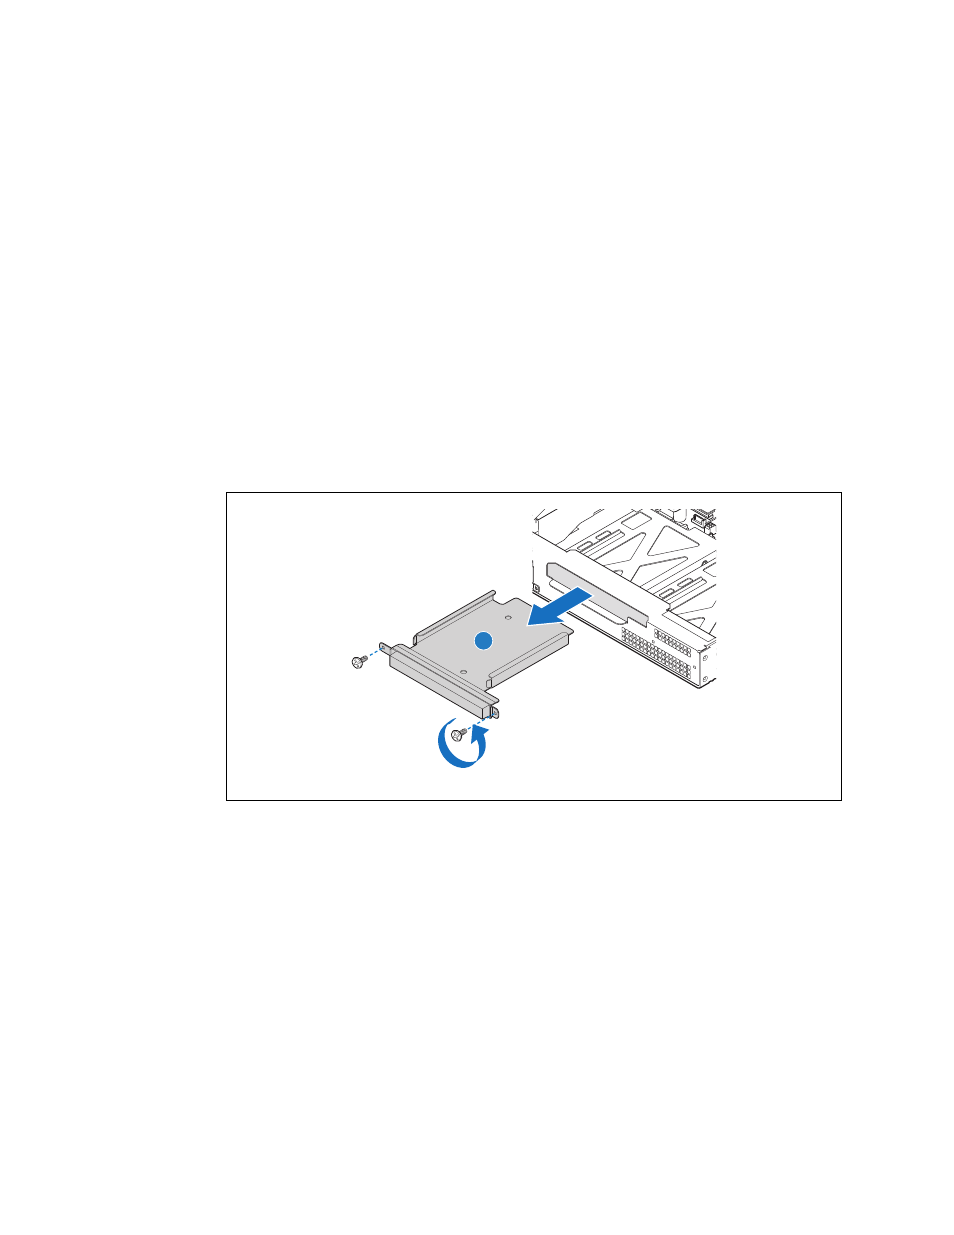
3. Remove the two screws on the front panel and remove the filler panel from the chassis.
, “A”)
4.3.2
Installing the Optical Device in the Chassis
1. Insert the interposer board connector into the port on the back of the optical drive.
2. Secure the interposer board connection with two screws, as shown. (
, “A”)
Figure 28.
Removing the Optical Device Filler Panel
A
TS000407