1 removing the filler panel, 2 installing the escutcheon, Removing the filler panel – Kontron NSW1U IP Network Server User Manual
Page 57: Installing the escutcheon
Kontron IP Network Server NSW1U
December 2009
Product Guide, rev. 1.4
57
Optional Component Installation Procedures—NSW1U Network Server
4.6.1.1
Removing the Filler Panel
1. Power down the server system and unplug all peripheral devices and the power cord.
2. Remove the chassis cover. For instructions, see
Section 3.2.1, “Removing the Chassis Cover” on
3. Remove the front bezel. For instructions, see
Section 3.2.3, “Removing the Front Bezel” on
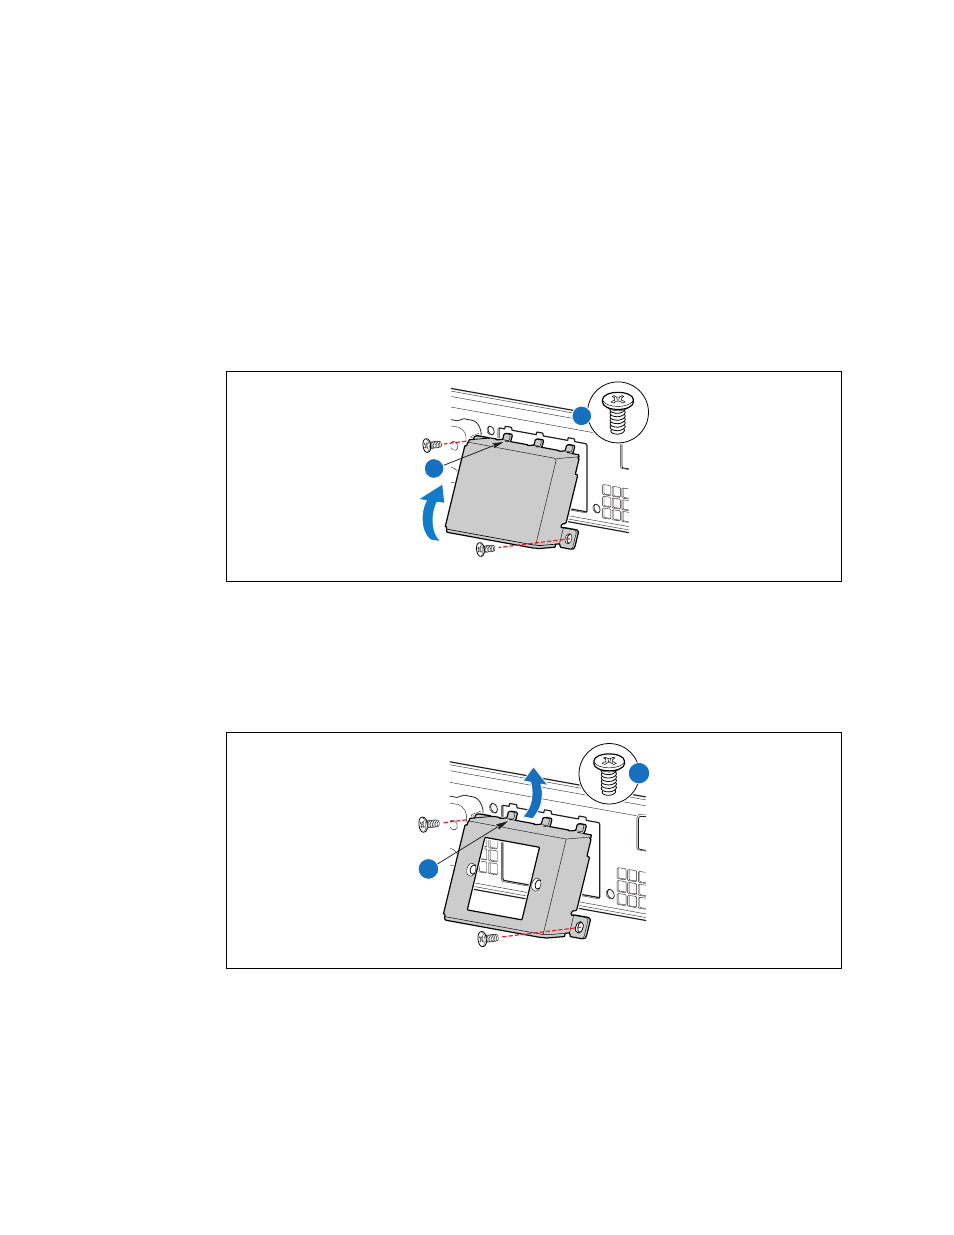
4. Remove both screws from either side of the filler panel and save for future use. (“A” in
)
5. Rotate the bottom edge of the filler panel outwards, lower the panel slightly to disengage the
retention tabs at the top, and remove the panel. (“B”)
4.6.1.2
Installing the Escutcheon
1. Insert the retention tabs located at the top of the escutcheon into the front panel notches, then
rotate the bottom edges toward the chassis. (“A”)
2. Attach the escutcheon with two screws as shown. (“B”)
Figure 38.
Removing the 4xGbE Filler Panel from the Chassis
Figure 39.
Installing the 4xGbE Escutcheon
B
A
AF000884
B
A
AF000885