2 removing dimms, 4 installing or replacing the processor, Removing dimms – Kontron NSW1U IP Network Server User Manual
Page 35: Installing or replacing the processor, Figure 16
Kontron IP Network Server NSW1U
December 2009
Product Guide, rev. 1.4
35
Server Installations and Upgrades—NSW1U Network Server
3.3.3.2
Removing DIMMs
To remove a DIMM, follow these steps:
1. Power down the server system and unplug all peripheral devices and the power cord.
2. Remove the chassis cover. For instructions, see
Section 3.2.1, “Removing the Chassis Cover” on
3. Remove the air duct. For instructions, see
Section 3.2.5, “Removing the Processor Air Duct” on
4. Locate the DIMM(s) on the server board and select the one(s) you want to remove. See
.
5. Open the DIMM socket levers.
6. Holding the DIMM by the edges, lift it away from the socket, and store it in an anti-static package.
7. Replace the chassis cover if you have completed all work inside of the server.
3.3.4
Installing or Replacing the Processor
Note:
Use the instructions provided below to replace a processor instead of using the
instructions that came with the processor.
Caution:
The processor must be appropriate: You could damage the server board if you install a
processor that is inappropriate for your server. For a list of compatible processors for
the NSW1U Network Server, go to
. Click on Downloads, and then click on Ordering
Guide.
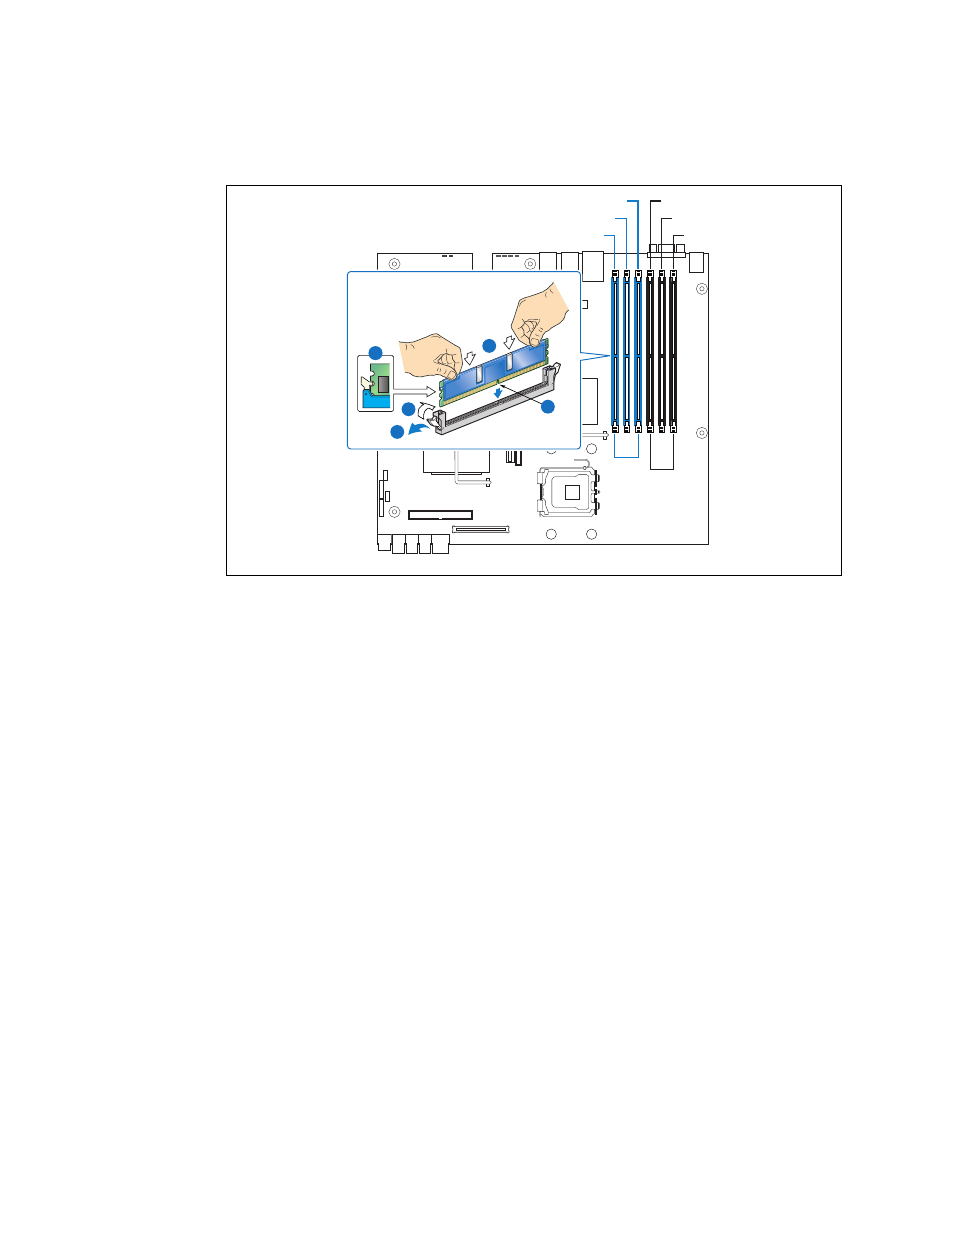
Figure 16.
Installing Memory DIMMs
Channel 1
Channel 0
DIMM A1
DIMM A2
DIMM B3
DIMM B2
DIMM A3
DIMM B1
E
A
C
D
B
AF000775