Final assembly – Elecraft T1 Assembly Manual User Manual
Page 23
23
Final Assembly
Locate the enclosure. It consists of a bottom cover, a top cover and an end panel. The top cover is
drilled with a row of holes for the LEDs and switches. The end panel is drilled with two large holes for the
BNC connectors and one small hole for the ground lug.
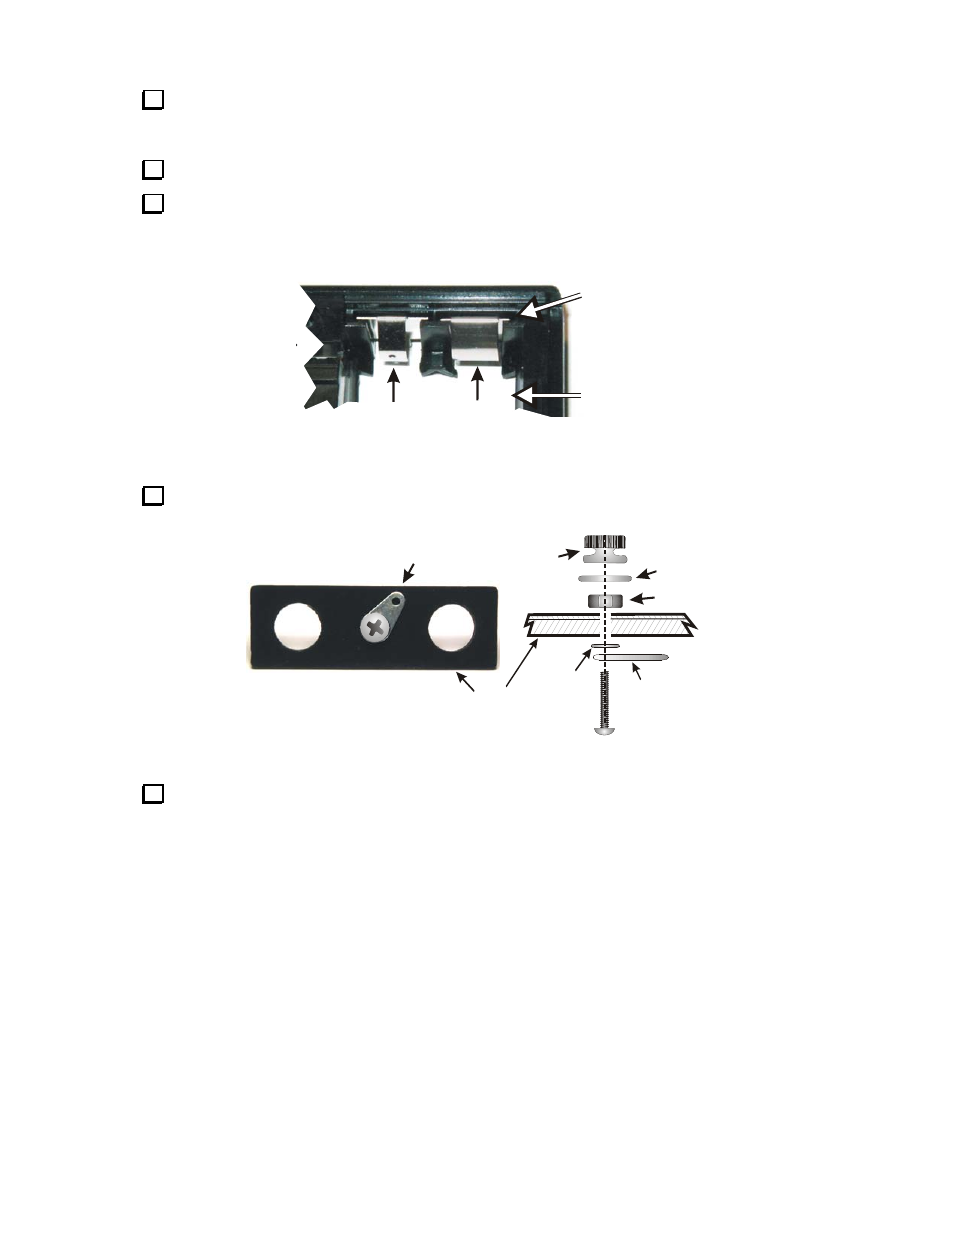
Locate the two battery clips. One has a narrow spring contact and one has a wide spring contact.
On the enclosure bottom cover, remove the battery compartment cover. It is indicated by an arrow
molded into the case. With the case face down and the battery compartment open, insert the metal battery
clips as shown in Figure 14. Be sure the wider contact is closest to the bottom of the enclosure. Once fully
inserted, the clips will lock in place.
WIDE
CONTACT
BATTERY
COMPARTMENT
DOOR OPEN
SLIDE CLIPS
INTO SLOTS
UNTIL THEY
LATCH
NARROW
CONTACT
Figure 14. Installing Battery Clips.
Assemble the ground screw hardware as shown in Figure 15. Tighten the hex nut and screw securely
so that tightening the knurled thumb nut will not loosen the assembly.
FLAT SIDE OF
END PANEL
SOLDER
LUG
NUT
THUMB
NUT
FLAT
WASHER
LOCK
WASHER
POSITION SOLDER
LUG AS SHOWN
Figure 15. Ground Screw Assembly.
Cut a 1” (26 mm) length of the black #26 AWG stranded wire. Strip 1/8” (3 mm) from each end and
tin the bare wires. Insert one end into the pad marked G on the main PCB next to J1, solder and trim the
excess. If this pad was filled with solder when you installed BNC connector J1, re-heat it and poke the wire
through from the top of the board.