Elecraft T1 Assembly Manual User Manual
Page 20
20
Control Board Assembly Procedure
Install resistor R10, 120K (brn-red-yel), 1/8 watt.
i
When your tuner is assembled, the bottom of the control PC board will be very close to the
top of the MCU. It is critical to flush cut all leads on the bottom of the board in the area directly over
the MCU to no more than 1/32” (1 mm) in height.
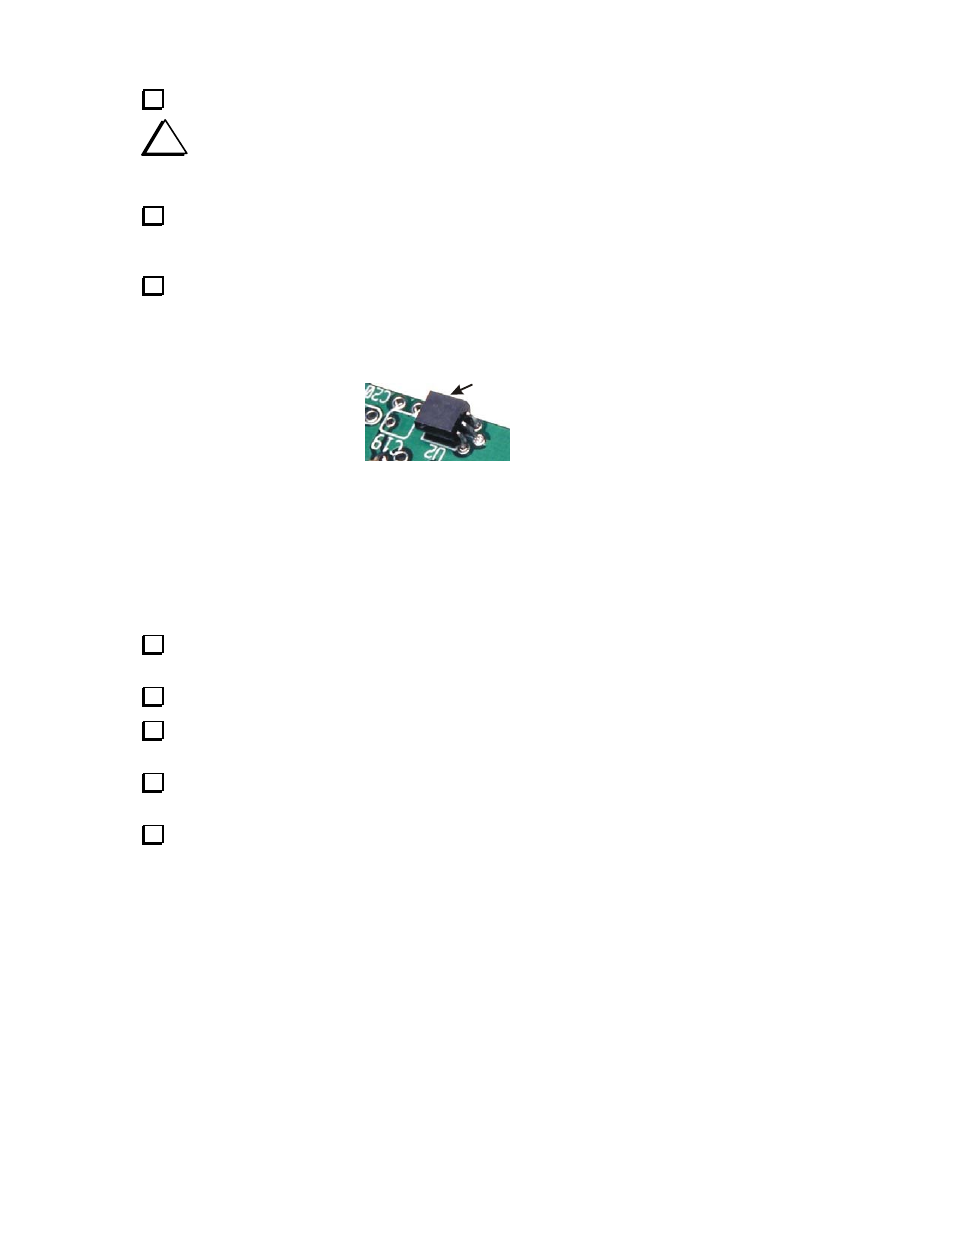
Locate voltage regulator U2 (78L06). This is a three-terminal device that looks like most transistors
with one flat face and a rounded back. The number is printed on the flat face, but you may have to use a
magnifier and hold it in just the right position under a strong light to see the lettering.
Install U2 as follows:
__ Bend the three leads toward the rounded side of the case, then position it on the board with the three
leads through the solder pads and the rounded side against the board (See Figure 13).
LAY AGAINST BOARD
FLAT SIDE UP.
Figure 13. Installing U2 on the Control Board.
__ On the bottom of the board, bend the leads to hold U2 in place.
__ Solder and flush-cut the center lead.
__ Adjust U2, if needed, to center it within the outline with the rounded back touching the board.
__ Solder and flush-cut the remaining two leads.
Install Q1 (2N3906) using the same procedure as you used for U2. When soldering, be careful not to
fill the open solder pad for C20.
Install diode D4 (1N5711). Orient the band over the end indicated on the circuit board.
Install C19, 1 µF, L.S 0.1 (105). Lay the capacitor body in the square shown on the control board with
the leads inserted through the solder pads. Adjust the leads to allow the body to lie as flat as possible.
Insert the leads of resistor R7, 120K (brn-red-yel), 1/8 watt, through the solder pads and bend them to
hold it in place, but do not solder yet to avoid filling the solder pad for R14.
Install resistor R14, 3.3k (org-org-red), 1/8 watt. Solder and flush-cut the leads for both R7 and R14.
Take care not to touch connector J4 with your iron while soldering.