Glazing for butt glazed vertical, Minimizing condensati, Step 1) – EFCO 904 Series User Manual
Page 39: For butt glazed vertical, Fig. 40, Step 2), Gasket length = d.l.o. + 2, Fig. 41
PAGE 37
SECTION V A - GLAZING PROCEDURES
STEP 1)
the ends.
INTERSECTIONS.
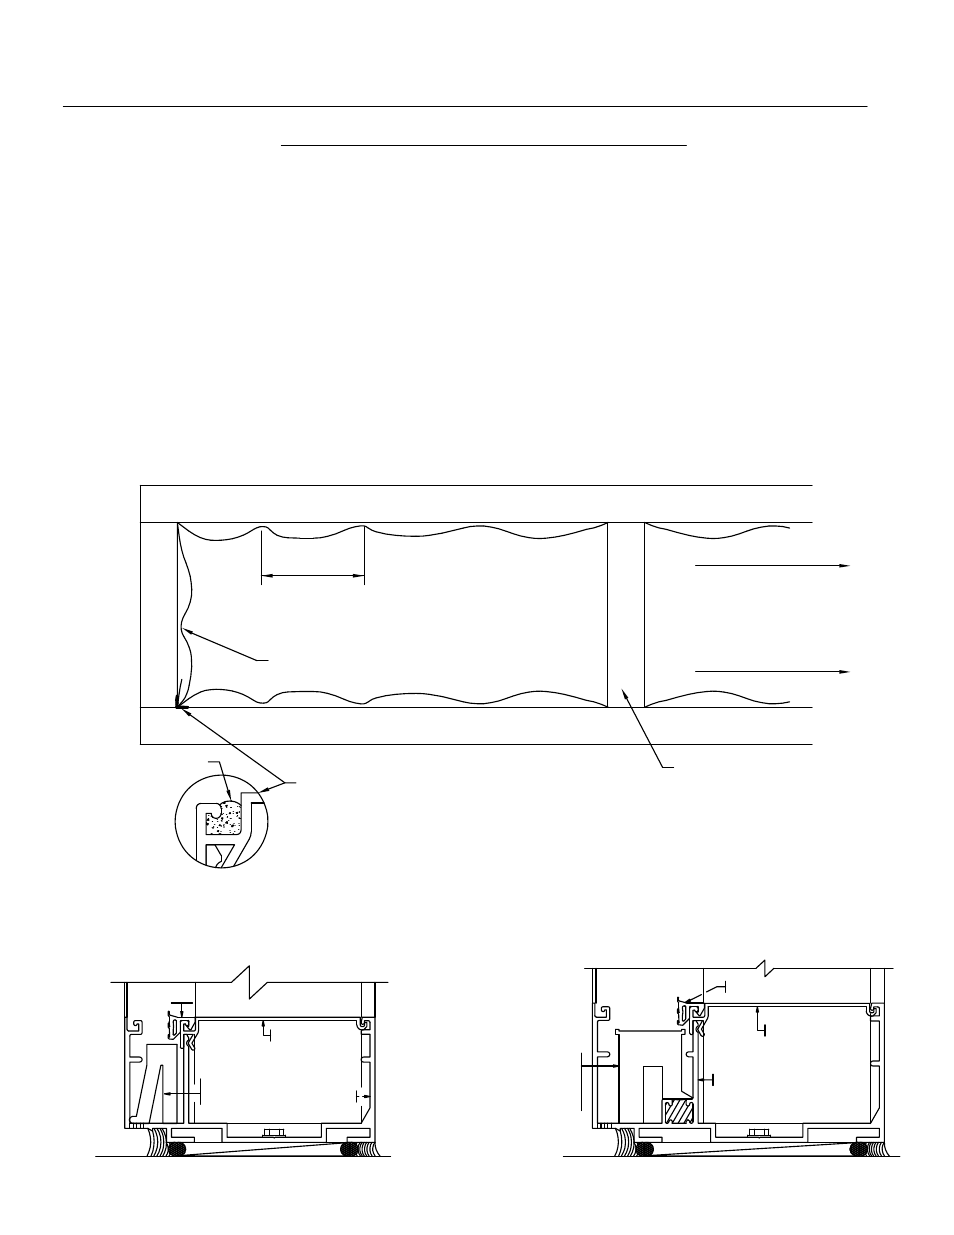
FOR BUTT GLAZED VERTICAL
from the exterior; install the interior gasket as follows.
the front of the butt glazed vertical. The glass will be installed
the middle, then to quarter points and work the "WAVES" toward
Start by pushing the gasket in place at the ends. Move to
The jamb gasket will run between. The gasket will run across
Glazing gasket (W164) will be continuous in the head / sill cans.
TO ITS ORIGINAL FORM, CREATING GAPS AT THE GASKET
DO NOT STRETCH THE GASKET OR IT WILL RETURN
GASKET RUNS TO JAMB
[FIG. 40]
SILL
VERTICAL
BUTT GLAZED
GASKET RUNS TO JAMB
9485
HN33 - 902
HN34 - 904
W164
9484
CDB 9/2009
HEAD
VARIES
8" - 12"
JAMB
RUN THRU.
JAMB GASKET TO
SEALANT
9479
9485
W164
STEP 2)
HNA1 - 901
HNA2 - 903
pockets. See Fig. 41 below.
Install setting block assemblies at 1/4 points in the sill can glazing
GASKET LENGTH = D.L.O. + 2%
BEFORE THE GASKETS ARE INSTALLED, SEAL 1"
VERTICALLY AND HORIZONTALLY IN THE GASKET
RACES WITH SILICONE TYPE SEALANT AT ALL
CORNERS. AFTER INSTALLATION SEAL THE ENDS
OF ALL GASKETS. SEALING RACES & GASKET END IS
REQUIRED AT THE INTERIOR OF THE SYSTEM.
EXTERIOR SEALANT AT RACE AND GASKETS ARE
OPTIONAL.
FU08 @ 1G66
902 I-BAR CAN
[FIG. 41]
See Fig. 40 below.