Step 5) step 4), Head and sill can splice, Step 3) – EFCO 904 Series User Manual
Page 29: Fig. 23
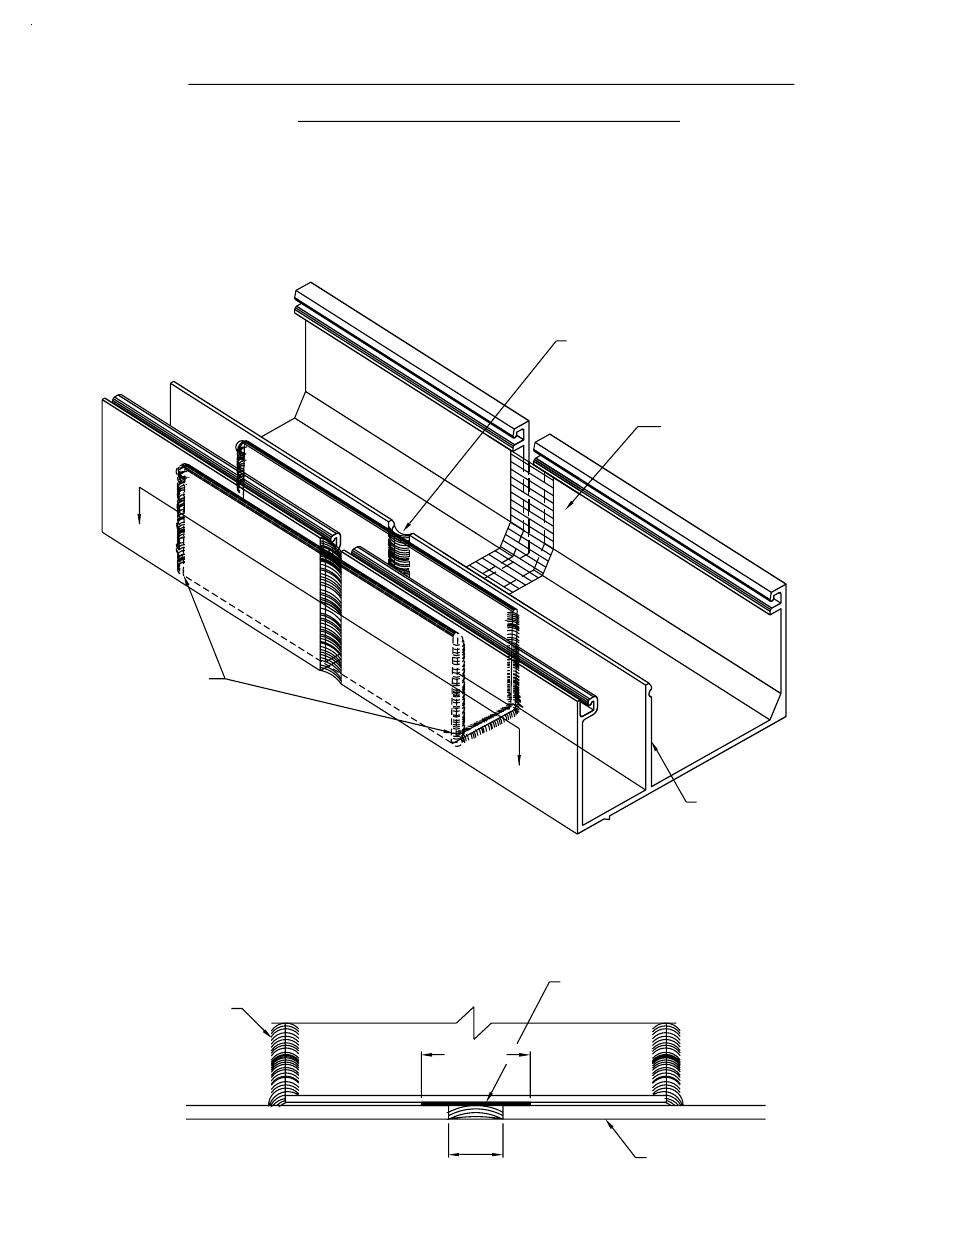
SECTION "A-A"
the seal to the splice sleeve and the two can members.
Apply sealant to the center vertical leg of the can, marrying
splice joint gap, and tool sealant smooth.
Proceed to the exterior face. Apply sealant to the exterior
OVER ENDS
TOOL SEALANT
STEP 5)
STEP 4)
BOTH SURFACES.
TOOL SEALANT
TO ADHERE TO
[FIG. 23]
1.000
SILL CAN
JDA 2/14/02
BOND BREAKER TAPE
"A"
LEG OF SILL CAN
CENTER VERTICAL
HEAD AND SILL CAN SPLICE
SECTION IV A - INSTALLATION
Apply a 1/4" bead of sealant over the ends of the splice sleeve.
Then tool the sealant across the edges of the sleeve and
onto the glazing pocket cavity surface. Be sure to work out any
air gaps that might occur. See Fig. 23 below.
"A"
STEP 3)
ACROSS THE GAP TO
APPLY SEALANT
ADHERE TO THE SILL CAN
AND THE SPLICE SLEEVE.
WM01 - 1" WIDE BOND
A CAULK BACKER.
AROUND THE SPLICE SLEEVE
BREAKER TAPE WRAPPED
AT THE CENTER AND USED AS
PAGE 27
(cont.)
Quick Set
1/2"