2pc. jambs and intermediate verticals, Fig. 31, Fig. 30 – EFCO 904 Series User Manual
Page 33: Step 5)
ESTABLISH THIS CLEARANCE.
MULLION CUT LENGTHS THAT
SEE CHART ’A’ ON PAGE 17 FOR
CLEARANCE VARIES
2pc. JAMBS AND INTERMEDIATE VERTICALS
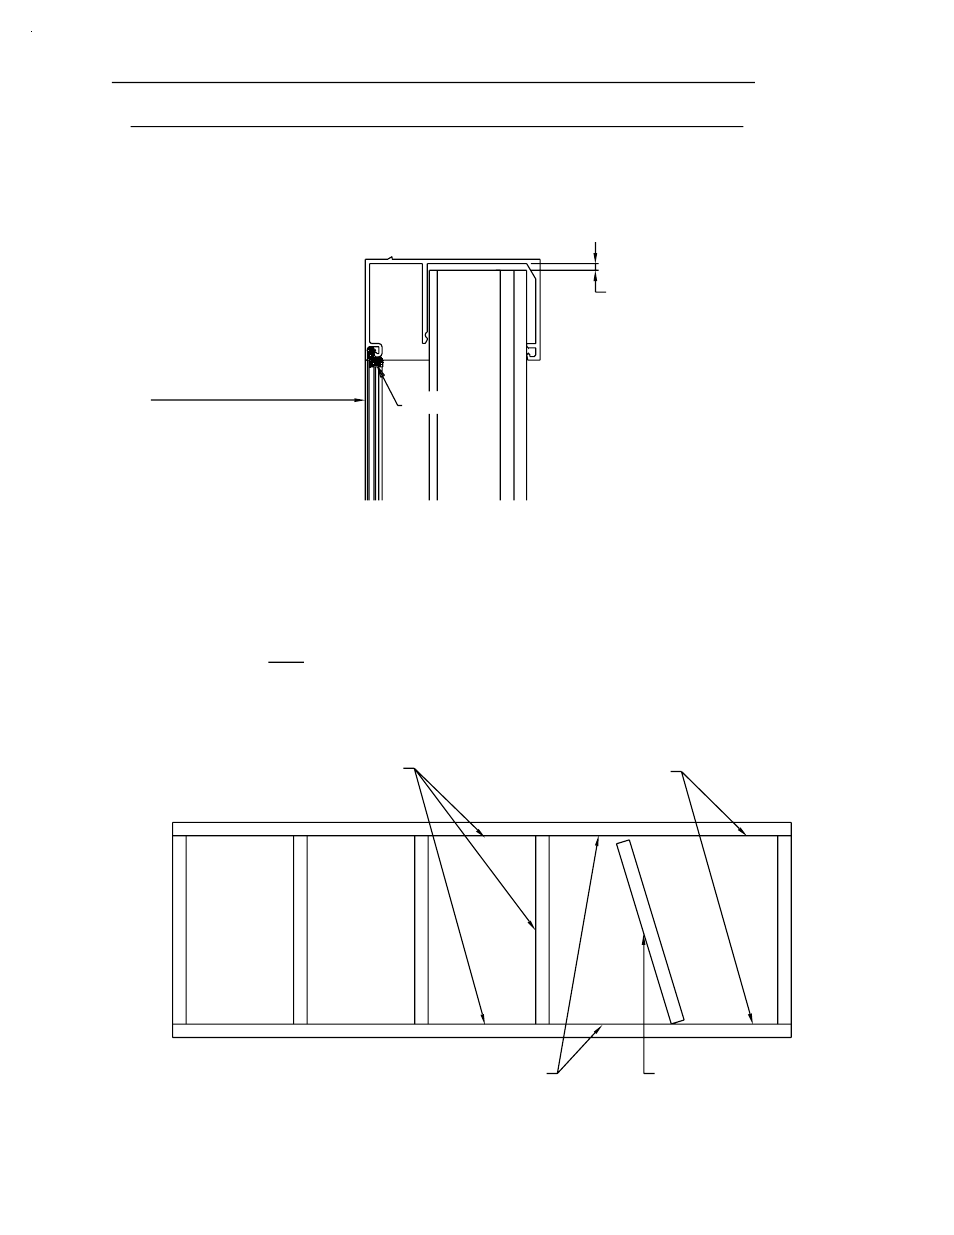
mullions. Check every third mullion for correct spacing.
Tap vertical mullion tight against the can fillers already in place.
Then repeat the installation of the next can fillers and vertical
SECTION IV B - INSTALLATION
After the vertical mullion is in position, let it move back
CAN FILLERS
POSITION AGAINST THE
TILT THE LAST VERTICAL INTO
This will allow tilting the last vertical mullion into place.
Install the last can filler of a run before the second to last.
UNTIL THE LAST VERTICAL IS INSTALLED
THESE CAN FILLERS ARE HELD OFF
[FIG. 31]
FACES of MEMBERS
MOVE BACK to FLUSH
MULLIONS INSTALLED TO HERE
CAN FILLERS AND VERT.
See Fig. 31 below.
NOTE:
STEP 6)
CAN FILLERS INSTALLED
SEALANT
[FIG. 30]
flush with the exterior face of the head and sill cans.
See Fig. 30 below.
STEP 5)
DPS 7/2001
PAGE 31
(CONT.)