Salter Brecknell 800 Series User Manual
Page 22
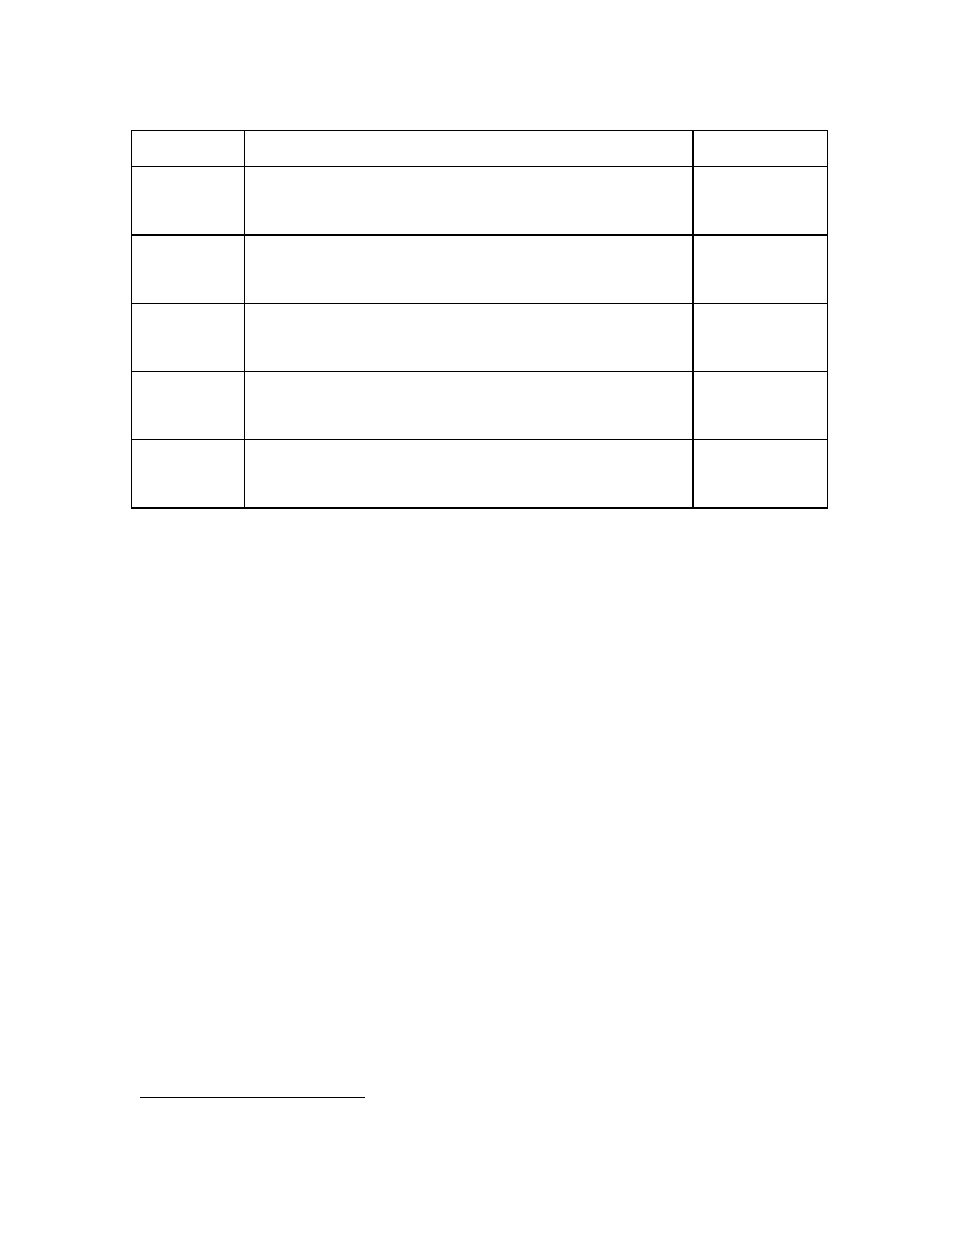
NAME/CODE
DESCRIPTION
CODE/VALUE
A11
Date Enable
Allows the date to be disabled in the Print Ticket mode. Valid only
when
A3
is set to “1”.
"0" = Disable the date printout "1" = Enable the date printout
0√
√√√
1
A12
Date Format
Selects the printed format for current date. Valid only when
A3
is set
to “1” and indicator contains Time and Date option.
"0" = mm/dd/yy "1" = dd/mm/yy
0√
√√√
1
A13
Date Entry
Actuates the function that allows entry of the current date. Valid only
for indicators containing the Time and Date option. Pressing the
#2
key to scroll down one level begins the test sequence.
Press
#2
key to
begin sequence
A14
Display Check
Actuates the function that illuminates all digit segments, decimal
points, and LCD annunciators in a test sequence. Pressing the
#2
key to scroll down one level begins the test sequence.
Press
#2
key to
begin sequence
A15
1
Print Header
Tells MP-20 printer to print the header information. Valid only when
A3
is set to “1”.
"0" = Do NOT Print Header "1" = Print Header
0√
√√√
1
5.2
USER MENU PROCEDURES
This section provides instructions for all of the User Menu procedures.
5.2.1
ID Number Entry (A5)
1.
While in the User Menu mode, scroll to "
A 5
", then scroll down once using
the 2 key to enter the ID Number menu.
5. The display will momentarily show "
ET ID
", followed by the current ID
number value.
6. Use the front panel numeric keys to key-in the actual ID Number value. If
you make a mistake, press the CL key to clear your entry and start over.
7. After entering the exact value, press the NET/GROSS key to save the ID
Number value. The display will show "
SET
" momentarily, then revert back
up to A5.
5.2.2
LF (Line Feeds) Number Entry (A6)
1. While in the User Menu mode, scroll to "
A 6
", then scroll down once using
the 2 key to enter the Line Feeds menu.
2. The display will momentarily show "
ET LF
", followed by the current line
feeds value.
3. Use the front panel numeric keys to key-in the actual line feeds value. If you
make a mistake, press the CL key to clear your entry and start over.
4. After entering the exact value, press the NET/GROSS key to save the line
feeds value. The display will show "
SET
" momentarily, then revert back up
to A6.