Rear mud flap installation – Rally Armor 2014+ Subaru Forester User Manual
Page 3
IMF 28
Version 1.1 Release Date 04.14.2013
3
Rear Mud Flap Installation
Removal of rear wheel is not necessary but can ease installation. Jacking the rear of the vehicle should enable access to the rear wheel
well area.
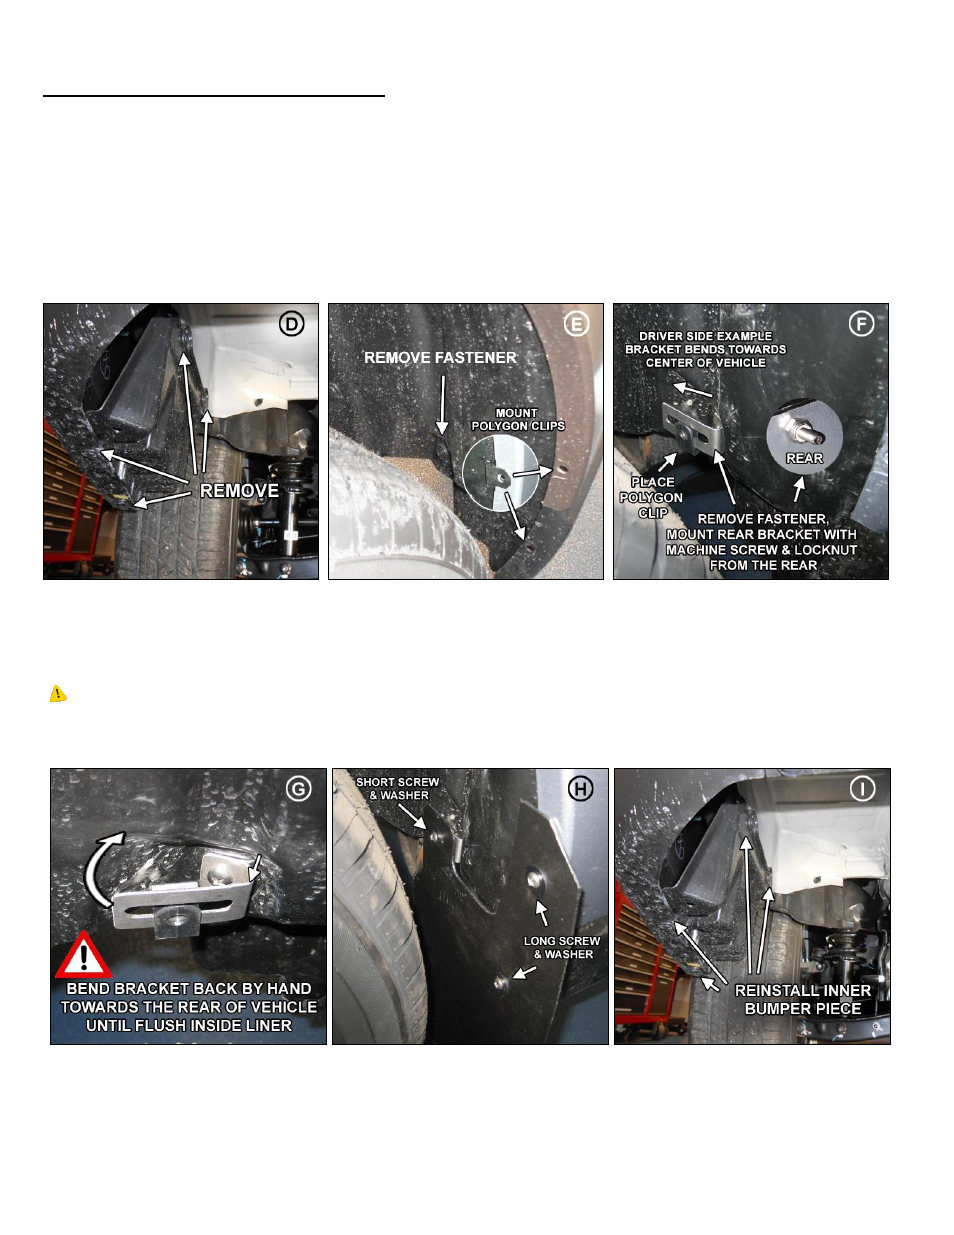
• (Figure D) Working from the rear of the vehicle, remove the 4 fasteners that secure the inner bumper piece to the bumper. Move
inner bumper piece aside to gain access to this area.
• (Figure E) Remove the inner fender liner fastener on the tire side. Place two polygon clips on the outer edge bumper mounting points.
• (Figure F) Mount the rear bracket to vehicle using a machine screw (1MCHSS) through the circular mounting point in the bracket,
through the liner, then secure with lock nut (SSLnut). You may place a Philips screwdriver through the extended slot on the bracket and
tighten nut on the other side of the chassis with a key or socket. Do not over tighten. Place a polygon clip over the center of the
extended slot on the bracket.
• (Figure G) Bend the bracket by pushing the edge until it is completely flush against the liner.
• (Figure H) Place the mud flap with the logo facing the rear of the vehicle, against the corresponding mounting points on the fender
liner and bracket. Place a washer (SmWash) over a long screw (1.5SS) through the flap into the two outer mounted clips. Place a
washer (SmWash) over a short screw (1SS) through inside mounting point of the flap into the polygon clip on the bracket.
Align outer edge of the flap by incrementally adjusting the angle of the flap and walking away from the vehicle until the flap is
perpendicular to even ground. Tighten all mounting screws only until snug. Do not over tighten.
• (Figure I)
Reinstall previously removed inner bumper piece with existing fasteners.