Rally Armor 03 to 08 Subaru Forester User Manual
Page 2
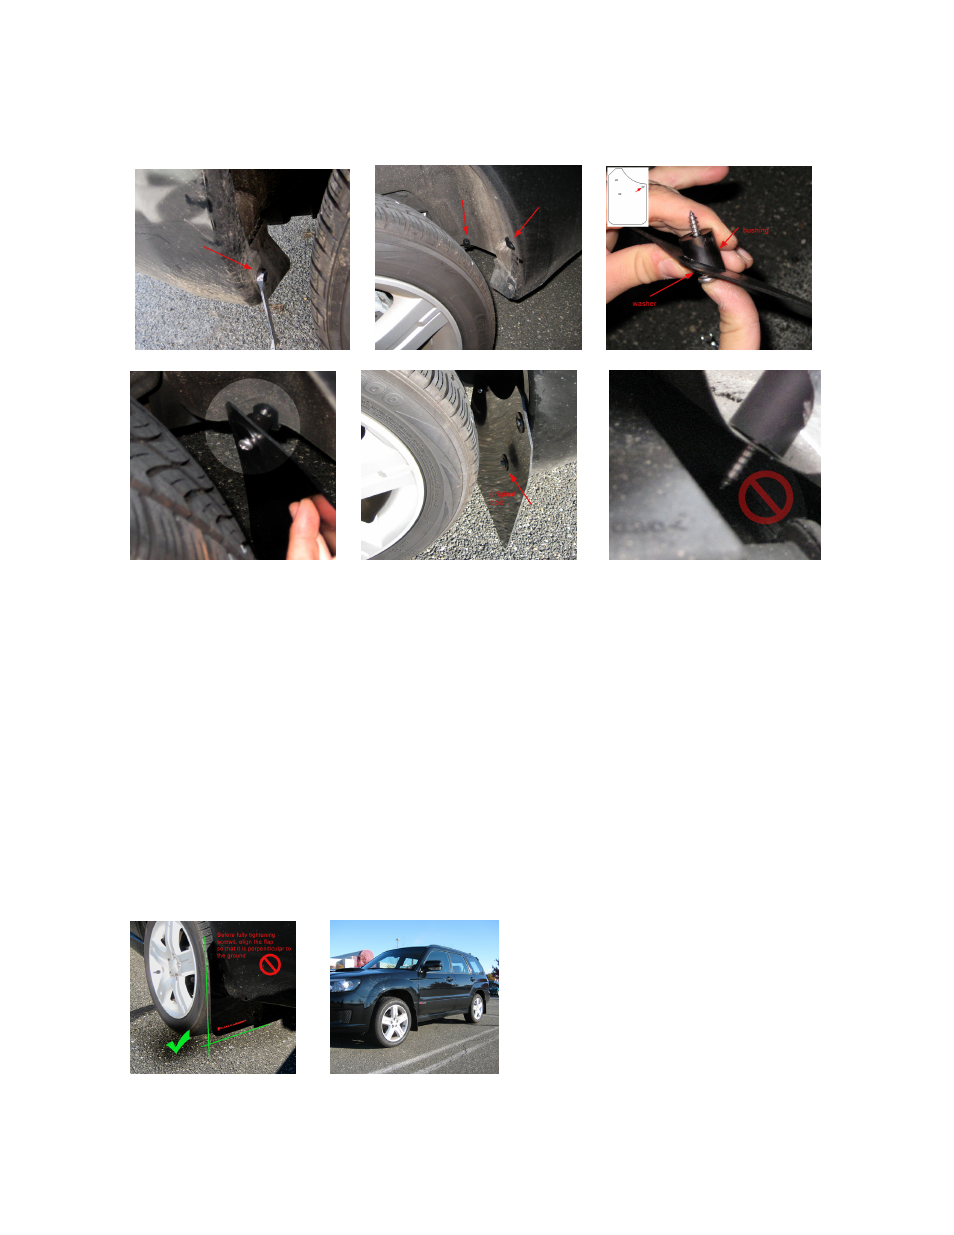
Step 1: Using an 8mm wrench, remove the lower bolt from the rear area but do not discard as it will be
reused (see figure F).
F)
G)
H)
Step 2: Place two clips (Item PolCl) on the inner wheel well and outer bumper area as shown in figure G.
I)
J)
K)
Step 3: Place washer first, then place a long screw (Item 2SS) on logo less side of the flap.
A) On the logo side of the flap, place angled spacer (Item 1AngSP) on the innermost mounting point.
TIP:
The Rally Armor logo side faces the rear of the vehicle.
B) Hand thread the long screw (Item 2SS) into the innermost clip.
TIP:
Loosely threading the mount will allow you to align the mud flap with the two outer mounting points.
For some, loosely hand threading the outer points first then bolt the inner point may be easier depending
on access to the rear inner mounting point. The flexibility of the flap allows for this.
Cautionary Note:
When working on the passenger side of the vehicle, be sure to confirm any clearance
issues with the fuel area when fully tightening as shown in figure K.
Step 4: Hand thread the two outermost points using a washer then a short screw (Item 1SS) for the
topmost mount and the original bolt with a washer (Item FenWash) for the lower mount.
As with the front set, before fully tightening screws, walk away from the vehicle and align the mud flap so
that it is perpendicular to the ground. This is achieved by tugging with pressure on the top (or bottom)
portion of the flap, walking away from the vehicle to view, and bolting down when complete (fig. L).
Cautionary Note:
The hardware is quite strong and self-threading but overtightening the clips beyond
their limit is not recommended on any of the hardware.
Step 5: Do the same for the other side of the vehicle to complete the installation.
L)
M)