Rally Armor 02 to 07 Subaru Impreza User Manual
Page 2
Step 4: Place the plastic insert (Item Ins) in hole #4 (fig. C)
IMPORTANT TIP:
The insert must be flush with the body of the car before bolting. The insert will expand
after a few turns. If it spins while bolting, confirm it is flush and apply firm pressure while turning. You may
opt to install the insert behind the plastic liner which may ease installation.
Step 5: Place a washer (Item FenWash) first then a long screw (Item 2SS) in the #4 innermost slot on the
flap (flapside facing tire). Place a spacer (Item 1SP) on the flapside with the logo.
Step 6: Place flap in wheel well and begin bolting the inner screw until it begins threading into the plastic
insert.
TIP:
Bolt loosely to allow for some adjustment. An offset or short screwdriver helps to avoid removing
tires but turning the steering wheel during installation helps to gain access.
Step 7: Align and start bolting the short screw into hole #1.
TIP:
Note the liner slightly touching the clip. You can align the hole with the tip of the screw through the
flap and the liner should slightly flex to accommodate.
Step 8: Bolt up the remaining short screw.
TIP:
Tighten enough to allow for adjustment. Step away to make sure the flaps are perpendicular to the
ground (fig. I), Once perpendicular, tighten the bolts until snug. The slotted design allows for further
adjustment. Be sure to replace the two clips from the side skirt removed earlier. Do the same for the other
side.
Important note: Side skirt clips #3 utilize a long screw!
REAR MUD FLAP INSTALLATION:
(May require removal of tires depending on access to holes)
Cautionary Note:
The hardware is quite strong and self threading but overtightening the clips beyond
their limit is not recommended. Simply bolt until snug without excessive pressure on the fender liner.
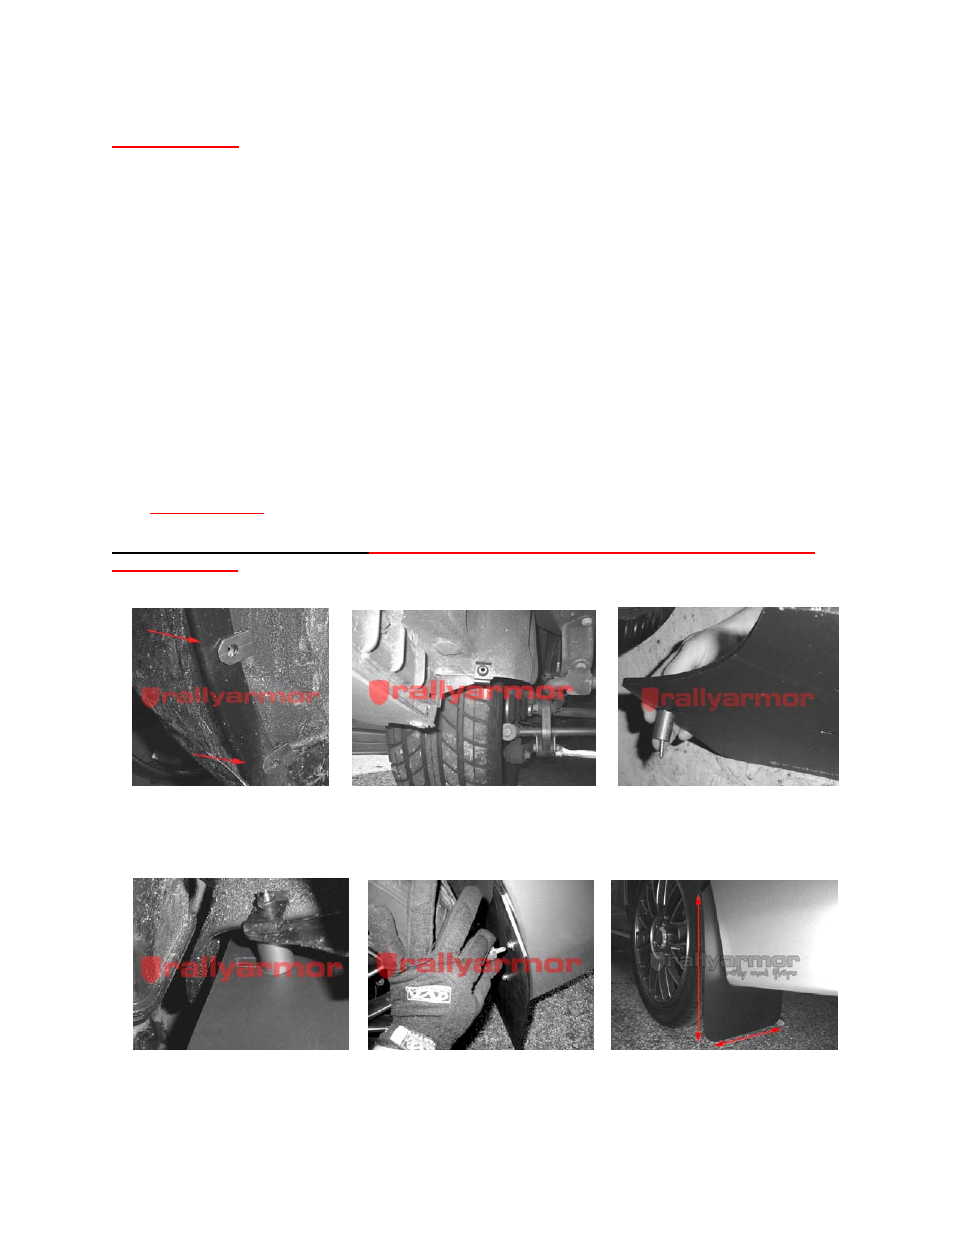
Step 1: Place two polygon edge clips (Item PolCl) over the two holes in the rear bumper as seen in fig. D
D)
E)
F)
For the innermost hole, remove the body plug and replace with polygon clip (fig. E):
Step 2: Get rear flap (3 mounting points) and place a washer/long screw/flap/spacer in that order (see fig.
F & G). Place mud flap in wheel well. Thread screw to innermost mounting hole -not fully to allow for
adjustment later.
G)
H)
I)
Step 3: Bolt the other washer/short screws in the other two until snug. Adjust flaps until perpendicular (fig.
I). Tighten screws when even. Walk away from the car to be sure. Do the same for the other side.