Figure 7 – Dell PowerEdge 2800 User Manual
Page 66
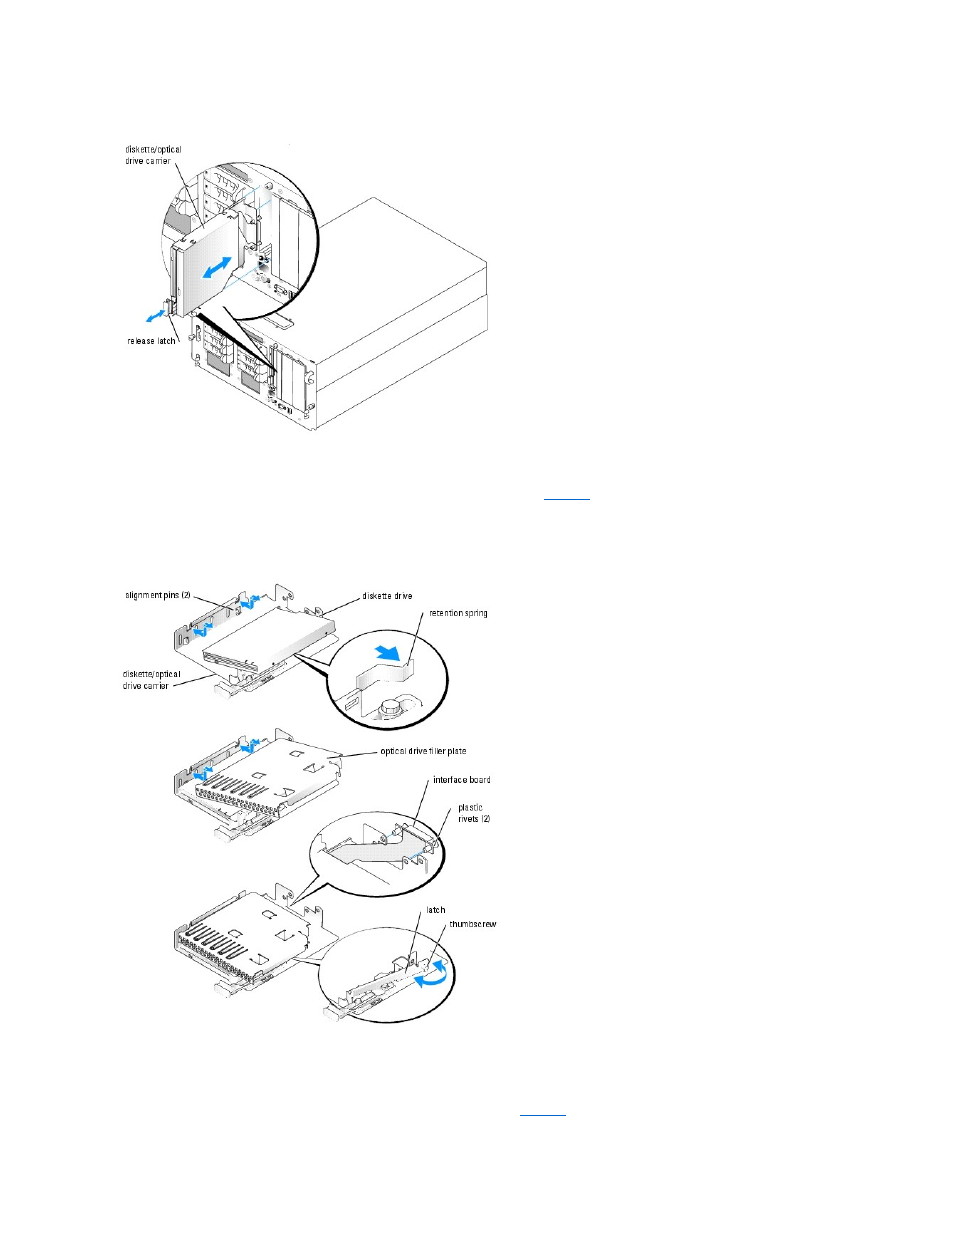
Figure 7-3. Installing and Removing the Diskette/Optical Drive Carrier
5.
Remove the optical drive or optical drive filler plate from the carrier.
a.
Loosen the thumbscrew on the latch securing the optical drive or filler plate. See
b.
Remove the latch.
c.
Lift the optical drive or optical drive filler plate from the carrier.
Figure 7-4. Installing a Diskette Drive in the Drive Carrier
6.
To remove the diskette drive filler plate, pull the retention spring slightly away from the filler plate, then lift the filler plate from the carrier.
7.
Deflect the retention spring slightly, then insert the diskette drive into the carrier.
The pins on the carrier fit into the corresponding holes in the side of the drive. See
.
See also other documents in the category Dell Computer hardware:
- PowerEdge RAID Controller H700 (178 pages)
- PowerEdge RAID Controller H700 (56 pages)
- PowerEdge RAID Controller H700 (200 pages)
- PowerVault TL2000 (2 pages)
- PowerVault TL4000 (2 pages)
- PowerVault TL2000 (176 pages)
- PowerVault TL2000 (16 pages)
- PowerVault TL2000 (3 pages)
- PowerVault TL2000 (116 pages)
- PowerVault 130T DLT (Tape Library) (49 pages)
- PowerVault TL2000 (1 page)
- PowerVault 110T DLT VS80 (Tape Drive) (49 pages)
- PowerVault TL2000 (22 pages)
- PowerVault TL4000 (306 pages)
- PowerEdge 800 (27 pages)
- PowerEdge 800 (28 pages)
- PowerEdge 800 (58 pages)
- PowerEdge 800 (87 pages)
- PowerEdge 800 (24 pages)
- PowerEdge 800 (82 pages)
- PowerEdge 800 (2 pages)
- PowerEdge 6400 (86 pages)
- PowerVault 124T (73 pages)
- PowerVault 124T (65 pages)
- PowerVault 124T (4 pages)
- PowerVault 124T (79 pages)
- PowerVault 124T (2 pages)
- PowerVault 124T (64 pages)
- PowerVault 124T (56 pages)
- PowerVault 124T (66 pages)
- PowerVault 124T (57 pages)
- PowerVault 110T LTO (Tape Drive) (28 pages)
- PowerVault 124T (55 pages)
- PowerVault TL4000 (22 pages)
- PowerVault TL4000 (3 pages)
- PowerVault TL4000 (176 pages)
- PowerVault TL4000 (2 pages)
- PowerVault TL4000 (16 pages)
- PowerVault TL4000 (116 pages)
- PowerVault TL4000 (1 page)
- PowerVault TL4000 (66 pages)
- PowerEdge RAID Controller 6i (120 pages)
- PowerEdge RAID Controller 6i (156 pages)
- PowerVault 715N (Rackmount NAS Appliance) (44 pages)
- PowerVault 715N (Rackmount NAS Appliance) (57 pages)