Dell PowerEdge 2800 User Manual
Page 55
Installing a Non-Hot-Plug Expansion Card
1.
Turn off the system and attached peripherals, and disconnect the system from the electrical outlet.
2.
Open the system. See "
Opening the System
" in "Troubleshooting Your System."
3.
Remove the expansion-card cage. See "
Removing the Expansion-Card Cage
."
4.
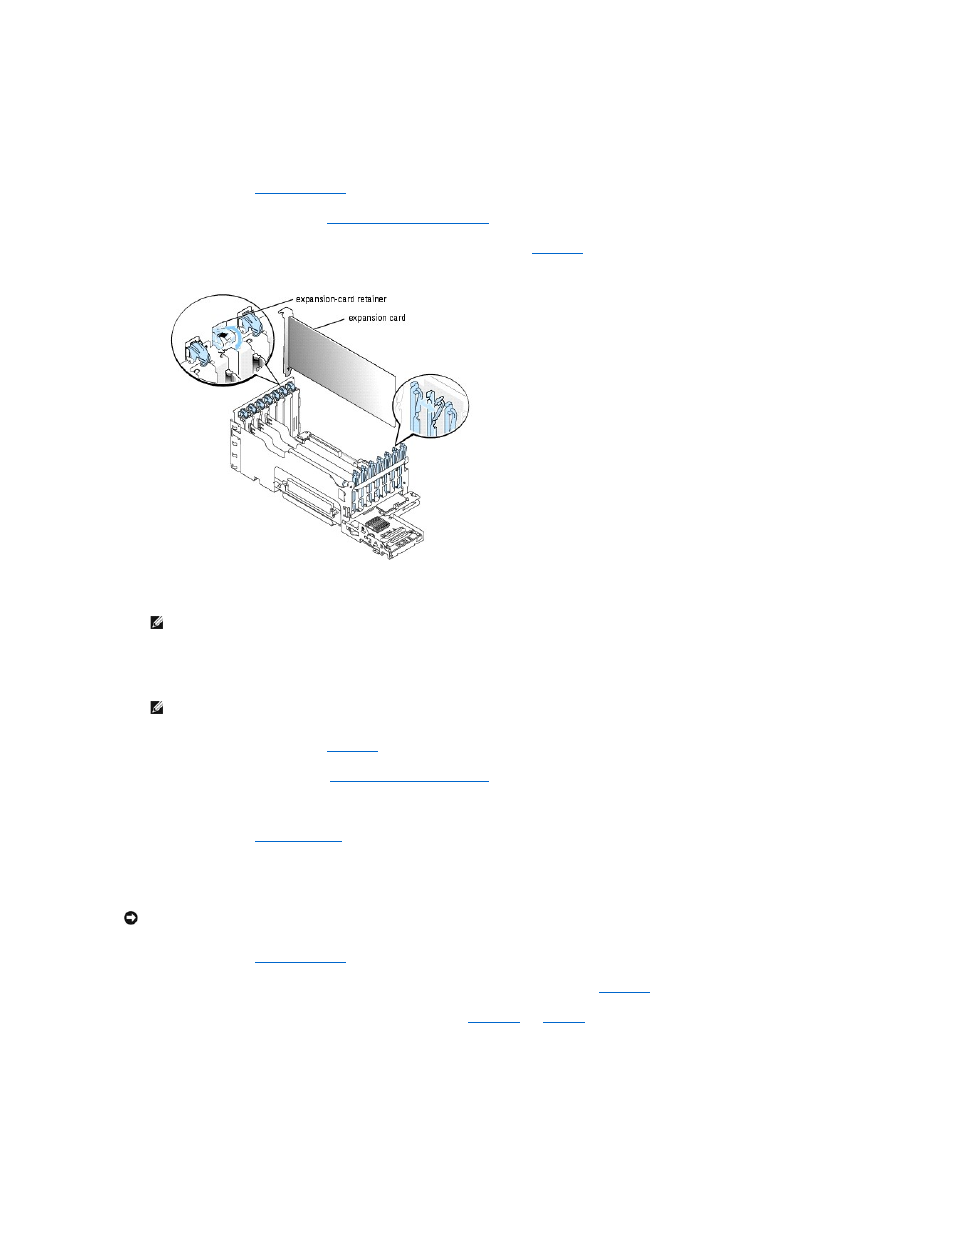
Open the plastic expansion-card retainer adjacent to the back of the empty slot. See
.
Figure 6-13. Installing and Removing Non-Hot-Plug Expansion Cards
5.
Remove the filler bracket on the slot you will be using.
6.
Insert the expansion card firmly into the expansion-card connector until the card is fully seated.
7.
Close the expansion-card retainer. See
8.
Reinstall the expansion-card cage. See "
Installing the Expansion-Card Cage
."
9.
Connect any internal or external cable(s) to the expansion card.
10.
Close the system. See "
Closing the System
" in "Troubleshooting Your System."
Installing a Hot-Plug Expansion Card
1.
Open the system. See "
Opening the System
" in "Troubleshooting Your System."
2.
To power down the expansion slot, press the indicator/switch at the end of the expansion slot. See
3.
Wait until the green and amber indicators for the slot are both off. See
Figure 6-14. Installing and Removing Hot-Plug Expansion Cards
NOTE:
Keep this bracket if you need to remove the expansion card. Filler brackets must be installed over empty expansion-card slots to maintain
Federal Communications Commission (FCC) certification of the system. The brackets also keep dust and dirt out of the system and aid in proper
cooling and airflow inside the system.
NOTE:
Ensure that the expansion-card bracket is also inserted into the securing slot on the back of the expansion-card cage.
NOTICE:
Your system's operating system and the expansion card itself must both support hot-plug installation and removal.