Installing drives, Installing scsi hard drives, Before you begin – Dell PowerEdge 2800 User Manual
Page 64: Installing a scsi hard drive
Back to Contents Page
Installing Drives
Dell™ PowerEdge™ 2800 Systems Installation and Troubleshooting Guide
Removing the Peripheral Bay Filler Panel (Tower Systems Only)
Installing an Internal SCSI Tape Drive
Connecting an External SCSI Tape Drive
Activating the Optional Integrated RAID Controller
Installing a RAID Controller Card
SCSI Hard-Drive Cabling Guidelines
Your system features eight standard internal hard-drive bays that accommodate up to eight SCSI hard drives. Systems with an optional RAID controller card or
optional ROMB support hot-plug SCSI drive operation.
The system's two peripheral bays can accommodate up to two 5-1/4-inch form-factor devices (such as tape drives) or an optional 1x2 SCSI backplane to
enable installation of two additional SCSI hard drives.
Installing SCSI Hard Drives
adapter and SCSI enclosure management controller.)
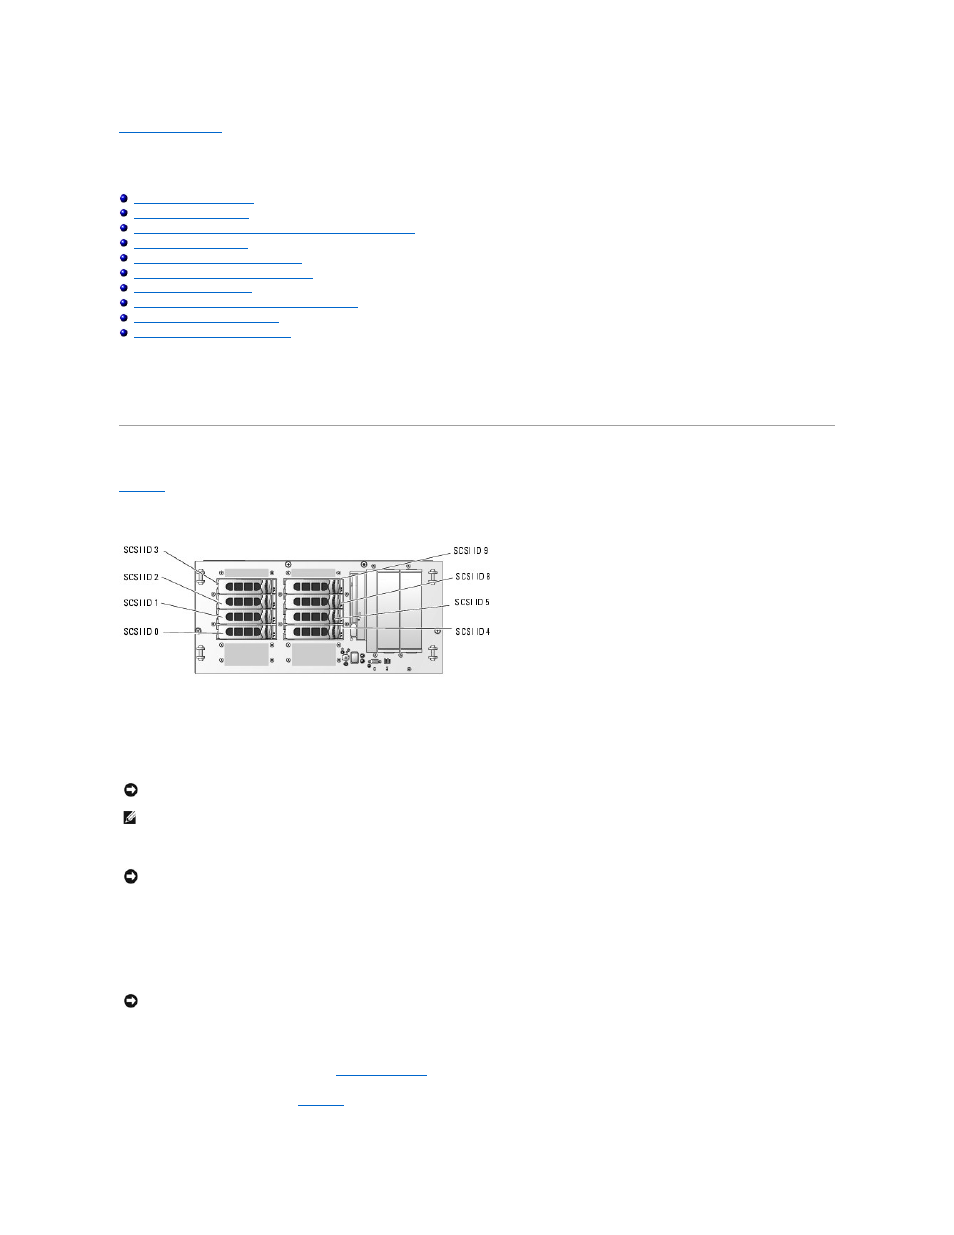
Figure 7-1. Hard-Drive SCSI ID Numbers
Before You Begin
SCSI hard drives are supplied in special drive carriers that fit in the hard-drive bays.
You may need to use different programs than those provided with the operating system to partition and format SCSI hard drives.
When you format a high-capacity SCSI hard drive, allow enough time for the formatting to be completed. Long format times for these drives are normal. A 9-GB
hard drive, for example, can take up to 2.5 hours to format.
Installing a SCSI Hard Drive
1.
If the system does not have an optional RAID controller card or optional riser card with ROMB, shut down the system.
2.
Remove the front bezel, if attached. See "
Opening the System
" in "Troubleshooting Your System."
3.
Open the hard-drive handle. See
NOTICE:
Before attempting to remove or install a drive while the system is running, see the documentation for the optional RAID controller card or
optional ROMB to ensure that the host adapter is configured correctly to support hot-plug drive removal and insertion.
NOTE:
It is recommended that you use only drives that have been tested and approved for use with the SCSI backplane board.
NOTICE:
Do not turn off or reboot your system while the drive is being formatted. Doing so can cause a drive failure.
NOTICE:
Hot-plug drive installation is not supported for systems without an optional RAID controller card or optional ROMB.