Installing an agp card, Drives, Overview – Dell XPS/Dimension XPS Gen 2 User Manual
Page 81
Removing and Installing Parts
81
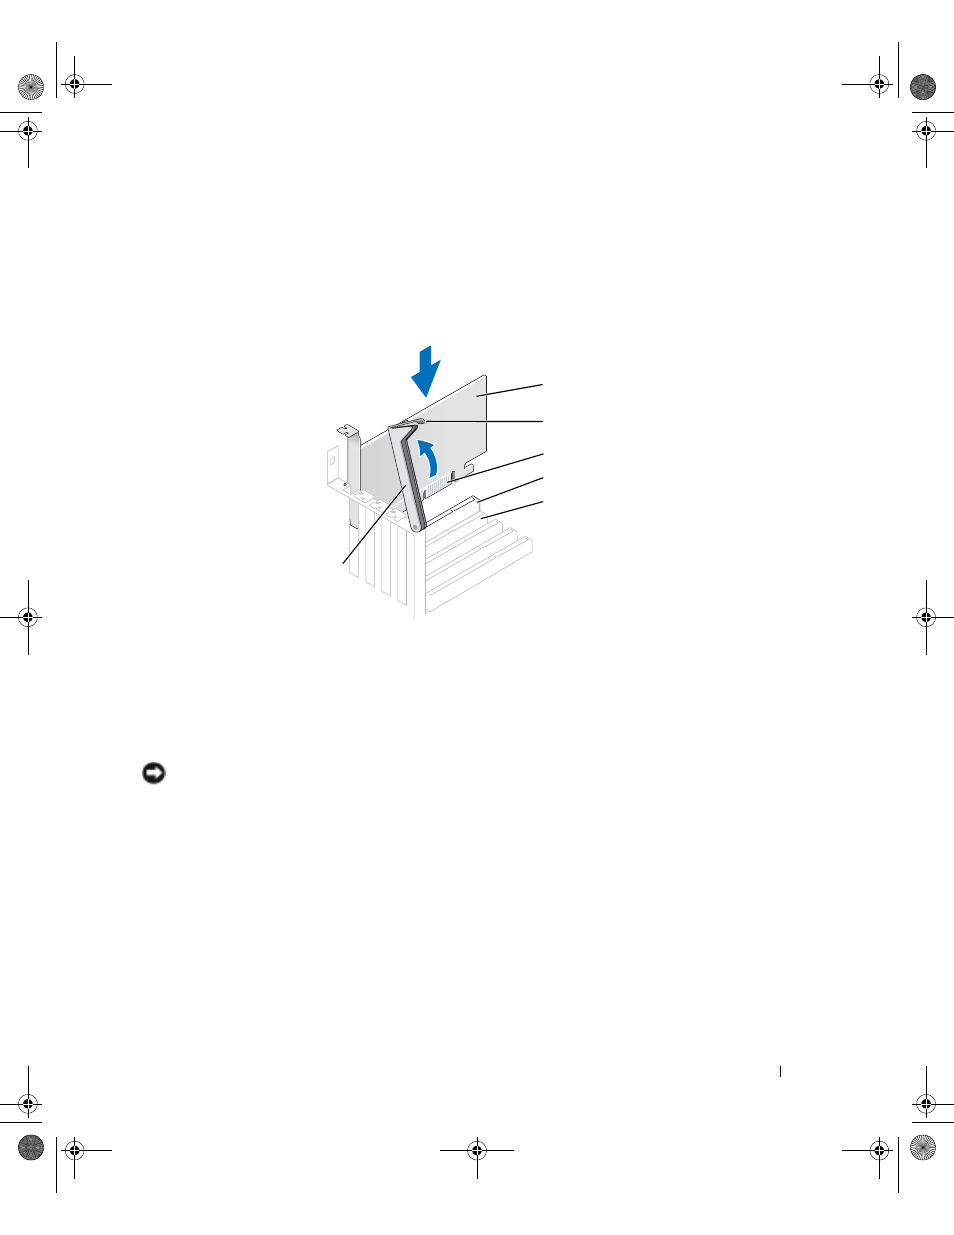
Installing an AGP Card
1
Follow the instructions in "Before You Begin" on page 68.
2
Open the computer cover (see page 70).
3
Press the lever on the card retention arm and raise the retention arm.
4
Gently press the card into the AGP connector until it clicks into place, ensuring that the tab
fits into the notch on the front end of the card.
5
Lower the retention arm and press it into place, securing the card(s) in the computer.
6
Close the computer cover (see page 102).
7
Connect the monitor cable to the card’s video connector.
NOTICE:
To connect a network cable, first plug the cable into the network wall jack and then plug it into
the computer.
8
Connect your computer and devices to electrical outlets, and turn them on.
Drives
Overview
Your computer supports one floppy drive and a combination of up to four of the following:
•
Either two IDE hard drives or two Serial ATA hard drives.
•
Two CD or DVD drives.
PCI connector
AGP connector
AGP card
edge connector
retention arm
lever
T2310bk2.book Page 81 Thursday, February 5, 2004 10:00 AM