Appendix ii, Firmware recovery, Appendix iii tcp/ip configuration – Compex Technologies WPE54 User Manual
Page 123: Appendix ii firmware recovery
Appendix III TCP/IP Configuration
122
Appendix II
Firmware Recovery
This section demonstrates how to reload the firmware to the access point should the system fail
to launch properly. In such cases, the access point will automatically switch to loader mode and
the DIAG LED will light up and remain ON.
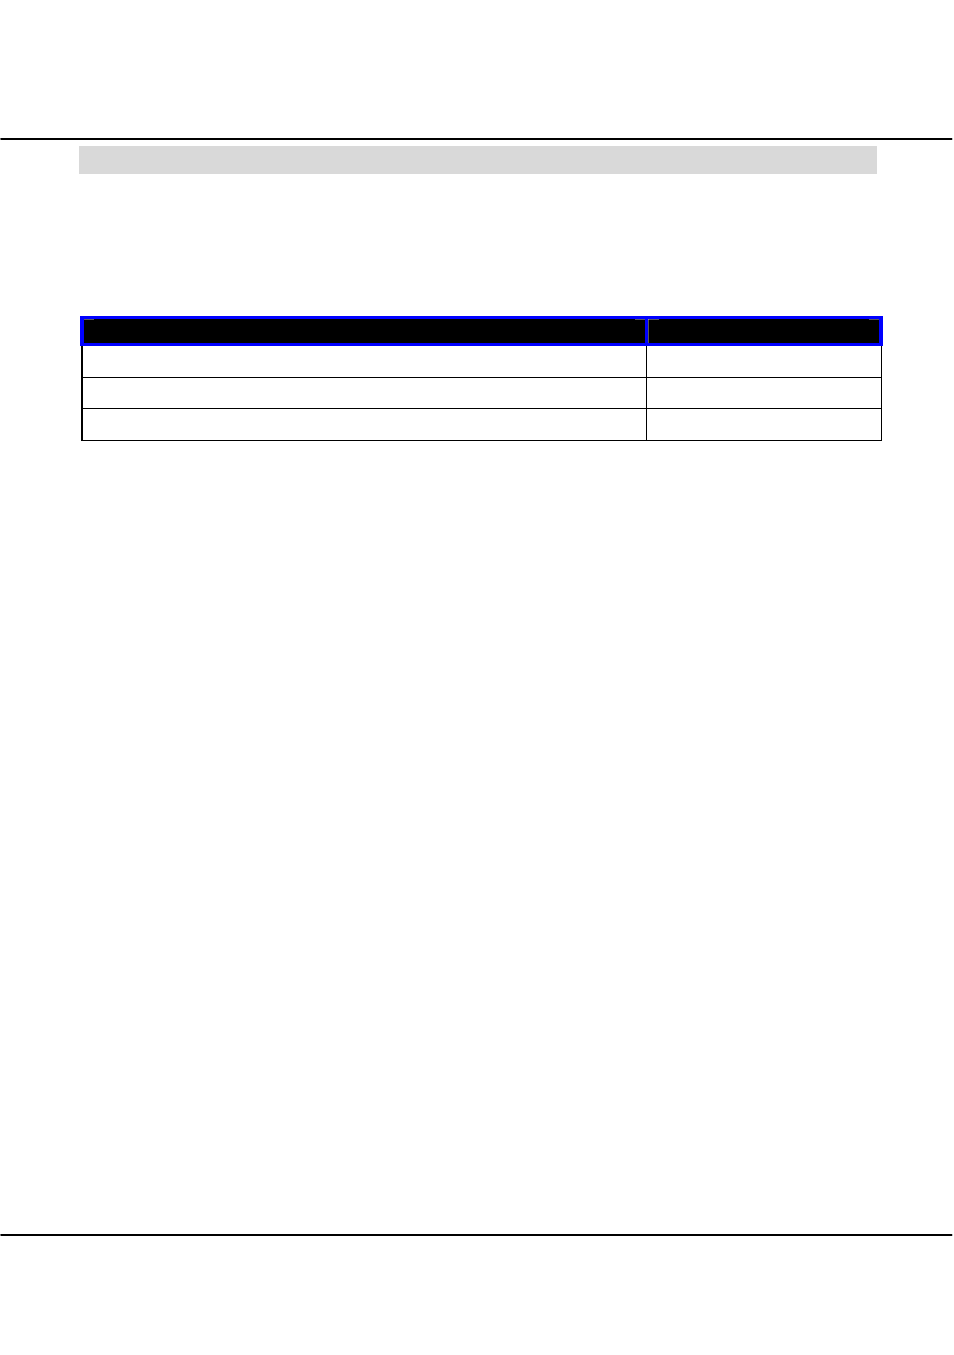
Table 1 below illustrates the behaviour of the DIAG LED.
Operation State
DIAG LED
Corrupted firmware – The access point switches to loader mode
Blinks very fast
Recovery in progress
ON
Successful recovery
Blinks very slowly
AII
How to recover the access point from failed firmware
Before starting, check the status of the DIAG LED against Table 1 above to verify
whether firmware failure has occurred.
9. Power the access point off and disconnect it from the network.
10. Use a MDI cable (cross-connect for the access point) to connect the LAN port of the
access point to the LAN port of your computer.
11. Power the access point on, and then start up your computer. The computer will
obtain an IP address of 192.168.168.100 from the access point.
12. Insert the access point Product CD into the CD drive of your computer.
13. From the computer, click Start, then Run and type in the following command:
X:TFTP -i 192.168.168.1 PUT X:image_name.IMG, where X refers to your CD
drive and image_name.IMG to the firmware filename found in the Recovery
folder of the Product CD.
14. If you have downloaded a newer firmware and have saved it in your local hard disk
as for example, C:\accesspoint\accesspointxxxx.IMG, then replace
X:\image_name.IMG with this new path and firmware name.
15. The recovery process will now take place. You can check the DIAG LED against
Table 1 to monitor the progress of the recovery process.
16. When firmware restoration has completed, reboot the access point and it will be
ready to operate.