Press wheel stagger, Press wheel centering, Press wheel stagger press wheel centering – Great Plains YP4025F-1670 Operator Manual User Manual
Page 94: 98 7 c
90
YP4010HD/YP4025/F
Great Plains Manufacturing, Inc.
401-571M
2014-09-08
Press Wheel Stagger
The factory stagger setting has been found optimal for
residue flow. If your conditions, such as wet soil or
shallow planting, appear to require even press wheels,
you might try one row before re-configuring the entire
planter. To change the stagger:
Refer to Figure 119
1.
Raise the planter and install the lift assist cylinder
locks. See “Lift Cylinder Lock-Up” on page 31.
2.
Remove the bolt
, nut
and lock-washer
for the
left press wheel
.
3.
Move the spacer
and wheel
to the forward of
the two mounting holes at
.
4.
Re-install the bolt, lock washer and nut. Tighten.
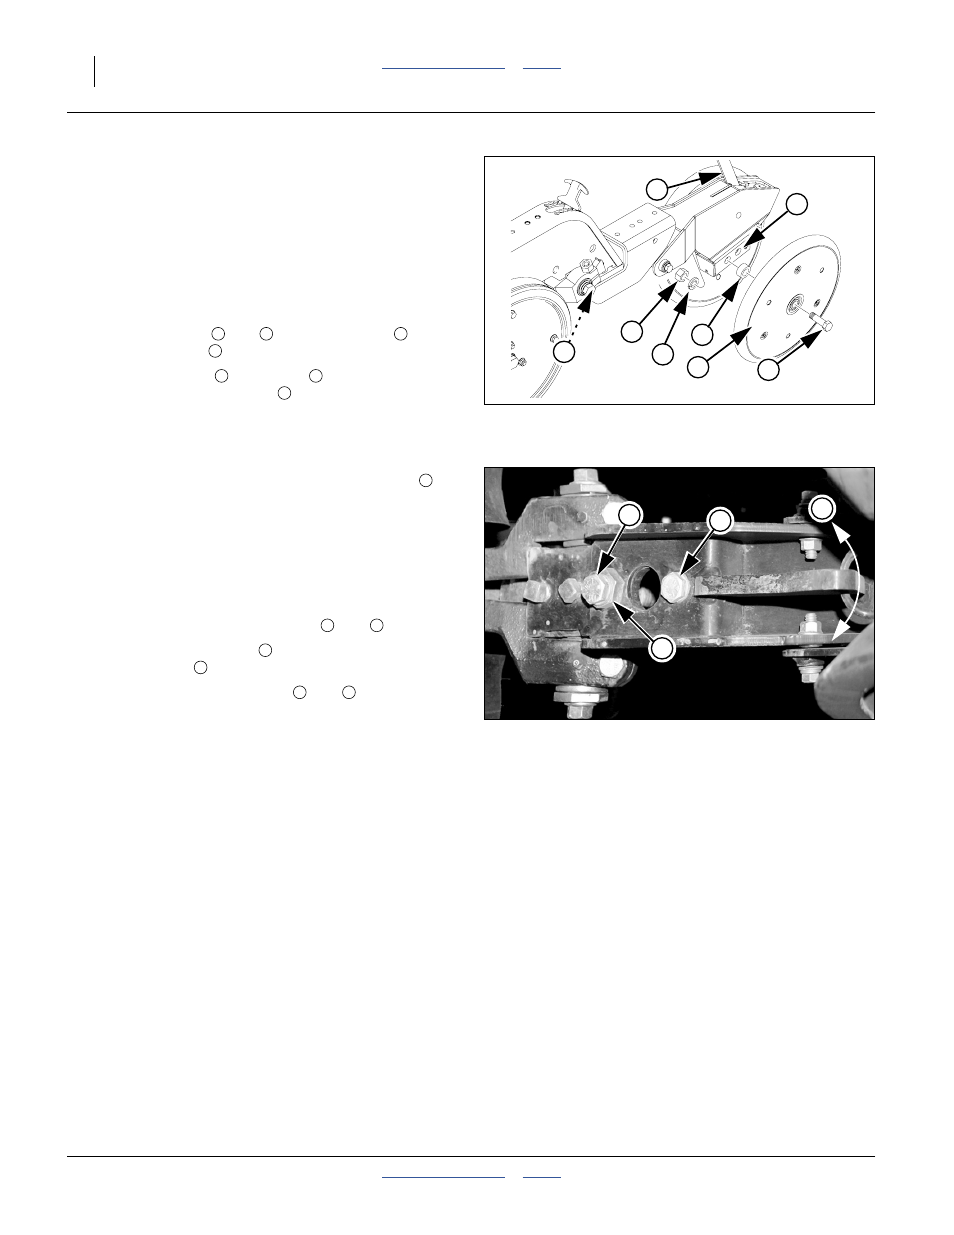
Press Wheel Centering
If one press wheel is running in the seed trench, or the
wheels are not centered over the trench, the angle
of
the press wheel assembly can be adjusted as follows:
Refer to Figure 120
1.
Determine how far, and in which direction, the press
wheel assembly needs to move to center the wheels.
2.
Raise planter and install lift assist cylinder locks. See
“Lift Cylinder Lock-Up” on page 31.
3.
Loosen the
1
⁄
2
in. hex-head bolts
and
.
4.
Turn the hex head cam
under the forward hex
head jam bolt
, and move the required amount.
5.
Tighten both hex-head bolts
and
.
If press wheel adjustments do not provide satisfactory
furrow closing, your conditions may require alternate
press wheels. A variety of wheel assemblies are
available. Consult your Great Plains dealer.
Figure 119
Press Wheel Force & Stagger
22907
a
4
5
3
2
c
1
6
1
2
3
4
5
4
6
Note: Do not loosen the square-head bolts forward of the
hex-head bolts.
Figure 120
Press Wheel Centering
(View from beneath opener)
25277
9
8
7
c
7
8
9
c
9
8
9