Skip stop™ annual maintenance, Skip stop™ installation – Great Plains YP4025F-1670 Operator Manual User Manual
Page 110
106
YP4010HD/YP4025/F
Great Plains Manufacturing, Inc.
401-571M
2014-09-08
Skip Stop™ Annual Maintenance
Skip Stop™
a
should be inspected on an annual basis.
Inspect cushion for wear, pockets, or other abnormalities
that may develop. Excessive wear or pocket formation
may cause seeds to become trapped and disrupt
singulation performance. As a general rule, if there is a
pocket that is large enough to hold one or more seeds
after the belt has passed by, Skip Stop™ Cushion should
be replaced.
Skip Stop™ Installation
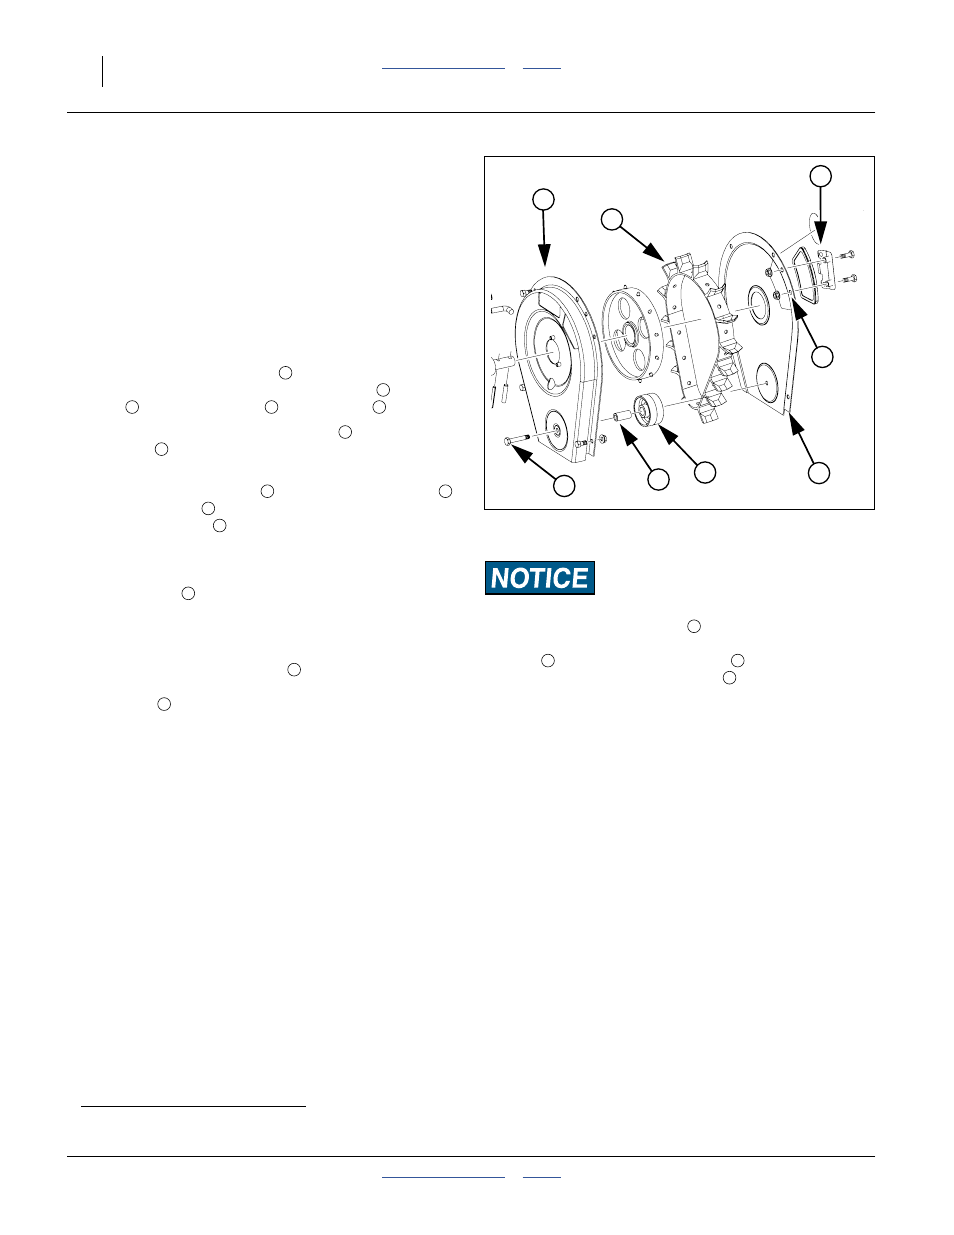
Refer to Figure 139
1.
Remove back metal cover
by removing five bolts.
Four bolts attach cover to metal housing
and one
bolt
holds idler wheel
and bushing
.
2.
Align new Skip Stop™ metal cover
over
housing
.
Note: Skip Stop™ metal cover has a hole cut out for
Skip Stop™ Cushion
. Make sure idler wheel
and bushing
remain properly aligned and insert
1
⁄
4
×
2 inch bolt
. Secure bolt loosely.
3.
Insert remaining three
1
⁄
4
×
1
⁄
2
inch bolts to fasten
metal cover to housing. Tighten all bolts securely.
4.
Tighten bolt
that secures idler wheel and turn belt
via the bearing shaft by hand to verify that belt is
centered between housing. If necessary, loosen bolt
and slide cover to adjust and re-center belt.
5.
Place Skip Stop™ Cushion
over the opening.
Insert two
1
⁄
4
×
3
⁄
4
inch bolts to secure Skip Stop™
Cushion
to housing.
a. Skip Stop™ is a trademark of Precision Planting, Inc.
Meter Performance Risk:
Make sure Skip Stop™ Cushion
is secured tightly to back
metal cover and cannot turn or rotate. Make sure Skip Stop™
Cushion
does not interfere with belt
rotation in any
manner. A loose Skip Stop™ Cushion
may result in seed
leakage, poor meter performance, and planting errors.
Figure 139
Skip Stop™
24032
7
7
5
7
3
2
6
1
5
4
7
8
6
1
2
4
3
6
1
7
4
3
2
2
7
7