Creating custom control – ClearOne XAP TH2 User Manual
Page 19
15
Configuration
~ Creating Custom Control
Technical Services Group ~ 1-800-283-5936 (USA) ~ 1-801-974-3760
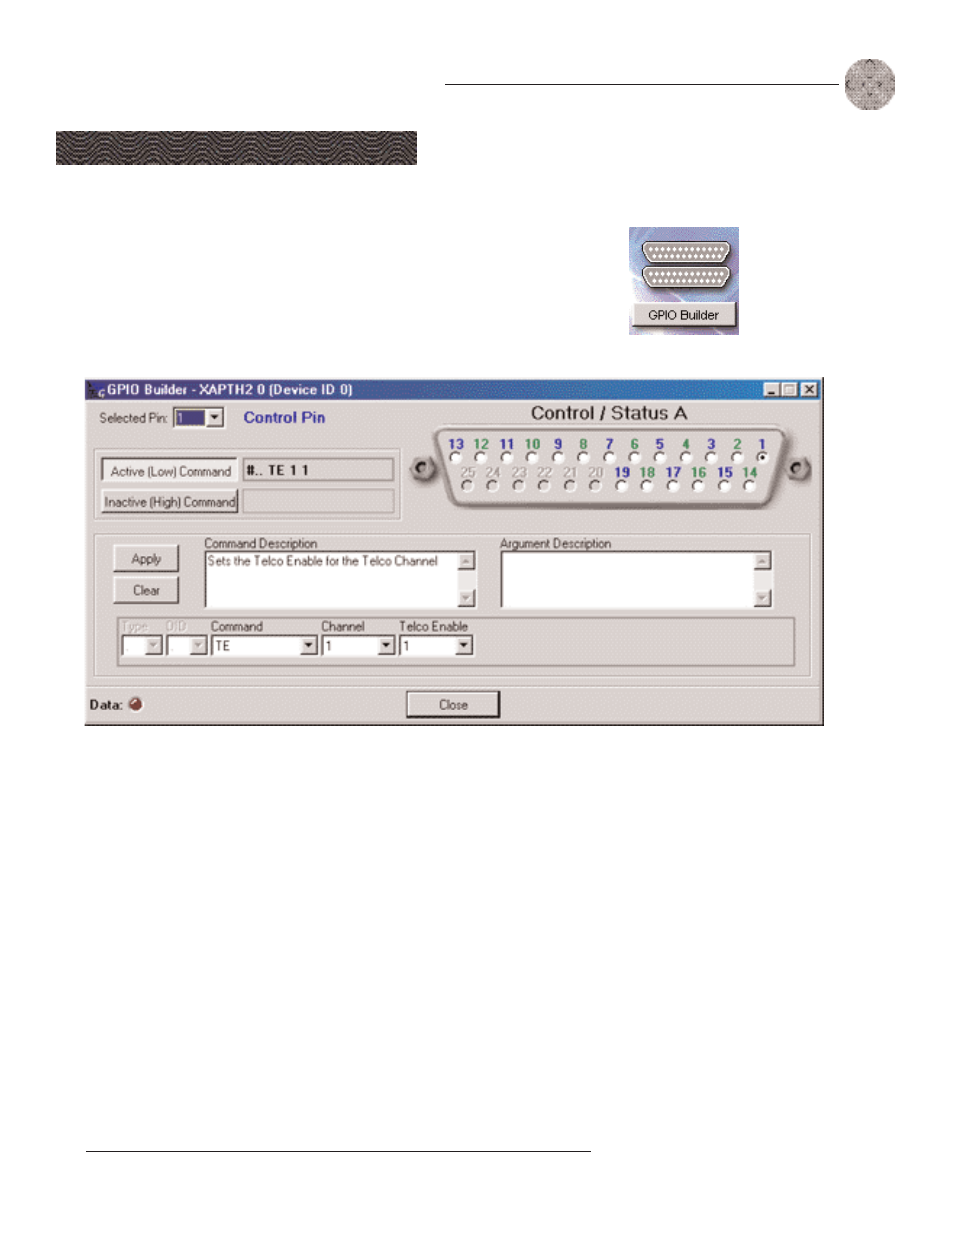
To use GPIO Builder
GPIO, or general purpose input/output, allows you to establish pin assignments for
the XAP TH2's Control/Status port. These pins provide control via contact closure
and status via open collector functions in the unit.
1.
Open the GPIO Builder by clicking the GPIO Builder button on the
Flow Screen.
2.
Select the Control/Status pin you want to program.
3.
Select the command state to change—Active (Low)/Inactive (High).
4.
To make changes to the command string, select the desired parameters from
the drop-down menus along the bottom of the window. For a list of
commands and their descriptions, see the G-Ware help file.
When you select a different command in the Command menu, the other drop-
down menus change to reflect available parameters.
The Command Description and Argument Description panes reflect command
and argument information. You can modify this information as desired.
5.
Click Apply to save changes or Clear to return to the default settings. To
exit the window, click Close.
The Active Command
pane reflects the default
command string for the
selected pin.
Figure 3.6. GPIO Builder in G-Ware
Creating Custom Control
✍ ✍
Odd-numbered pins
(blue) are control pins,
a
n
d
even-numbered pins (green) are
status pins. Pins 20-25 are not
✍ ✍