Brandmotion 9002-6500-V2 User Manual
Page 5
!"#$%&&%$!'"(!"#$)*+$!'"#
6500 Instructions 12-15-12.doc
Page 5 of 10
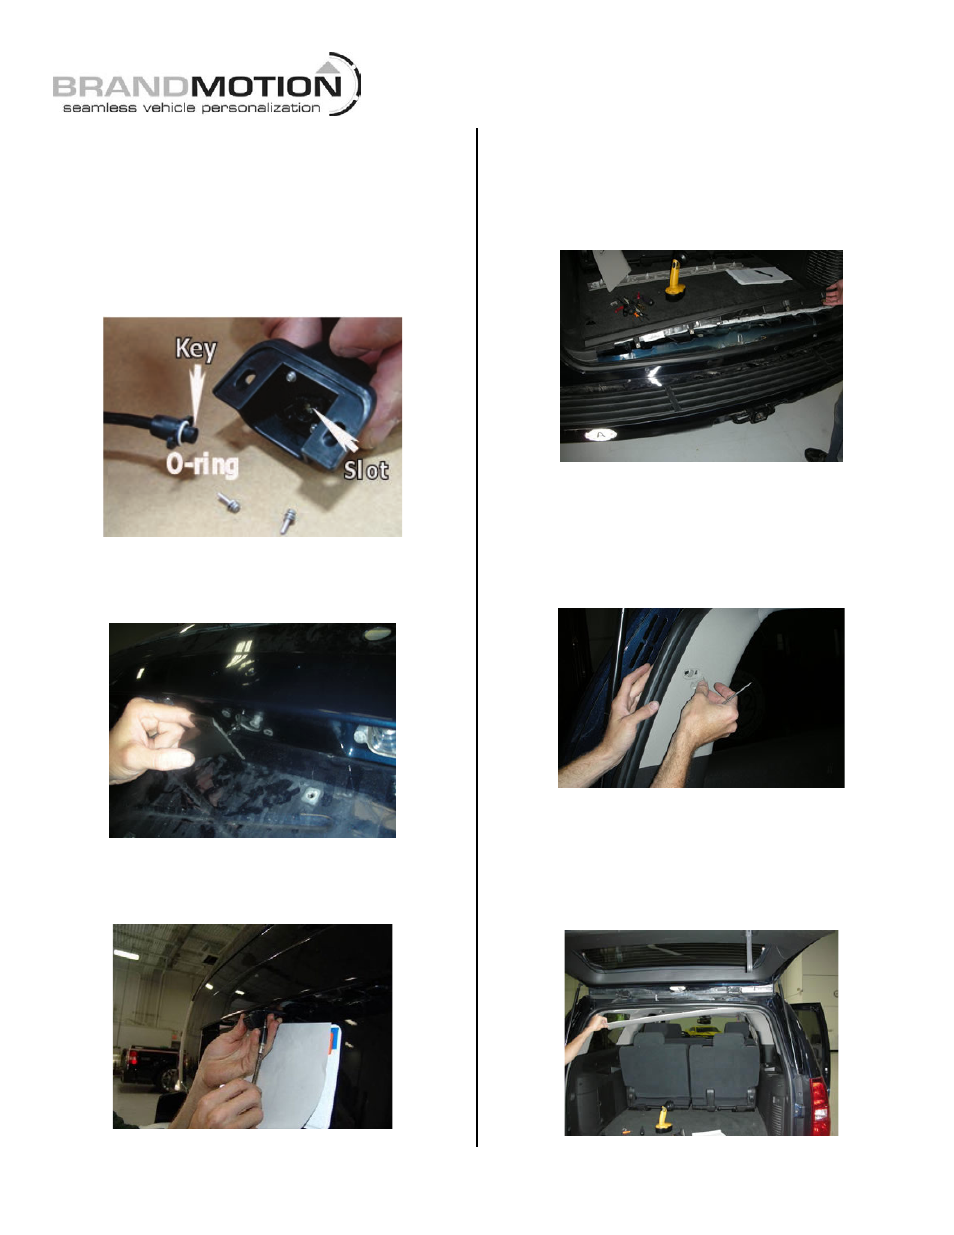
NOTE 2: The Camera Harness end has a small
alignment key that fits into a slot in the Camera; if
the Camera Harness does not connect to the
Camera, rotate the Harness end 180° and attach.
(Figure 19).
IMPORTANT: Do not use a power tool to install Screws
or over tighten Screws as they could break and/ or
damage to the Camera could result. (Figure 19)
Figure 19
27. Insert supplied Well Nuts into the two 5/16” holes in
the appliqué. (Figure 19a)
Figure 19a
28. Bolt Camera Mount to the appliqué using two
supplied Bolts and a Phillips screwdriver. (Figure 20)
Figure 20
Install Chassis Harness
29. Remove liftgate sill plate by lifting at one end and
working your way to the other with your hands to
release the mounting clips. (Figure 21)
Figure 21
30. Remove the bolt cover on the driver’s side D-pillar
using a pick. Insert the pick into the gap between
the bolt cover and D-pillar cover. Gently pry the bolt
cover away from the D-pillar cover taking care not
to damage trim. (Figure 22)
Figure 22
31. Use a Phillips screwdriver to remove D-pillar cover
bolt.
32. Remove headliner garnish by working your way from
one end to the other and popping out the mounting
pins with your hands. (Figure 23)
Figure 23