Installation instructions – Brandmotion 9002-6500-V2 User Manual
Page 4
INSTALLATION INSTRUCTIONS
6500 Instructions 12-15-12.doc
Page 4 of 10
16. Remove Template and drill three 1/8” pilot holes in
the appliqué where the transfer marks were made.
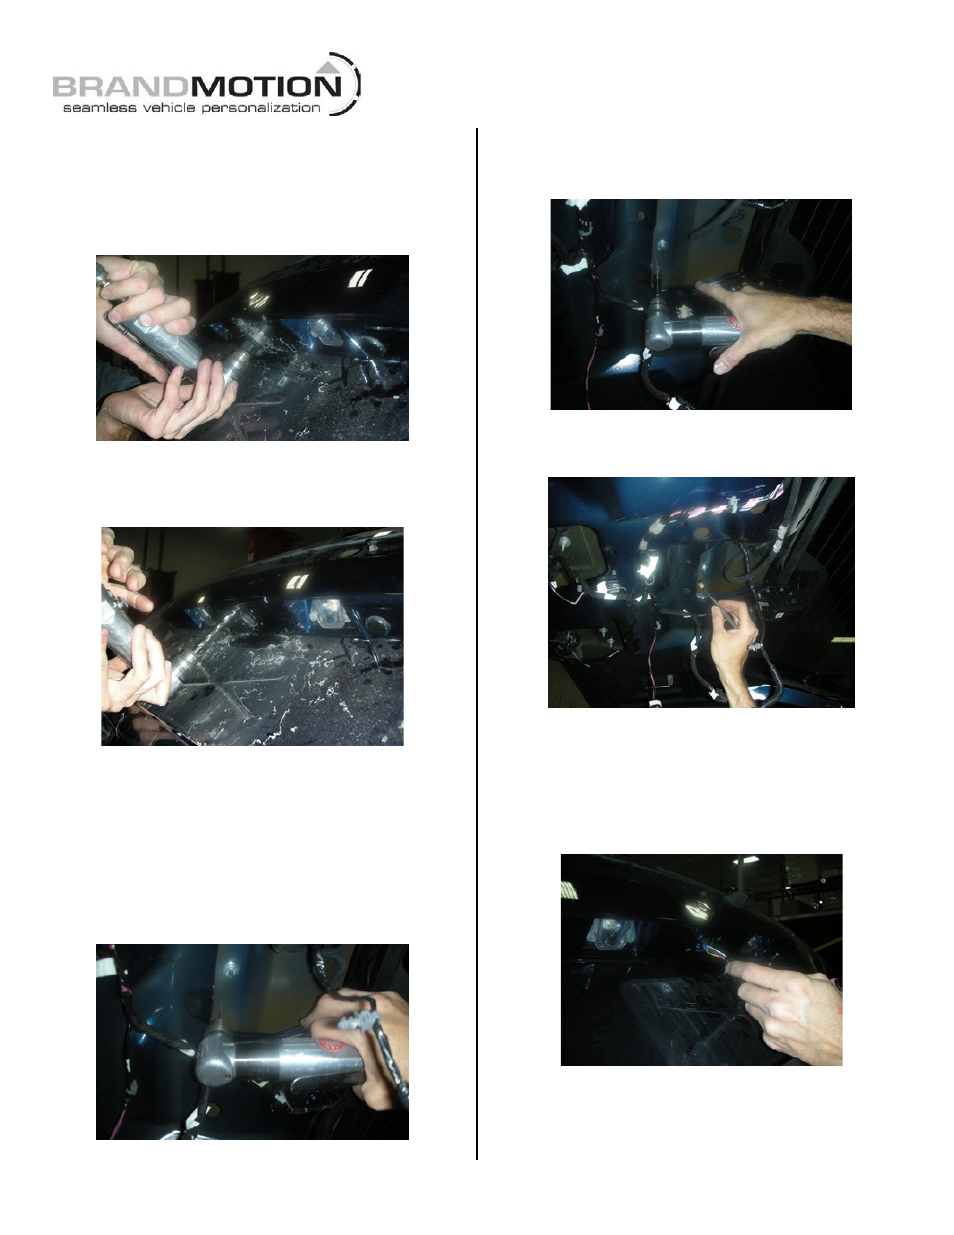
17. Use a 3/4” center hole saw or sheet metal cutter to
cut the hole in the center of the Camera Mount
Template. (Figure 13)
Figure 13
18. Use a 5/16” drill bit to drill the remaining two holes
on the Template. (Figure 14)
Figure 14
19. Use a deburring tool to clean holes.
20. Affix the Camera Harness Pass Through Template to
the inside of the liftgate using masking tape. See
Template for placement instructions.
21. Use a transfer punch to transfer the center of the
hole to the sheet metal and remove the Template.
22. Drill a 1/8” pilot hole through the sheet metal where
the transfer mark was made. (Figure 15)
Figure 15
23. Use a 3/4” drill bit, center hole saw, or sheet metal
cutter to cut an opening in the liftgate. (Figure 16)
Figure 16
24. Apply supplied ZTech to the ¾” hole. (Figure 17)
Figure 17
25. Route connector end of the Camera Harness
through the 3/4” hole in the appliqué then through
the 3/4” hole in the sheet metal. RECOMMENDED:
Use a small rubber grommet or dab of silicone caulk
to protect Camera Harness from sharp metal edges
(Figure 18)
Figure 18
26. Attach Camera Harness to Camera Mount using two
supplied small Phillips Screws and a Phillips
screwdriver. NOTE 1: Make certain the white O-ring
(Figure 19) is on the Camera Harness end.