3 calibration with an external calibration leak, Calibration with an external calibration leak, See "6.4.6.4 checking the calibration with an in – INFICON HLD6000 Refrigerant Leak Detector User Manual
Page 45
6 Operation
45
Tr
an
sl
ation
o
f the
o
rig
in
al
operatin
g
in
str
u
ct
io
ns
HLD
6000
, k
ina4
3
e1-
a
, 140
8
6.4.6.3
Calibration with an external calibration leak
The gas that leaks from the calibration leak is carried away by strong air currents. Keep this
in mind when, for example, a fan blower is standing in your surroundings. Strong air cur-
rents provide false results when calibrating.
1 Select "
> Set up > Calibration leak external".
2 Enter the leakage rate to calibrate for the tracer gas and confirm using
.
Alternatively, set the desired leakage rate via the calibration display on the touch
screen,
see "Fig. 14: Display when calibrating externally", page 45
.
3 Switch to measurement screen
.
4 For external calibration, select
.
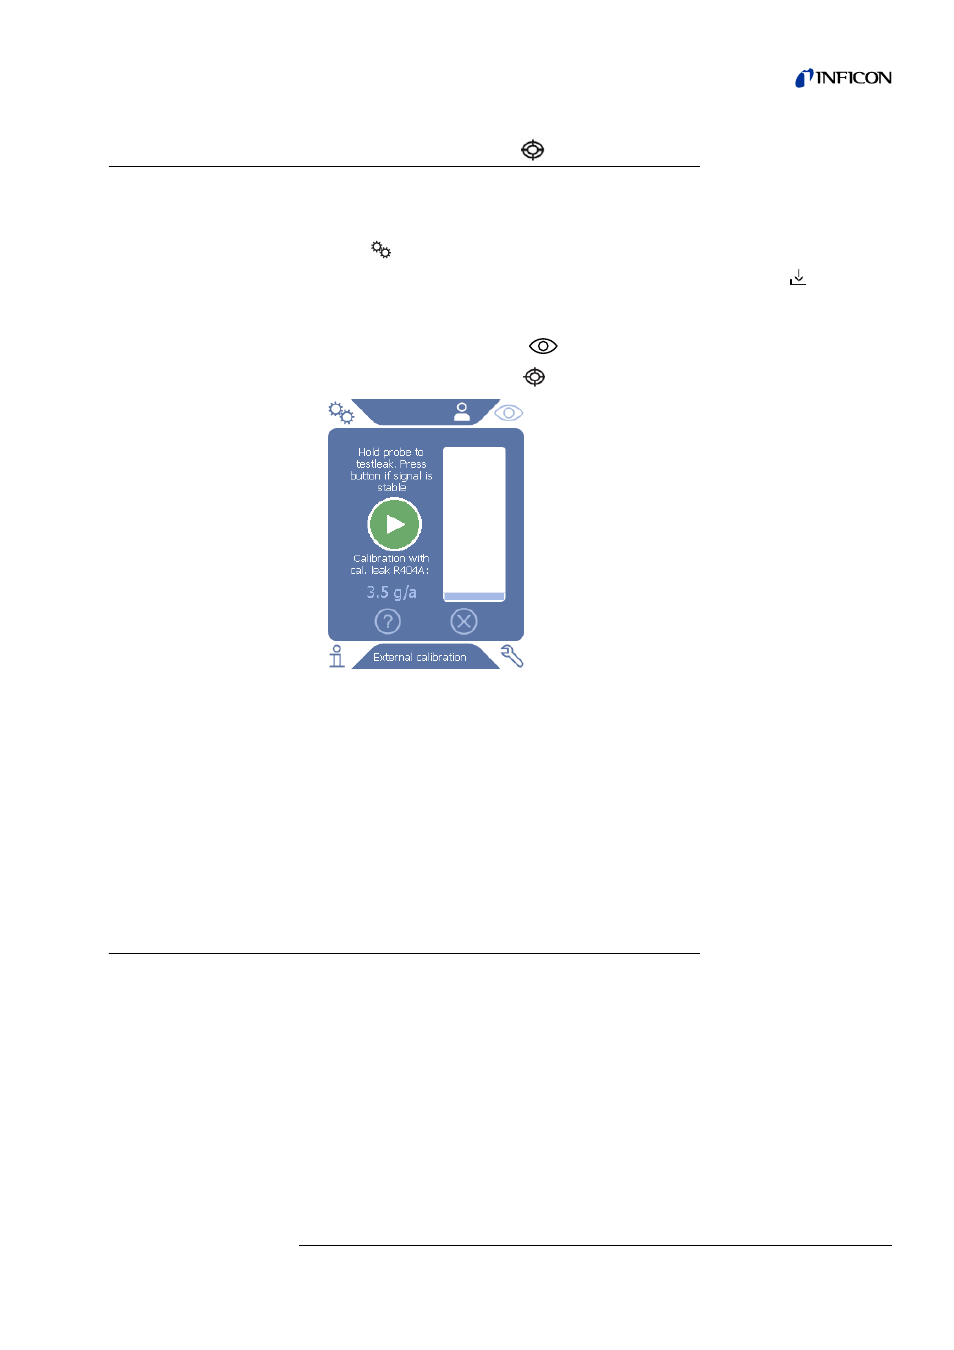
Fig. 14: Display when calibrating externally
5 If you wish to change the displayed leakage rate (in this example: 3.5 g/a) then this can
be done after pressing a finger on this value. For more information, see
ture of the touch screen", page 30
.
6 Hold the sniffer tip to the opening of the external calibration leak and start calibration
by pressing the green button on the touch screen or alternatively pressing the key on
the sniffer probe.
7 Hold the sniffer line still and straight as long as the device is calibrating.
The display shows individual calibration phases and informs you whether or not calibra-
tion was successful.
6.4.6.4
Checking the calibration with an internal COOL-Check
The calibration can also be checked without changing calibration values. You can find out
whether calibration is necessary.
1 Switch to measurement display.
2 Lead the sniffer tip into the calibration opening on the front of the basic unit without
pressing the button on the sniffer probe.
3 Hold the sniffer line still and straight as long as the device is checking the calibration.
A message appears stating whether the calibration is OK or whether the device re-
quires recalibration.
►
When the corresponding message appears on the measurement screen then press the
button on the sniffer probe to calibrate.