Caution – COATS ProRide Wheel Balancer User Manual
Page 11
Important: Always read and follow instructions.
• 7
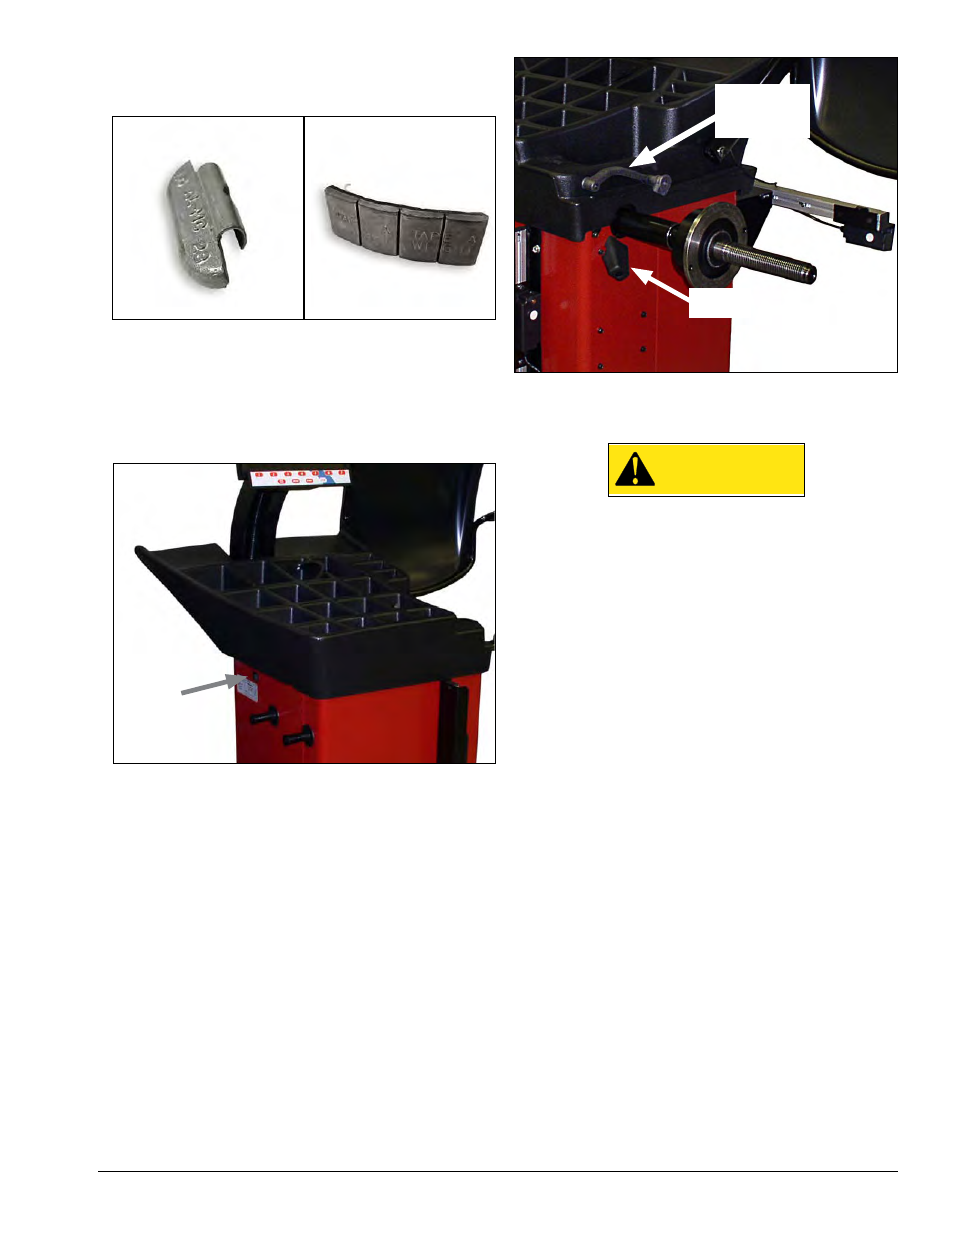
Note: Throughout this manual, wheel weights are
referred to as Clip-on or Tape-A-Weight®. Figure 3
shows an example of each weight.
Figure 3 - Corrective Weight Examples. For Best Results, use
BADA® Brand Wheel Weights.
Power Switch
The ON/OFF switch location (figure 4) is on the left
side of the balancer; below the weight tray.
Figure 4 - On/Off Switch
Using The Offset Arm
Use the offset arm gauge to automatically measure
the distance from wheel to machine and the wheel
diameter at the point of weight application. Also, use
the offset arm for the correct positioning of weight
application on the inside rim as indicated by the bal-
ancer instructions. When not in use or when prompted
by the balancer instructions, store the offset arm in the
home position as shown in figure 5.
Using The Laser Locator
If a hidden weight (Tape-A-Weight
®
) location is
selected, use the laser locator (figure 5) to point to the
hidden weight location.
Note: For best performance, choose an outboard
weight position as deep into the rim as wheel allows.
Figure 5 - Location of Offset Arm (Stored In Home Position)
and Laser Locator
Wheel Guard
CAUTION
Never raise up the wheel guard before the
wheel has come to a stop. Keep hair, loose
clothing, fingers and all parts of body away
from moving parts.
If, due to a fault in the machine, the wheel keeps
spinning permanently, switch off the machine at the
master switch or by unplugging the plug from the
power supply. Wait until the wheel stops, or actuate the
positioning pedal before opening the wheel guard.
Positioning Pedal
In the standard version, the pedal controls a mechani-
cal brake which facilitates positioning and holding the
wheel in place for corrective weight application.
In the pneumatic version, the pedal engages/releases
the pneumatic sleeve. The pedal has two positions: the
upper position releases the pneumatic sleeve; the lower
position engages the pneumatic sleeve to mount the
wheel onto the pneumatic shaft.
Auto Wheel Lock Feature (PL Version Only)
Once the assembly is rotated to the weight application
position, it will lock in place to assist in weight place-
ment. Simply apply additional force and the lock will
release to allow movement to the next weight position.
Clip-on Weight
Tape-A-Weight
®
ON/OFF
Power
Switch
Offset Arm
In Home
Position
Laser
Locator