10 electrical connections, 11 setting up, Electrical connections – Eppendorf S41i Incubator Shaker User Manual
Page 17: Setting up, S41i co2 incubator shaker — operating manual, Installation
17
S41i CO2 Incubator Shaker — Operating manual
4.10
Electrical connections
1. If you have not already done so, check that the voltage and frequency of your incubator/
shaker are compatible with your mains/electric supply.
2. Set the circuit breaker on the left side of the incubator/shaker to the OFF position.
ONLY THEN:
3. Plug the mains/power cord into an earthed/grounded electrical outlet.
4.11
Setting up
1. If necessary, level the incubator/shaker by adjusting the feet, after removing the foot shields.
Place a small level on the shelf of the incubator/shaker. Adjust the leveling feet until the
incubator/shaker is level and stable. Lock the leveling feet in place by tightening the locking
nuts on each foot. Reinstall the foot shields.
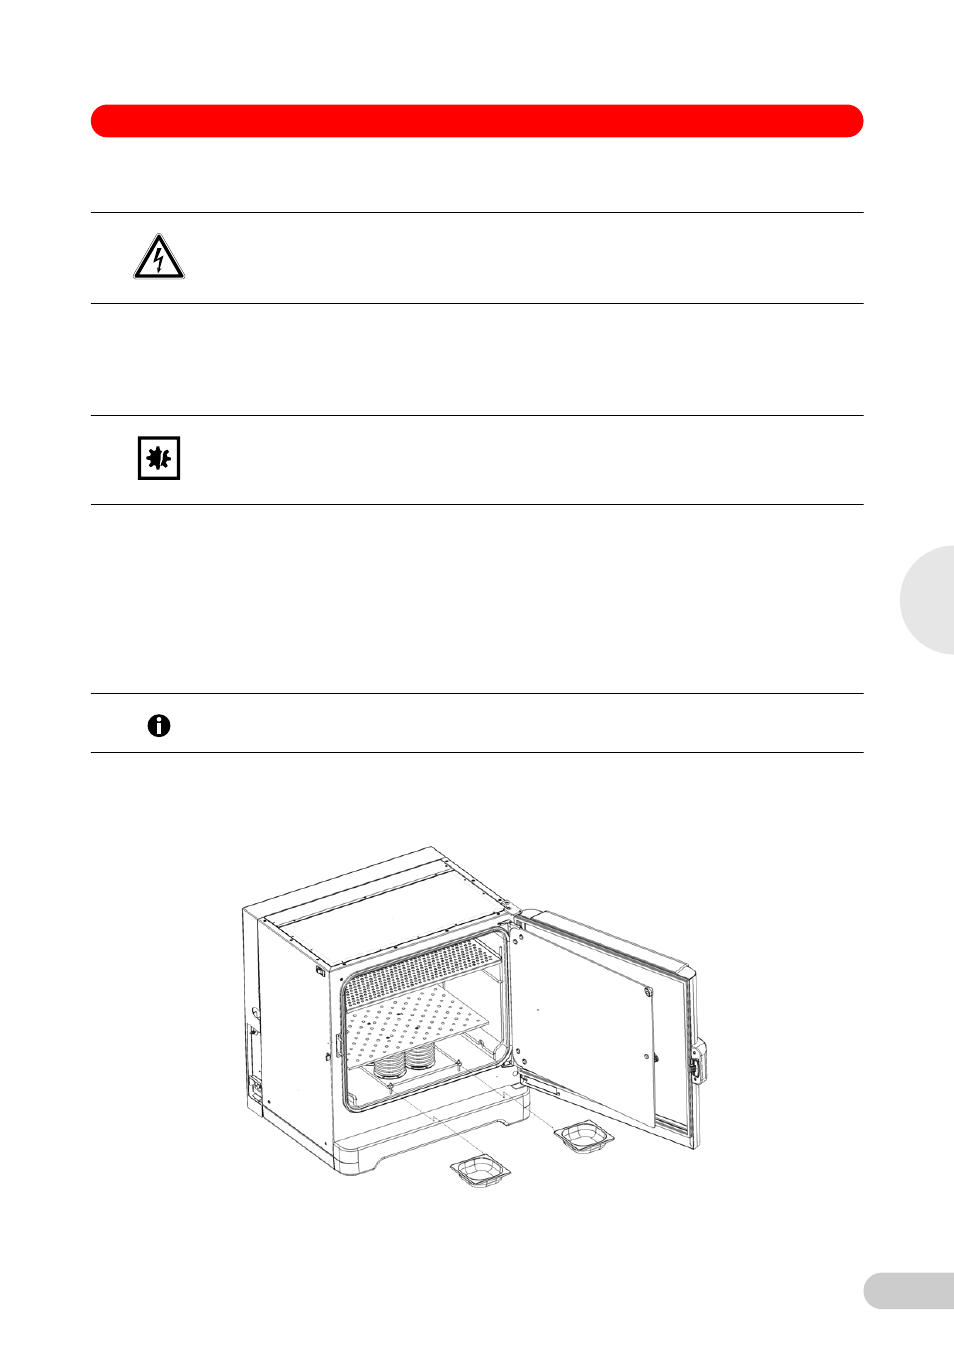
2. Fill each humidity tray halfway with water (approximately 250 mL) if you wish to use them for
humidification.
3. Place the humidity trays one at a time onto the parallel support rods on either side of the
bearing housing at the bottom of the incubator/shaker. Sit them behind the stopper bends,
making sure that the back edge of each tray fits under the end of the condensation/spill
channel.
Abb. 10:
Installing the humidity trays
Fig. 10:
Installing the humidity trays
CAUTION!
Risk of electrical hazard
Before making electrical connections, be sure to check the following list.
NOTICE!
Risk of material damage
An earthed/grounded electrical outlet is necessary for the safe operation of this instrument.
Hint!
Be sure to install the humidity trays one at a time, after wiping the bottom and edges dry.
If you will not use them for humidification, install them anyway to catch spills.
4
Installation