Apple Xserve (Slot Load) User Manual
Page 37
Installing Your Server in a Rack
37
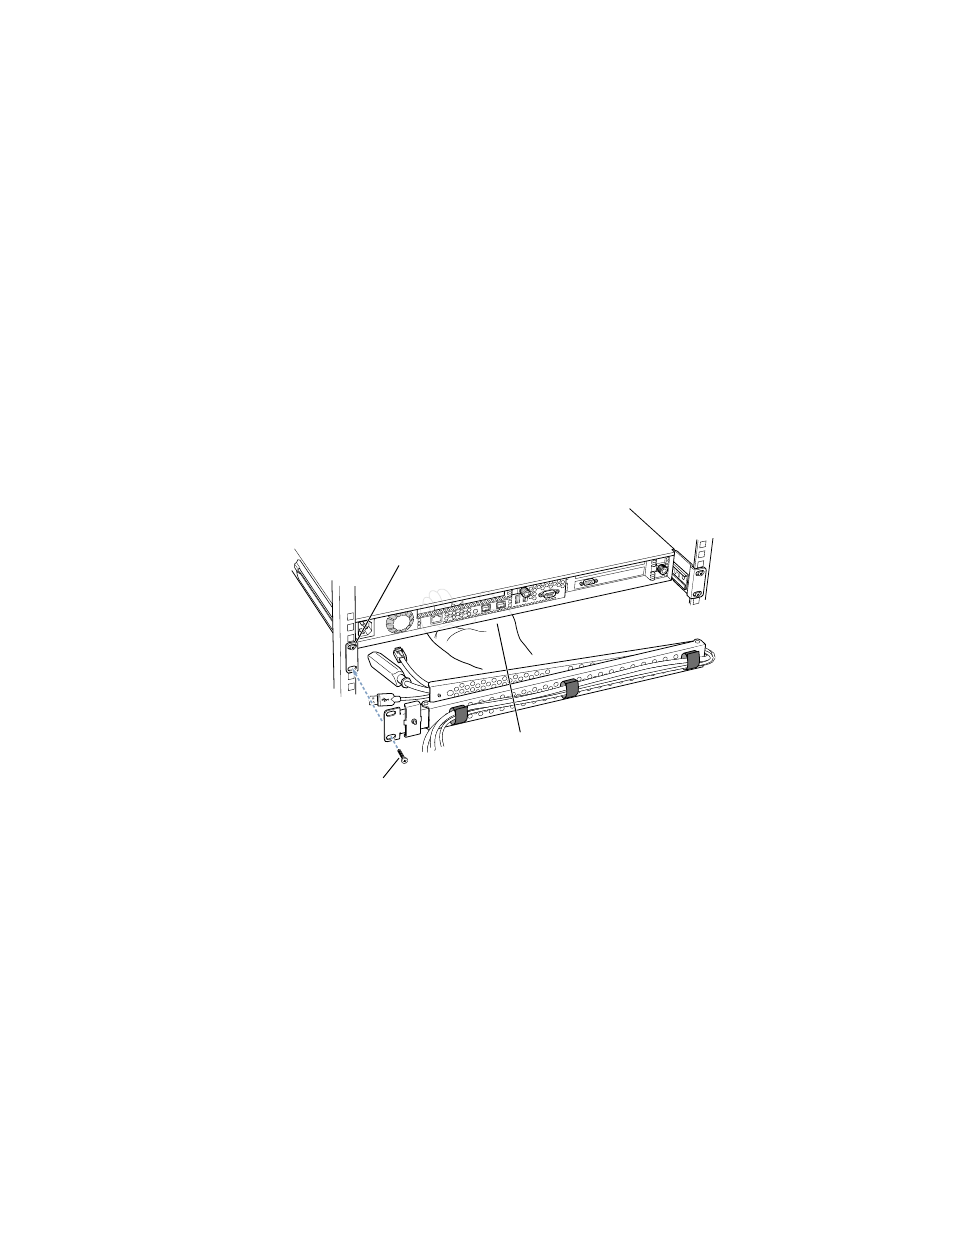
Follow these steps to attach the cable-management arm to the rack.
1
At the front of the server, loosen the thumbscrews securing it to the rack and slide the server
a few inches forward.
Moving the server forward allows you to check the position of the cable-management arm
after you mount it.
2
Position the cable-management arm so that the short part is closer to the server’s back panel
and the elongated holes on the long part align with the holes on the brace attached to the
left post.
3
While holding the arm in the correct position, disconnect the upper mounting screw that
holds the left brace to the left post, place the corresponding hole of the cable-management
arm’s long side over that opening, and reconnect the mounting screw.
4
Disconnect the lower mounting screw, line up the corresponding part of the arm, and
reconnect the mounting screw.
Support the server from below while doing this step.
5
Verify that the arm’s position is correct by moving the arm inward so that it swings under the
cover of the server.
If the arm hits the cover or is not level as you move it, you need to adjust its position by
unscrewing one or both mounting screws and moving the arm up or down slightly until it is
level and moves smoothly under the server’s cover.
Important
Be sure to support the server from below as you remove and replace the
mounting screws one at a time.
Place the cable-management arm over the U-shaped
brace, and secure it to the rack. It is important that
you remove and then reinstall one screw at a time
so that the server is supported at all times.
Remove and then reinstall the mounting screws one at a time.
Support the server from below while
attaching the cable-management arm.