Apple Xserve (Slot Load) User Manual
Page 36
36
Chapter 3
3
Hold the cable-management arm in the orientation you will use to attach it to the rack or
support brace.
The short part of the arm should be closer to the server’s back panel and the elongated
holes on the long part of the arm should face the left back post of the rack (as you face the
back of the server).
4
Bunch together the cables and power cord and lay them along the cable-management arm,
starting at the server side of the short part of the arm and moving to the side closer to you
on the long side of the arm.
The connectors for the server should be between the short part of the arm and the back
panel, with enough free cable to reach the connectors on the back of the server.
5
Use the hook-and-loop straps provided to secure the cables to both parts of the arm at
several points.
Attach the Cable-Management Arm to the Rack
If the rear posts of your rack are flush with the server’s back panel or within an inch of it, you
attach the cable-management arm to the left rear post of the rack.
If your rack is more than an inch deeper than the server, see “Attach the Cable-Management
Arm to the Support Brace” on page 39 for mounting instructions.
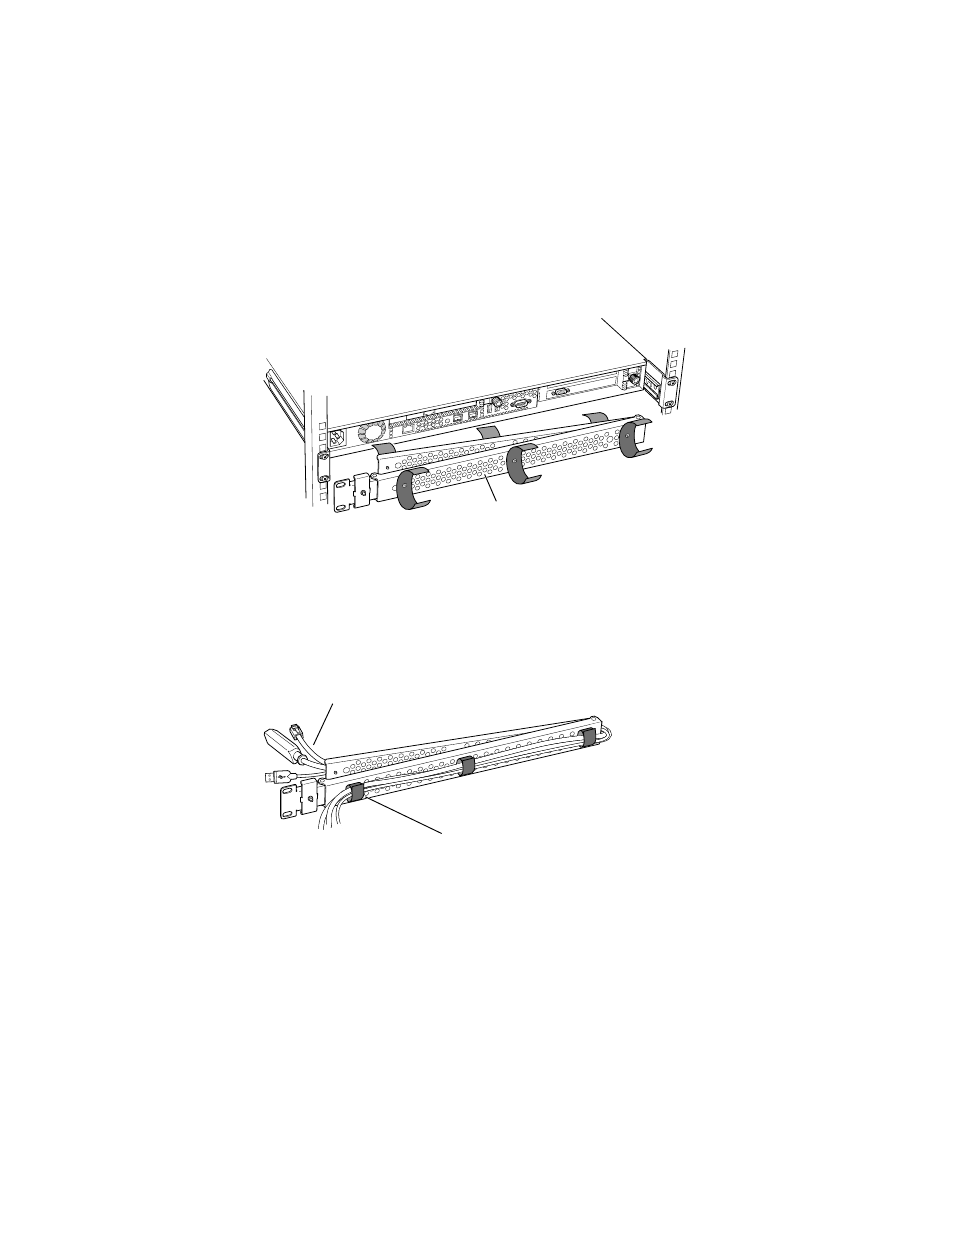
Cable-management arm
Gather all the cables you will be connecting to the server, and attach them to
the cable-management arm. Use the hook-and-loop fastener straps
to secure the cables to the arm.
Make sure you lay the cables against
the full length of the cable-management
arm to ensure unobstructed extension.