Changing background picture 51, Changing background picture – Pioneer AVIC-X1BT User Manual
Page 53
51
Chapter
4
Editing
the N
aviga
tion Utilities
NA
VI
Changing Background Picture
• Make sure the total data size of the CD-R
(-RW) for background picture is grater
than 100MB and the data can be “dummy”
data, not necessarily background picture
data to reach 100MB.
In the menu operation screen, you can specify a
picture for the background. Some pictures are
already stored, but you can also use pictures
(JPEG format data) created by a personal compu-
ter or a digital camera. If you save the pictures to
a CD-R (or CD-RW), you can use them as back-
ground pictures. The following two types of back-
ground pictures can be changed:
• AV Background : Background for the screen
during the operation of audio, or during play-
back.
• Navigation Background : Background of
navigation menu screen.
Several background pictures are stored in the
Pioneer DVD map disc. If you want to use these
pictures, insert the Pioneer DVD map disc.
Here, a method for changing the background pic-
ture is described with an example of loading a
picture stored on a CD-R (-RW) onto the naviga-
tion system as the background picture.
❒ When storing original pictures on a CD-R (-
RW), create a folder named “BG” in the CD-R
(-RW), and store the picture files in this folder.
Up to 20 picture files can be used in the BG
folder.
❒ When creating a “Background Picture Set-
ting” CD-R (-RW) for changing the navigation
system background picture, make sure the
total data size of the CD-R (-RW) is greater
than 100MB. However, you cannot use a CD-R
(-RW) containing MP3 files or the Audio data
part (CD-DA session) for the “Background
Picture Setting” function.
❒ Only JPEG format (“.jpg” or “.JPG”) pictures
can be used as a background picture.
❒ You can only use standard characters (alpha-
bets of both cases: A-Z, a-z) and numbers (0-9)
for the file name of a background picture
(international (accented) characters cannot
be used).
❒ Pictures up to a maximum of 2 048×1 536 pix-
els can be used. We cannot guarantee proper
operation for a picture bigger than this size.
❒ Progressive format JPEG pictures cannot be
used.
1
Insert a CD-R (-RW) to the disc loading
slot.
2
Touch “Settings” in the Main menu, then
touch “System Options”.
3
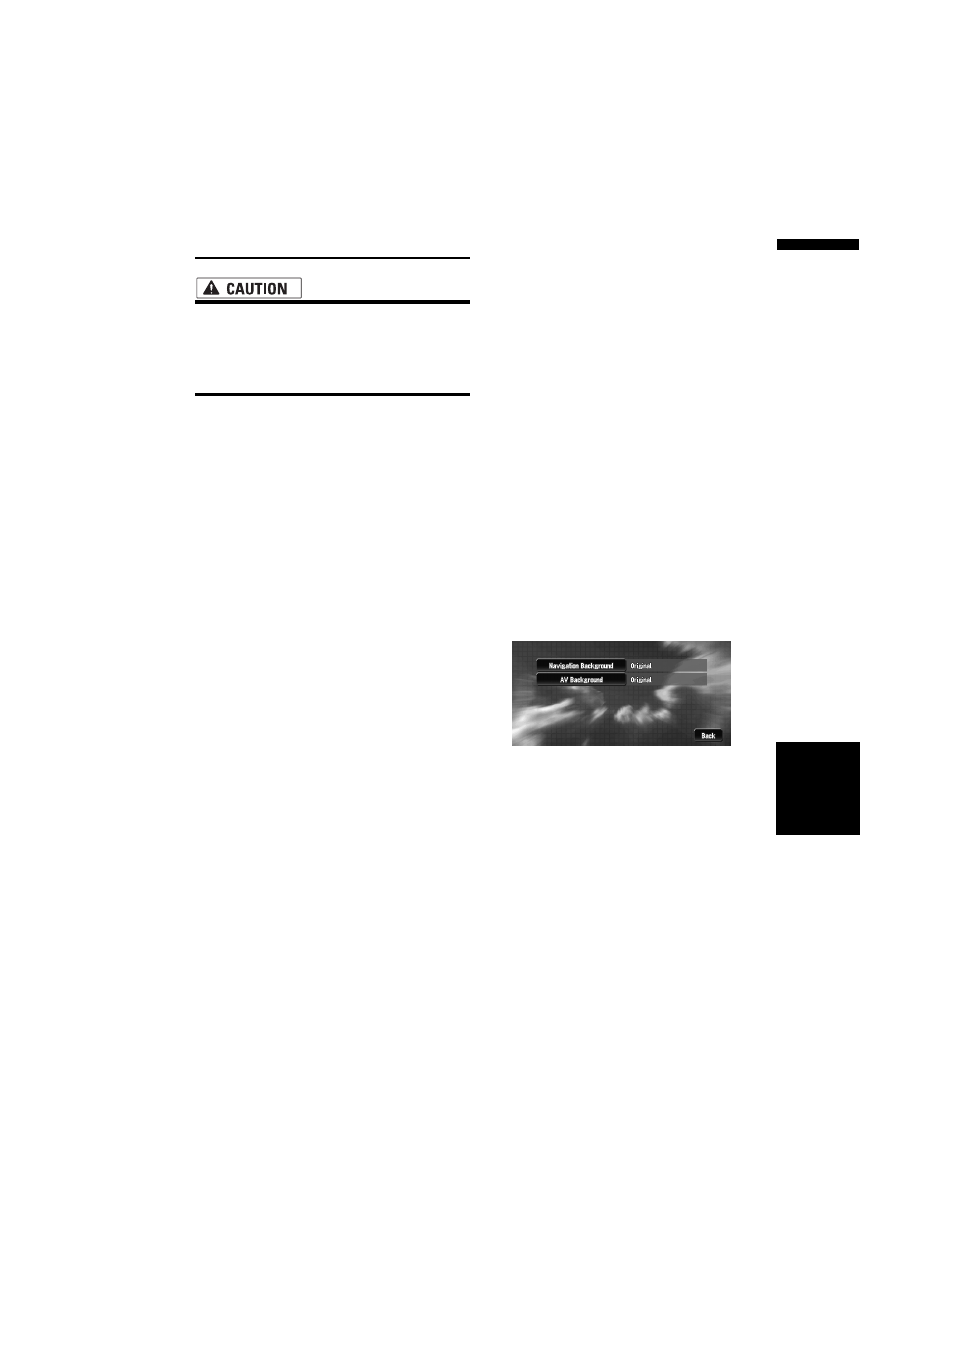
Touch “Background Picture Setting”.
The picture selected for each screen is indi-
cated on the right side of “AV Background”
and “Navigation Background” items.
4
Touch “Navigation Background” or “AV
Background”.
5
Touch “Import from Disc”.
The list of the pictures stored in the CD-R (-
RW) is displayed.
On this screen, you can select the following
item:
Back to Original :
The picture originally used when the system
was purchased is selected.
❒ When a CD-R (or CD-RW) is inserted, you
cannot select “Back to Original”. When
the Pioneer DVD map disc is inserted, you
cannot select “Import from Disc”.
❒ In step 5, touching other than “Import
from Disc” allows you to select a back-
ground image stored on the Pioneer DVD
map disc.