Piston seal, General description, Removal – Pulsafeeder Pulsar Shadow User Manual
Page 32: Reinstallation, 7 piston seal
26
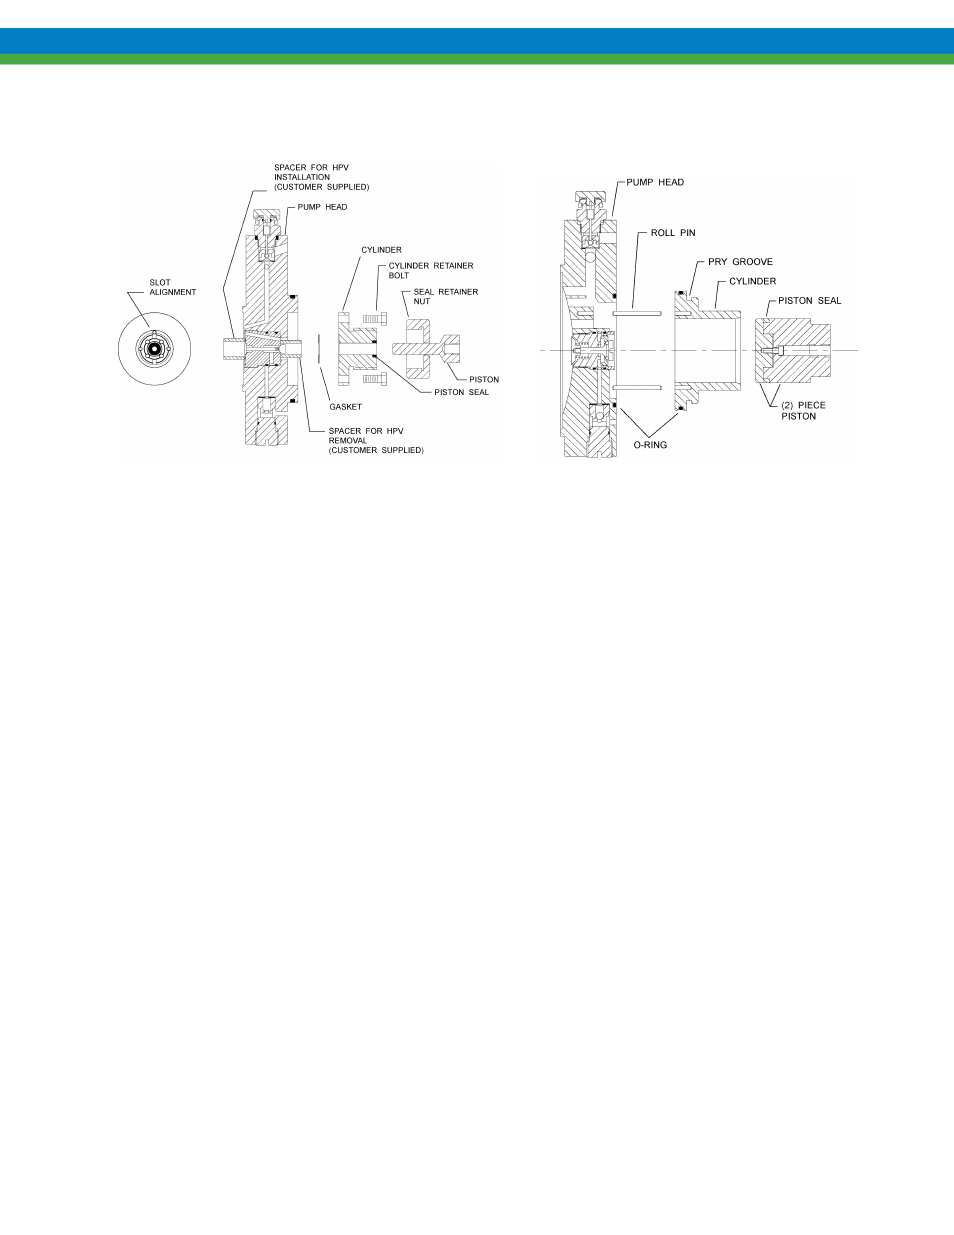
7.7
Piston Seal
Figure 21
Figure 22
7.7.1
General Description
The piston seals are of carbon graphite reinforced TFE U-cup construction with a stainless steel
energizer spring. The seal is mounted two different ways: on the piston (for the larger piston sizes –
Figure 22) or in the cylinder (for the smaller piston sizes – Figure 21). With oil changes at
recommended intervals, piston seals should give years of service.
7.7.2
Removal
Use the following procedure to remove the Piston Seal:
1. Remove the reagent head and diaphragm.
2. Remove the four bolts that secure the pumphead to the eccentric box and withdraw the pumphead.
Take care not to lose the oval gasket and the o-ring on the face of the eccentric box.
3. For larger piston sizes (seal installed on piston), withdraw the crosshead/piston assembly from the
eccentric box. Unscrew the piston from the crosshead and remove the socket head capscrew inside
the piston, withdraw the front of the piston, and remove the large seal.
4. For smaller piston sizes (seal installed in cylinder), unscrew the seal retaining nut from the cylinder
and withdraw the seal from the counterbore.
7.7.3
Reinstallation
Reinstallation is the reverse of removal. In the case of the larger piston sizes (seal installed on
piston), it is important to apply an anaerobic thread-locking compound to the threads of the piston-
crosshead connection and the capscrew to prevent loosening during operation. Apply PULSAlube 7H
hydraulic oil to seals prior in installation to facilitate assembly and for startup. Fill the eccentric box
with PULSAlube 7H hydraulic oil and prime the pump head.