Hpv removal and replacement - a & b pumphead style – Pulsafeeder Pulsar Shadow User Manual
Page 28
22
7.4.3
HPV Removal and Replacement - A & B Pumphead Style
Use the following procedure for a HPV Removal and Replacement (A & B Pumphead Style)
1. Remove the reagent head and diaphragm, and drain hydraulic oil from the eccentric box.
2. Remove the four bolts on the front eccentric box flange which retain the pumphead. The piston
return spring is under compression and will force the pumphead/cylinder away from the eccentric box
as the bolts are removed.
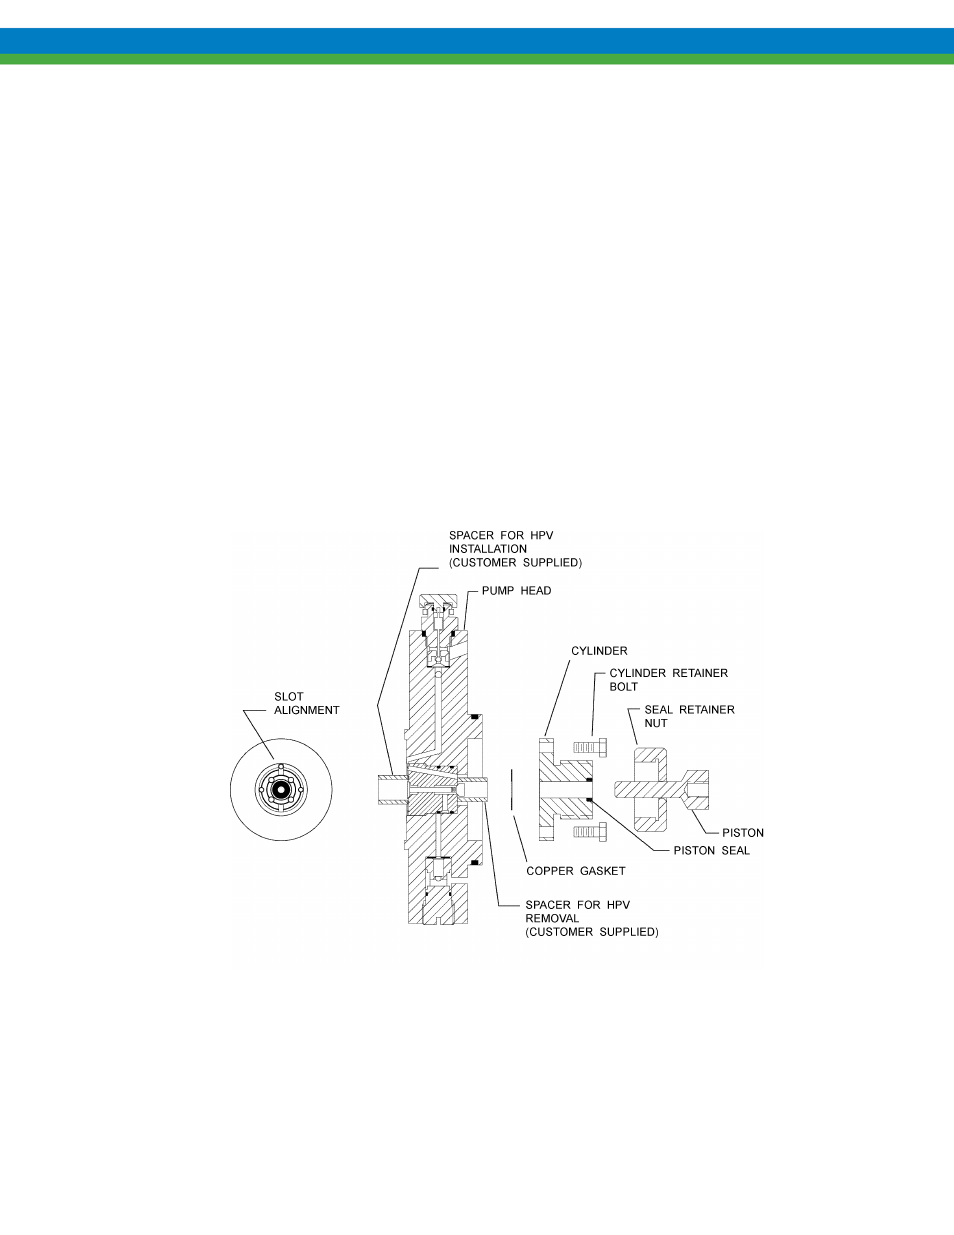
3. Remove the seal retainer nut from the pumphead cylinder (refer to Figure 18).
4. Remove the four socket head capscrews that retain the cylinder to the pumphead (refer to Figure 18)
and remove the cylinder, taking care to not lose the copper gasket.
5. Select a socket or spacer which fits into the cylinder side bore of the pumphead and also clears the
rear poppet of the HPV (refer to Figure 18).
6. Exert pressure on the socket or spacer to press the HPV out of the pumphead.
7. If cleaning of the valve is required, use a suitable solvent and blow air through the valve to remove all
contaminants.
8. Inspect the o-rings on the body of the valve for nicks or other damage and replace if required.
9. Lubricate the o-rings with PULSAlube 7H and carefully insert the HPV into the dish side bore of the
pumphead. Rotate the valve so that the hole and slot farthest from the center are aligned with the
corresponding slot in the pumphead. Using a socket or spacer which clears the front poppet, press the
valve into the pumphead until it is fully seated.
Figure 18
10. Reinstall the cylinder, copper gasket, and seal retainer nut.
11. Inspect the o-ring on the pumphead locating shoulder for nicks or other damage, replace if necessary,
and lubricate with PULSAlube 7H.
continues next page…