B175, Installation instructions – Hubbardton Forge 304815 User Manual
Page 3
Installation Instructions
B175
Beacon Hall Outdoor Wall Sconce 30-4810, 30-4810F, 30-4815 & 30-4815F
Page 3 of 3
Hand-Forged,
Vermont-Made Lighting and Accessories
154 Route 30 South, Castleton, Vermont 05735
22735 Rev C
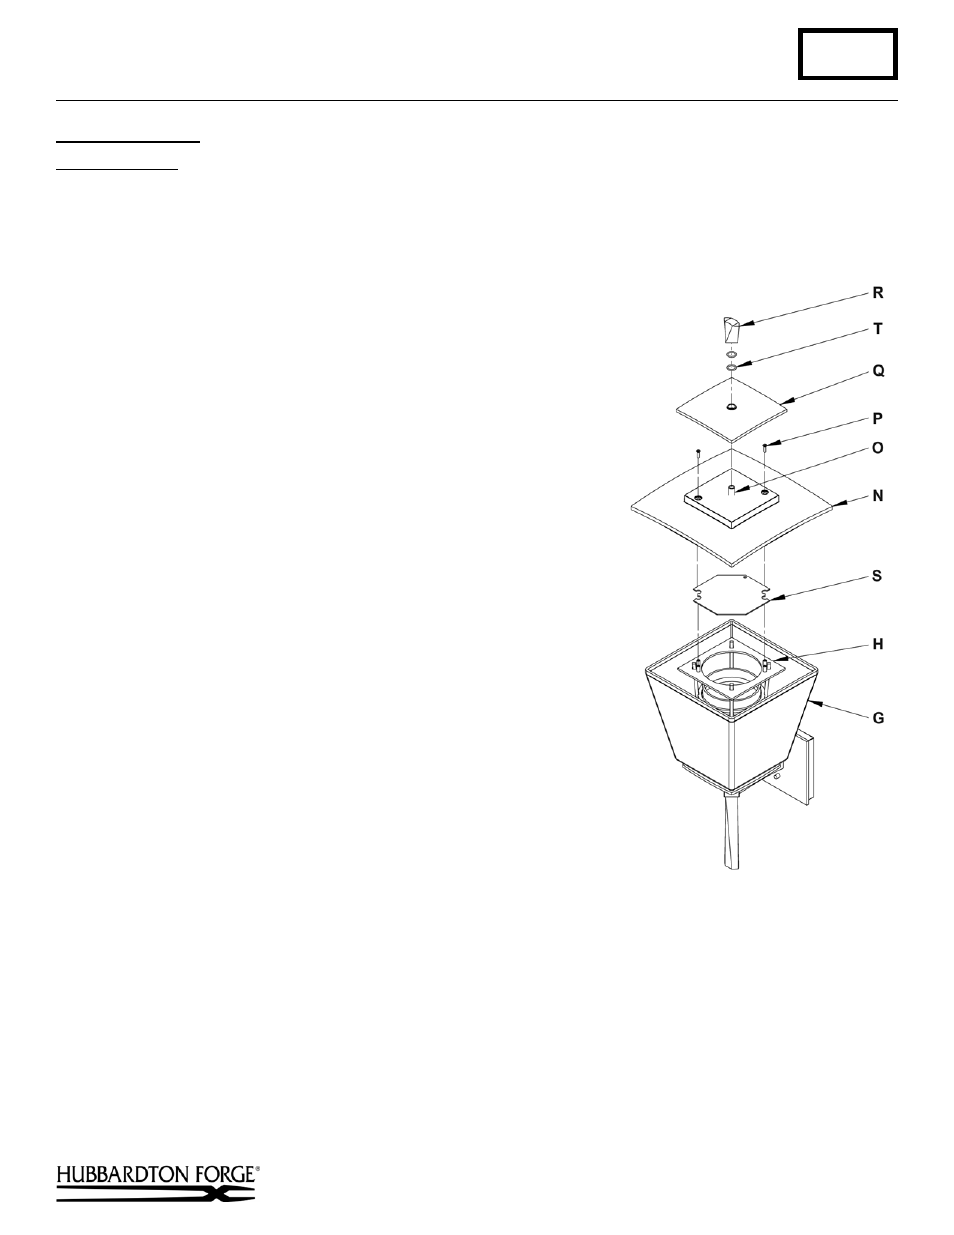
To Install Top Hat
(Figure 6)
Component Parts
G Outer
Glass
H Glass
Cage
N Top
Hat
O Threaded
Stud
P Flat Head Screw (2)
Q Top
Cover
R Finial
S Cover Plate (Model 30-4815 only)
T O-Rings
(2)
1. Place cover plate (S) on top of glass cage (H) aligning the holes in
the plate with the standoffs in the glass cage. It should sit flat on
top of the glass cage. Model 30-4815 only.
2. Place top hat (N) on top edge of outer glass (G) and align two
holes in top hat (N) with two of the standoffs in the glass cage (H).
Note: Holes in top hat will only match up with two of the standoffs.
3. Install two flat head screws (P) and tighten.
4. Slip top cover (Q) over threaded stud and let rest on the top
hat (N).
5. Slip two o-rings (T) onto threaded stud (O).
6. Thread finial (R) onto threaded stud (O) until snug against top
cover (Q). Align as shown in Figure 4.
7. Restore electricity at main breaker.
If you need further assistance, or find that you are missing any parts, please contact the dealer from which you purchased
this product. We hope you enjoy your fixture!
* Hubbardton Forge will not be liable for injury or damage caused by improper installation, lamping or use of this fixture.
(Figure 6)