B156, Assembly & installation instructions – Hubbardton Forge 217740 User Manual
Page 3
Assembly & Installation Instructions
B156
For Ono Sconce 21-7740F
Page 3 of 3
Hand-Forged,
Vermont-Made Lighting and Accessories
P.O. Box 827, 154 Route 30 South, Castleton, Vermont 05735
21357
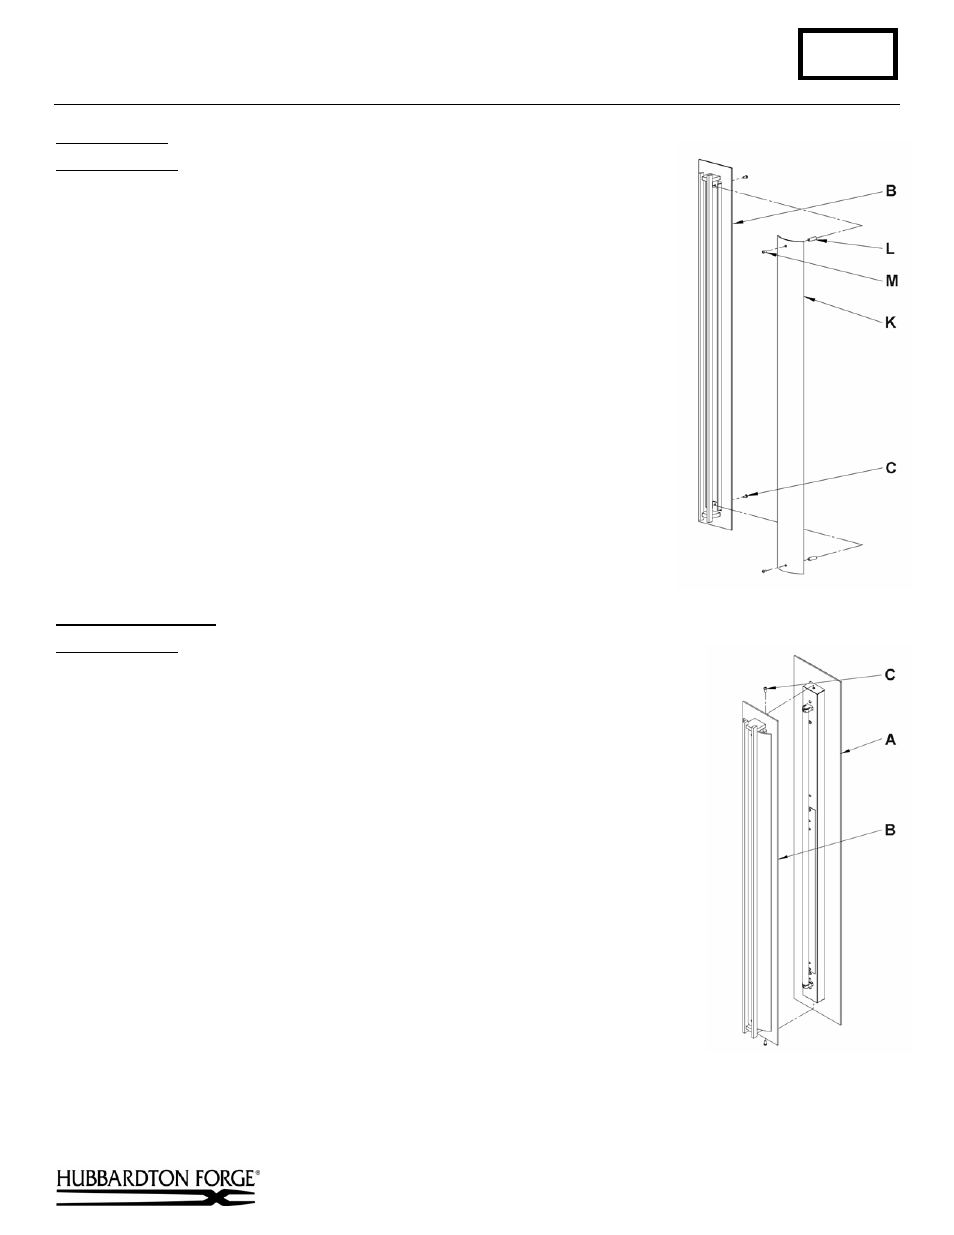
Install Acrylic
(Figure 5)
Component Parts
B Fixture
Front
C 8-32 x 3/8” Black Screws (2)
K Acrylic
L Standoff
(2)
M Button Head Screw (2)
1. Place fixture front (B) on flat surface with the back facing up.
2. Slide acrylic (K) through opening in fixture front (B) so it rests on the vertical
bars.
3. Slip standoff (L) inside acrylic (K) and align with hole through the back of the
fixture front (B).
4. Install screw (C) through back of fixture front (B) and thread into standoff (L)
until snug.
5. Repeat step 4 for the other end of acrylic.
6. Align acrylic (K) holes so they match with the two standoffs (L).
7. Install button head screw (M) through acrylic and thread into standoff (L).
8. Tighten button head screws until snug. Be careful not to over tighten.
Install Fixture Front
(Figure 6)
Component Parts
A Fixture
B Fixture
Front
C 8-32 x 3/8” Black Screws (2)
1. Install fixture front (B) on fixture (A).
2. Install two machine screws (C) top and bottom and tighten.
If you need further assistance, or find that you are missing any parts, please contact
the dealer from which you purchased this product. We hope you enjoy your fixture!
*
Hubbardton Forge will not be liable for injury or damage caused by improper
installation, lamping or use of this fixture.
(Figure 5)
(Figure 6)