A196, Assembly & installation instructions – Hubbardton Forge 18793 User Manual
Page 5
Assembly & Installation Instructions
A196
For Pendant 18-791 & 18-793
Page 5 of 5
Hand-Forged,
Vermont-Made Lighting and Accessories
P.O. Box 827, 154 Route 30 South, Castleton, Vermont 05735
22609
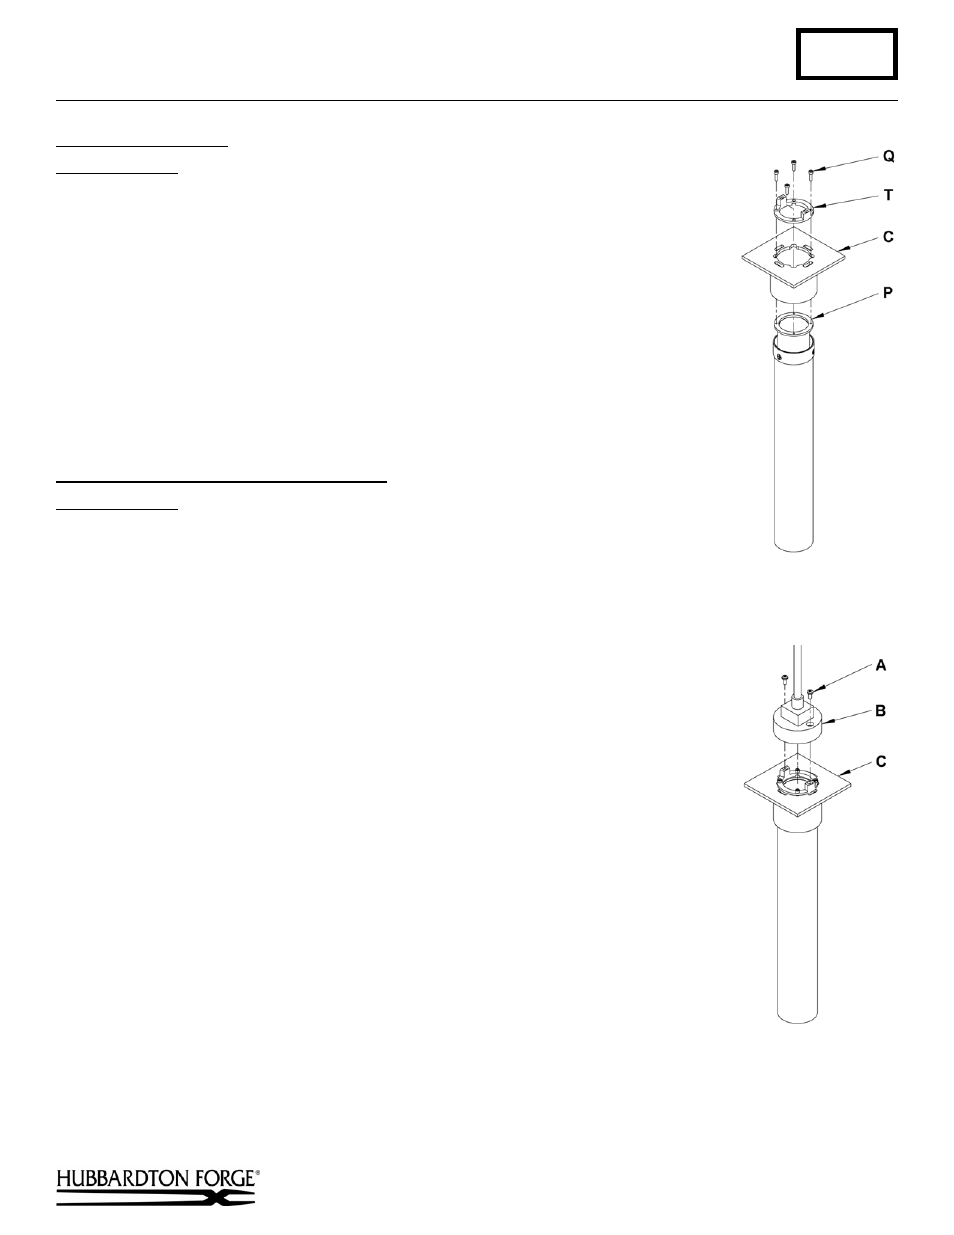
To Assemble Bottom
(Figure 8)
Component Parts
A Bottom
Assembly
P Tube
Assembly
Q 6-32
Screws
(4)
T Retainer
1. Slip 6-32 screw (Q) through retainer (T) and bottom assembly (C). Thread screws (Q)
into tube assembly (P) and tighten with supplied Allen wrench.
To Install Glass or Screen Option & Bulb
(Figure 9)
Component Parts
A 8-32 Screw (2)
B Top
Assembly
C Bottom
Assembly
1. Install light bulb (not included).
2. Install 8-32 screw (A) through top assembly (B) and thread into bottom assembly
(C). To replace bulb the two 8-32 (A) screws are removed to separate bottom
assembly from top assembly.
3. Restore electricity at main breaker.
If you need further assistance, or find that you are missing any parts, please contact the
dealer from which you purchased this product. We hope you enjoy your fixture!
* Hubbardton Forge will not be liable for injury or damage caused by improper installation,
lamping or use of this fixture.
(Figure 8)
(Figure 9)