A259, Assembly & installation instructions – Hubbardton Forge 18453 User Manual
Page 5
Assembly & Installation Instructions
A259
For Adjustable Mobius Shade Pendant 18-453
Page 5 of 7
Hand-Forged,
Vermont-Made Lighting and Accessories
P.O. Box 827, 154 Route 30 South, Castleton, Vermont 05735
24794 Rev A
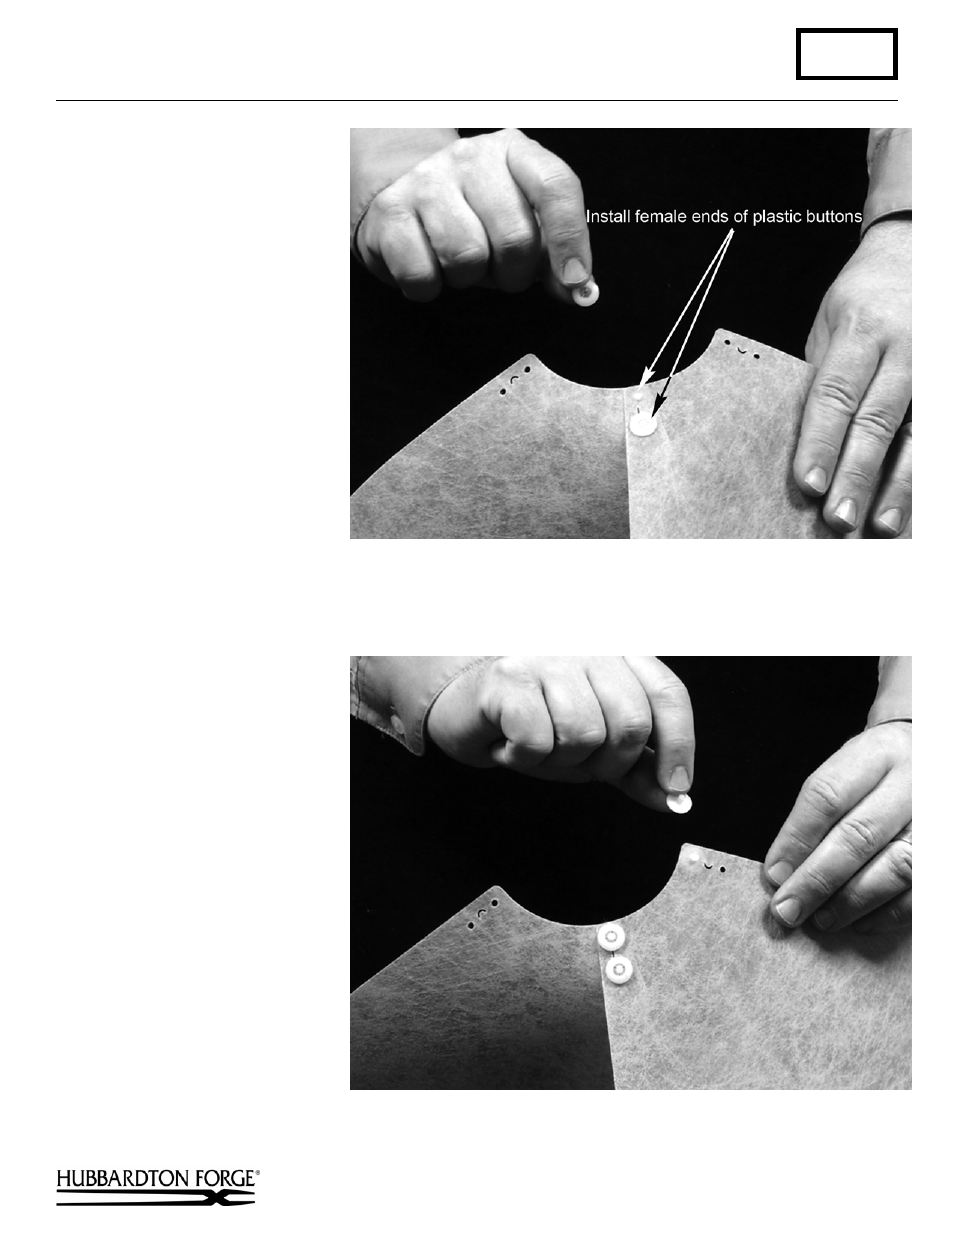
Step 4 Align "L" holes and mount the
other side of the shade panel (R)
onto the two male end plastic
buttons (S). Install two female
end plastic buttons (T) and press
firmly to snap into place. Clip
excess length of the male button
off after installing female plastic
buttons.
Step 5 Slip male end plastic buttons (S)
through the “C” side of the
shade panel (R).
Note: Letter “C”
should read the same as shown
(this indicates the outside of the
shade).
(continued)
See also other documents in the category Hubbardton Forge Lighting:
- 126742 (3 pages)
- 134601 (2 pages)
- 135001 (3 pages)
- 138587 (3 pages)
- 138589 (3 pages)
- 138650 (6 pages)
- 161140 (2 pages)
- 18450 D (3 pages)
- 18450 (3 pages)
- 205651 (1 page)
- 205651D (2 pages)
- 205762D (2 pages)
- 205762F (1 page)
- 205772L (2 pages)
- 205772FL (2 pages)
- 205772DL (2 pages)
- 206440 (4 pages)
- 206729D (2 pages)
- 206729 (1 page)
- 206740 (1 page)
- 206740D (2 pages)
- 207430 (2 pages)
- 207440 (2 pages)
- 207760 (2 pages)
- 217305 (1 page)
- 306415 (4 pages)
- 306401 (3 pages)
- 306425 (4 pages)
- 308010 (2 pages)
- 161020T (5 pages)
- 161020 (4 pages)
- 161040 (2 pages)
- 161040T (4 pages)
- 161060T (4 pages)
- 161060 (2 pages)
- 161080 (2 pages)
- 161080T (4 pages)
- 161090T (4 pages)
- 161090 (2 pages)
- 161105T (4 pages)
- 161105 (2 pages)
- 161120 (2 pages)
- 161120T (4 pages)
- 124910 (2 pages)
- 127663 (3 pages)