A259, Assembly & installation instructions – Hubbardton Forge 18453 User Manual
Page 3
Assembly & Installation Instructions
A259
For Adjustable Mobius Shade Pendant 18-453
Page 3 of 7
Hand-Forged,
Vermont-Made Lighting and Accessories
P.O. Box 827, 154 Route 30 South, Castleton, Vermont 05735
24794 Rev A
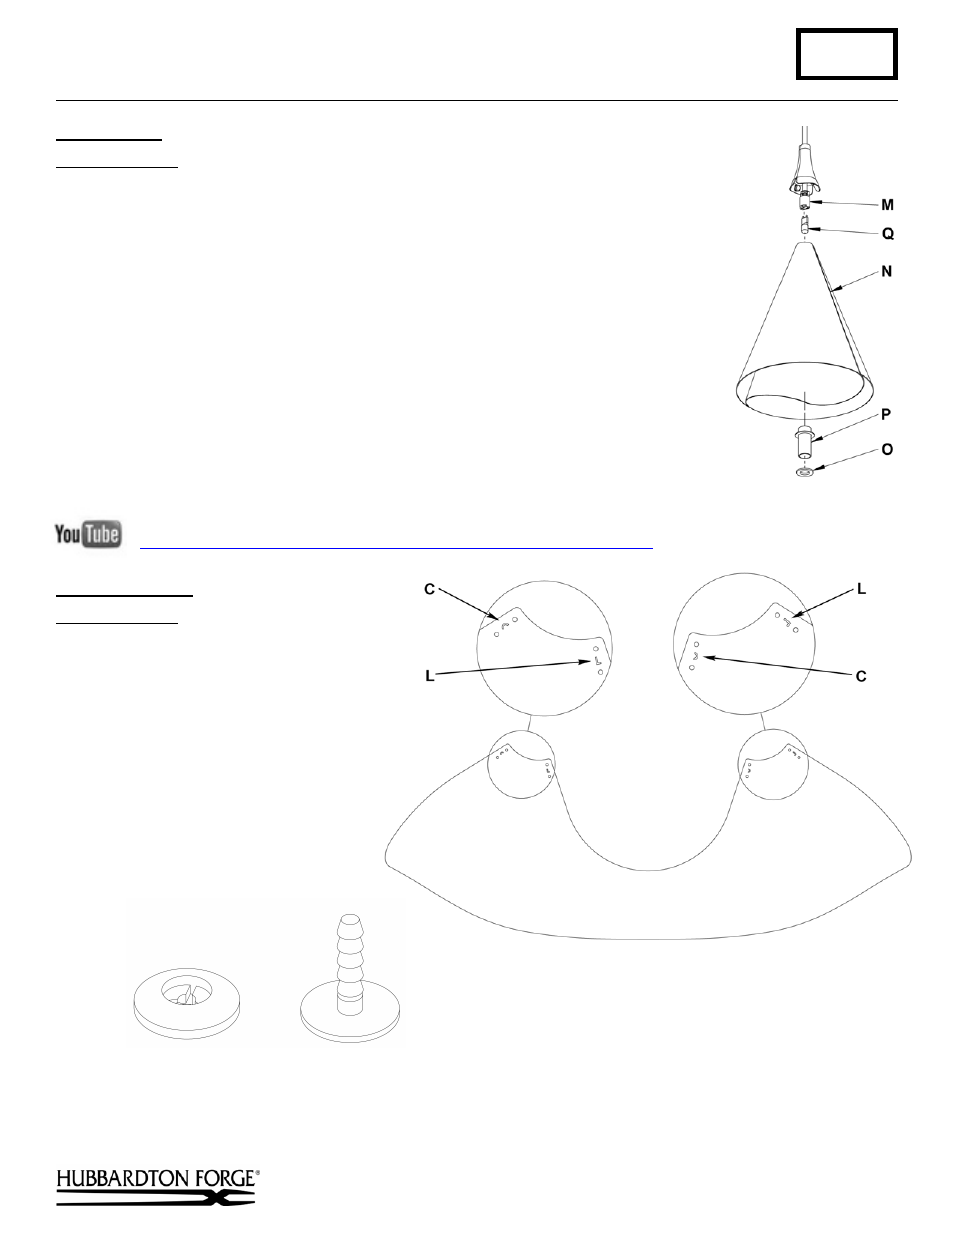
Install Shade
(Figure 5)
Component Parts
M Socket
N Shade
Assembly
O Retaining
Ring
P Spacer
Q Bulb
1. Refer to last pages for instructions on how to assemble the shade.
2. Install light bulb (Q) into socket (M). Be careful not to touch bulb with bare
hands; oil from the hands will dramatically reduce bulb life.
3. Slip shade assembly (N) followed by spacer (P) over socket (M).
4. Thread retaining ring (O) onto socket (M).
5. Restore electricity at the main breaker.
To see a video on how to assemble the Mobius shade, go to:
Assemble Shade
Component Parts
R Flat Shade Panel (1)
S Male End Plastic Button (4)
T Female End Plastic Button (4)
Step 1 Identify all parts needed.
(continued)
(Figure5)
(S) Male End Plastic
Buttons (4)
(R) Flat Shade Panel (1)
(T) Female End Plastic
Buttons (4)